The 3D Solid texture nodes

Nodes are the essential building blocks in the Advanced interface to the Poser Material Room. They are the graphical representation of mathematical function calls, that is: calculation procedures which turn parameters (inputs) to a result (output).

Advanced

This article presents a description of the following nodes from the 3D Textures group:

  • Cellular
  • Spots
  • Marble
  • Granite
  • Wood
  • Wave3d

The first ones are meant to fill up solid objects with a texture that has a lot of randomness in it, the latter produce deterministic patterns, with some turbulence for a more natural effect. The previous article offers descriptions of the remaining nodes from the 3D Textures group.
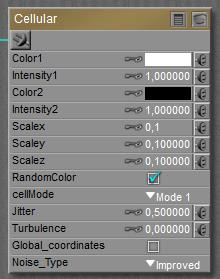
Cellular

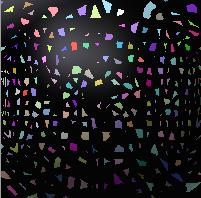
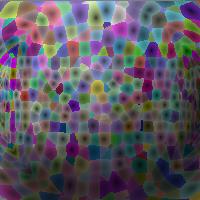
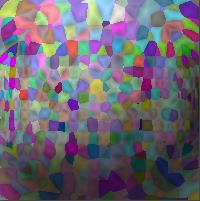
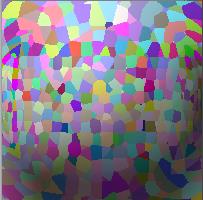
This node generates a mosaic / stained glass-like pattern. The type of pattern is defined by the CellMode parameter, the Color2 / Intensity2 defines the mortar or lead (walls of the cells) and the cells are filled with either Color1 / Intensity1, or by various colors when the RandomColor option is checked.

Larger ScaleX/Y/Z values make larger patterns (so these work opposite to the scale parameters of the previous nodes).

So what do the various (Cell)Modes do?

Mode 1 Mode 2 Mode 3 Mode 4 Mode 5
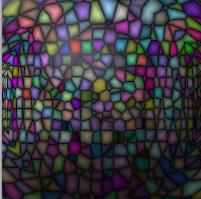
In all modes the cell patterns are similar, but the use of the “mortar” is different. Mode 1 makes nice stained-glass while Mode 2 might be nice for granites. Mode 3 and 4 use the mortar to make the structure visible in an indirect way, while Mode 5 does not apply any mortar at all. That means that this mode gives me a homogeneous fill with Color1 when the RandomColor is OFF.

Do note that the texture is a 3D one, it’s continuous in all spatial directions, and mesh edges are irrelevant.
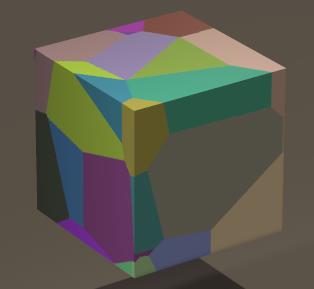
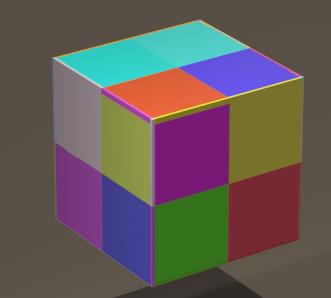
This however depends somewhat on Jitter, which controls cell-irregularity. The left render above was made with Jitter=1, the right one with Jitter=0.
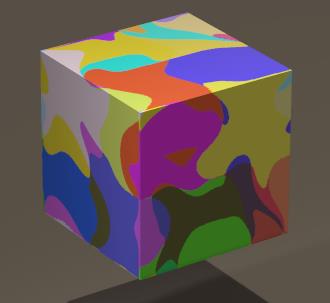
Low Turbulence makes straight cell edges, high values make curves ones. The right image above with Jitter=0, Turbulence=0 changes to …

when only Turbulence is raised to 1.

Noise_Type lets me pick my favorite random number generator behind all the irregularities, and the Global_Coordinates option determines whether the pattern is relative to the object (OFF) or to the Poser space (ON). The latter is relevant when multiple objects make up one ‘thing’ and the material has to be continuous over all of them. Note that this also implies that the pattern changes when the object is moved around in an animation, so it’s meant for inanimate objects in the scene.

Spots

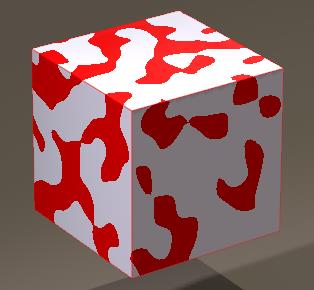
Spots create the kind of pattern I get when pouring red paint (Base_color) into a bucked with white (Spot_color), though I can alter the colors of course. To me the naming of the colors seems a bit in reverse given the result below, but anyway.
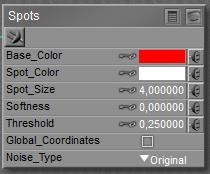
makes

Threshold defines the Base to Spot ratio: a low value (down to 0.0) gives more white (Spots) and a high value (up to 1.0) gives more red (Base).
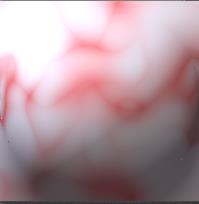
Softness defines the blur at the edges, at 0 the edges are well defined (image above) and higher values makes the impression that I have been stirring the mix. With 0.4 I get…

Larger Spot_Sizes make larger spots (no surprise there) and as discussed at the other nodes above, Noise_Type lets me pick my favorite random number generator behind all the irregularities, and the Global_Coordinates option determines whether the pattern is relative to the object (OFF) or to the Poser space (ON).

Marble

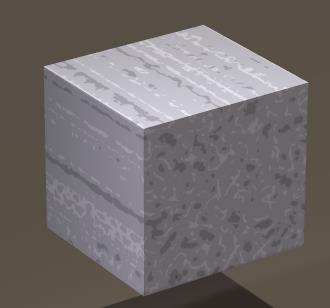
No doubt I can guess the use of this one, but… what’s a proper marble pattern? As
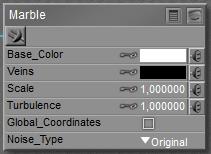
makes

I see thick veins in one (X-) direction, and thin veins in the two other (Y, Z) directions. Larger Scales make larger patterns, Turbulence makes them wilder, and as discussed at the other nodes above, Noise_Type lets me pick my favorite random number generator behind all the irregularities, and the Global_Coordinates option determines whether the pattern is relative to the object (OFF) or to the Poser space (ON).

Granite

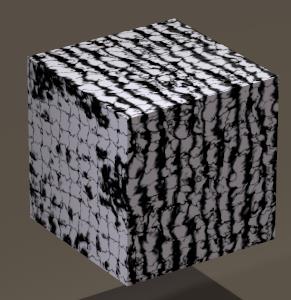
A no-brainer again, but what makes a granite pattern? It’s sort of various kinds of gravel mixed with clay and squeezed together into one material, so
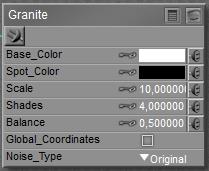
makes

Larger Scales make larger patterns, note that the value is increased (from default 1) to 10 to get the granite effect visible. It’s a bit like the Cellular node in Mode 2, with variants of the same (Spot) color. Shades determines the amount of colors in the granite, while a low Balance pushes the colors towards the Spot_color, and a high value pushes the colors towards the Base.

As discussed at the other nodes above, Noise_Type lets me pick my favorite random number generator behind all the irregularities, and the Global_Coordinates option determines whether the pattern is relative to the object (OFF) or to the Poser space (ON).

Wood

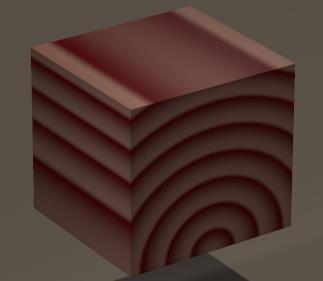
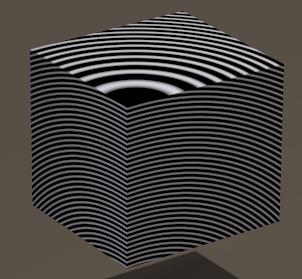
Another no-brainer, which indeed makes the ring-patterns I expect.
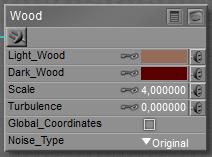
makes

Larger Scales make larger patterns, and some Turbulence make them less regular and hence more natural. As discussed at the other nodes above, Noise_Type lets me pick my favorite random number generator behind all the irregularities, and the Global_Coordinates option determines whether the pattern is relative to the object (OFF) or to the Poser space (ON).

Wave3D

This is the 3D spatial equivalent of the 2D surface wave. In 3D, it’s like a sound blast, with alternating high (white) and low (black) pressure areas.
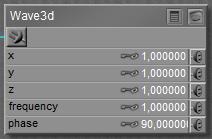
makes

The X,Y,Z parameters do NOT scale the pattern, but move the center around instead. Higher Frequencies make smaller patterns, and more frequent repetitions in the same area. Phase caters for the alternating state, and is quite valuable in animation.

The pattern is in Global Coordinates and ripples through when the object is moved around.

I’m sure one can find an artistic purpose for texturing with this node. Using it as a density driver in the Poser Atmosphere can make the sound-blast patterns visible in a room (vibrating smoke).
Next >

The 3D Cloudy texture nodes

Nodes are the essential building blocks in the Advanced interface to the Poser Material Room. They are the graphical representation of mathematical function calls, that is: calculation procedures which turn parameters (inputs) to a result (output).

Advanced

This article presents a description of the following nodes from the 3D Textures group:

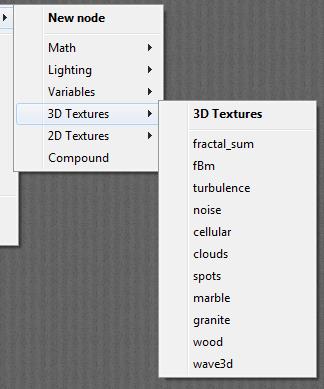
  • Fractal_sum
  • fBm
  • Clouds
  • Turbulence
  • Noise

The first ones are random number or fractal based “cloudy” textures which are quite suitable for dirt patterns on walls and for atmospheric clouds. The latter or more generic helper functions. The next article offers descriptions of the remaining nodes from the 3D Textures group.

Fractal_Sum

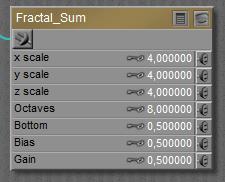
This node returns a result between -1..+1, driven by a fractal function. Although fractal results make a strong irregular, even random impression, they differ from noise in various ways:

  • The result is mathematically predetermined, repeatable
  • The result in continuous in X,Y,Z

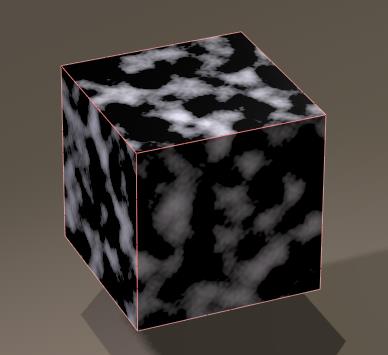
The Fractal Sum makes “mildly complex” patterns and can be considered very useful for surface patterns, like stains, dirt, rust etc.

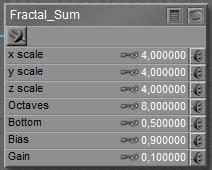
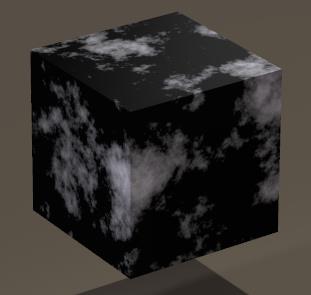
makes

Larger X/Y/Z Scale values make smaller patterns, and as a fractal is an irregularity of an irregularity of … (etc.) and each step in this is “an Octave” (as in music), raising Octaves increases the complexity of the pattern.

Although the fractal function generates values from -1..+1 (with like a sine wave, more ‘hits’ in the extremes), these are folded into the 0..1 range. Without further measures, the 0.. -1 range is folded onto 0.. +1 and that will give a lot of high (bright) values and far less low (dark) values. The solution is to lift the result with the Bottom value, 0.5 by default. In that case, the result ranges from -0.5..+1.5 and the 0.. -0.5 is folded up onto 0.. +0.5 while 1.. 1.5 is folded down onto 1.. +0.5. That gives as much brights as darks in the pattern. Simply stated: 0.0 or lower will result in a bright, bleached pattern. Raising it will darken the pattern till it’s completely black, until 1.0 is entered exactly which turns the result completely white.

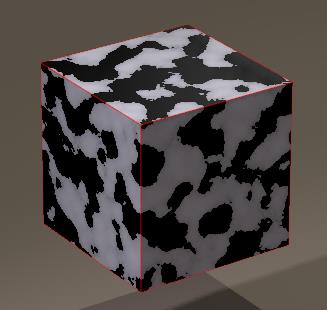
Bias and Gain get their (usual) incomprehensible explanation in the manual, sorry for that. Generally, when I consider the result of this node to be a greyscale image of some sort, Bias refers to its brightness while Gain refers to its contrasts, both as if applied by Photoshop or alike in a pre-processing stage. Both default to a 0.5 value, and lowering Bias pushes the bright details into black until all brights are gone at 0.0 while increasing Bias adds more bright details into the already bright area. This does not reduce the black areas but just removes the details, and makes hard-edged splotches. Gain works about the other way around.

makes

fBm

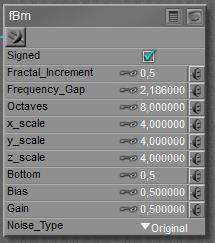
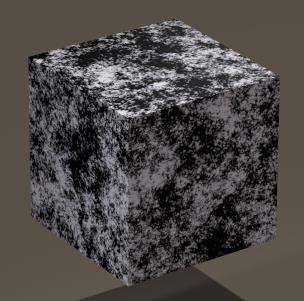
This is just another fractal function which offers parameters similar to Fractal_Sum, but results in more complex patterns as it’s derived from various fractal formulas combined into one.

makes

These patterns are considered especially useful for creating terrains, which requires that this node is to be plugged into the Displacement slot of PoserSurface. Though it shows too much detail for a simple stain, it might also be used for a worn, aged and rubbed one. When used for terrains, it’s advised to reduce the Bottom parameter to its default 0.0 to get rid of the black (so non-displaced, flat) areas.

What are the other parameters about?

Noise_type offers the usual choice between Original (for compatibility) and Improved (recommended), and Signed folds the 0..-1 range of fractal results back onto the 0..+1 range. This folding somewhat disables the use of the Bottom parameter, what – as already said – can be kept at its default 0.0. Frequency_Gap effects the spatial distribution of the pattern, values between 2..3 are recommended and one can leave the default as is. Lower values take the details out and higher values have no effect.

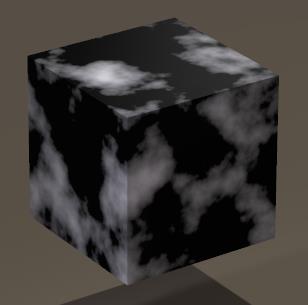
Fractal_Increment is the most interesting parameter. At 0.0 the result turns out very noisy, loose pickles everywhere. At 1.0 the result is quite consistent, and looks a lot like the simpler Fractal_Sum node. So here I can adjust the complexity and noisiness of the result, and the roughness of terrains made with it.

From 0.0   to 1.0

Clouds

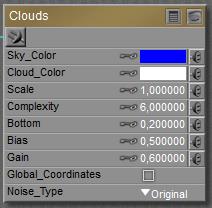
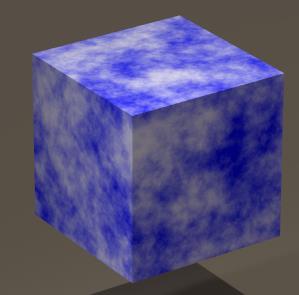
Clouds, a mixture of fractal and turbulence, serve well in backgrounds as well as in driving the fog density in Poser Atmosphere. They also serve well for fine patterns in stone.

makes

There is one Scale parameter for all directions, larger values make larger patterns. Higher Complexities make richer, more detailed and crispier patterns while Bias caters for the balance between dark (Sky) and bright (Cloud) areas. Higher values make less cloudy skies. Gain serves as a mixture: low values make a closed, less detailed cloud pattern while high values make an open sky with sharp-edges clouds. Generally, when I consider the result of this node to be a greyscale image of some sort, Bias refers to its brightness while Gain refers to its contrasts, both as if applied by Photoshop or alike in a pre-processing stage.

As discussed at the other nodes above, Noise_Type lets me pick my favorite random number generator behind all the irregularities, and the Global_Coordinates option determines whether the pattern is relative to the object (OFF) or to the Poser space (ON).

Turbulence

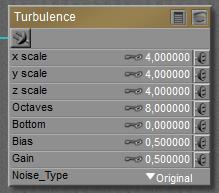
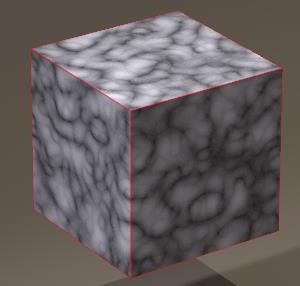
Like Fractal_Sum is best for surface effects and fBm is best for terrain displacements, Turbulence is best for cloudy patterns as are required in a Poser Atmosphere (instead of a PoserSurface). The best way to look at it is to consider a space full of tiny droplets that make a fog, and some wind pushing some of them into other areas. So some areas get more filled, and adjacent areas get less.

makes

and the parameters can’t be a surprise anymore, they all were discussed in Fractal_Sum as well. Turbulence does make nice marbles too, as I can see in the sample above.

Noise

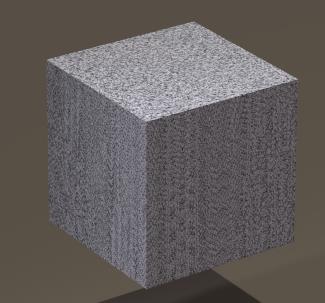
Noise is not a fractal, but just generates random values (brightnesses) for each point in space. So adjacent positions do not have adjacent function results, the function is not continuous.

makes

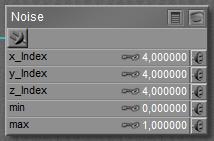
The X/Y/Z_index means the same as X/Y/Z_scale in the previously discussed nodes: larger values make smaller patterns. The result is a value between Min and Max, I can use values closer to each other to generate small color or brightness variations.

Next >

What are the 3D surface texture building blocks used for?

Nodes are the essential building blocks in the Advanced interface to the Poser Material Room. They are the graphical representation of mathematical function calls, that is: calculation procedures which turn parameters (inputs) to a result (output).

Advanced

3D Textures are meant to be ‘mapped’ against their position in space, such that multiple objects, eventually combined to one larger thing, show continuity in their looks. Think about a large city wall made from various block elements placed next to each other. The consequence of a texture driven by an objects position in space, is that changing position (e.g. in animation) make the texture change accordingly. This might either be utmost unwanted, or might be a really nice special effect. That’s up to me.

Let’s have a closer look. The next article offers a description of

  • Fractal_sum
  • fBm
  • Clouds
  • Turbulence
  • Noise

The first ones are random number or fractal based “cloudy” textures which are quite suitable for dirt patterns on walls and for atmospheric clouds. The latter are more generic helper functions.

The article after that offers a description of

  • Cellular
  • Spots
  • Marble
  • Granite
  • Wood
  • Wave4d

The first ones are meant to fill up solid objects with a texture that has a lot of randomness in it, the latter produce deterministic patterns, which some turbulence for a more natural effect.

Next >

What are the 2D surface texture building blocks used for?

Nodes are the essential building blocks in the Advanced interface to the Poser Material Room. They are the graphical representation of mathematical function calls, that is: calculation procedures which turn parameters (inputs) to a result (output).

Advanced

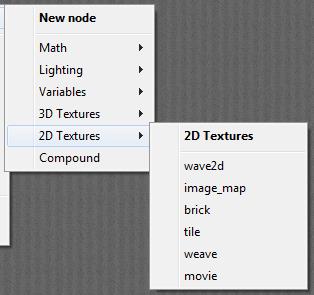
The various nodes from the 2D Textures group all serve the same purpose: offering an image or tiling pattern which is to be (UV-) mapped onto the object surface. Image_Map and Movie do so with external static or dynamic sources. The other options generate patterns on their own. Let’s have a closer look at those.

In all cases: for each portion of an object that has its own UV coordinates, both U and V vary from 0.0 to 1.0. U mainly in horizontal direction, V in vertical direction.

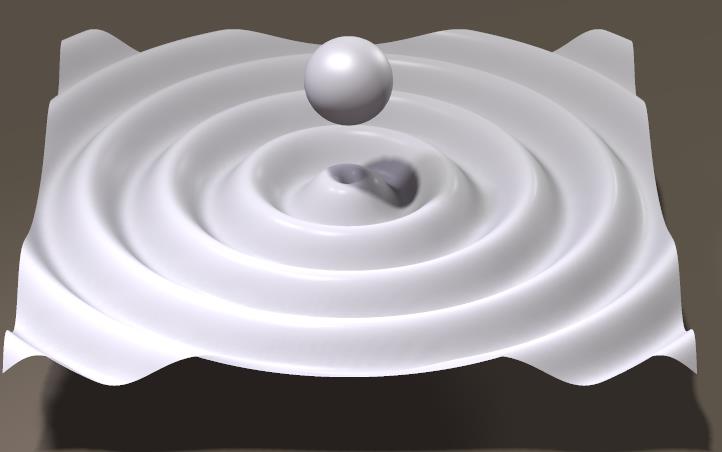
Wave2D

This node generates a circular sine wave pattern, which is ideal for wavy displacement maps.

The U_pos, V_pos parameters determine the center of the pattern, Frequency determines the number of repetitions and by animating the Phase, the pattern starts rippling.

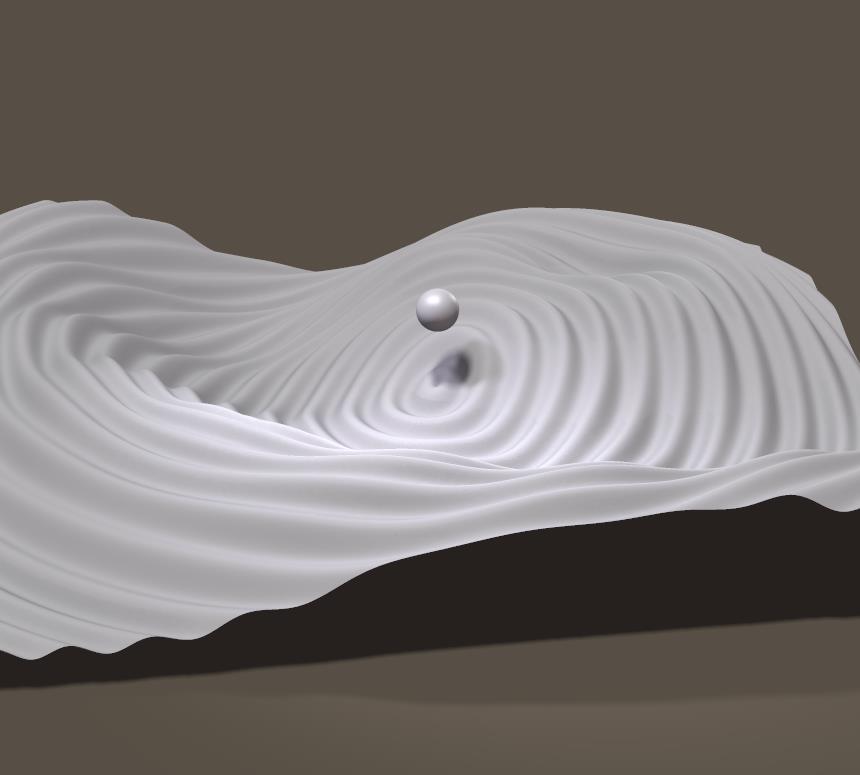
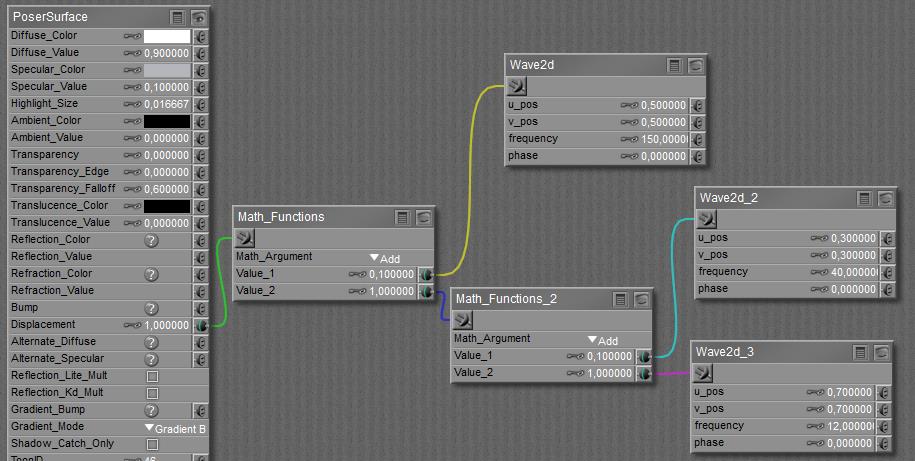
As a single pattern looks quite simplistic and cartoony, one can combine patterns with different frequencies (and origins, phases as well) to make more complex, realistic ones.


Made from

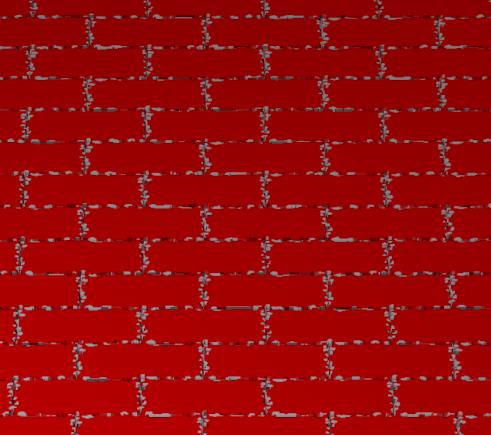
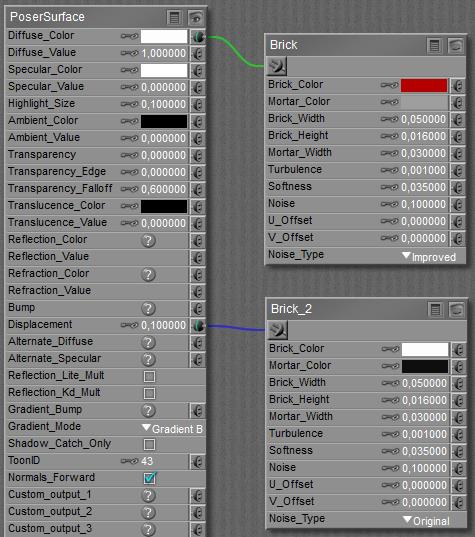
Brick

This node generates a brick & mortar texture, in the first place for use in the Diffuse slot, or in combination with its alternatives. But because brick and mortar behave different for specularity, and for bump/displacement, variants of the node are usually combined with some other components of the PoserSurface.


Brick_Width and Height, and Mortar_Width define the main aspects of the texture, while U_offset, V_offset define the placement of the texture on the object. Note that all of those are expected to vary within the 0..1 bound.

Turbulence makes the mortar-lines less straight and perfect, while Noise makes the mortar filling more irregular. As the manual states: Turbulence is low frequency, Noise is high frequency variation. In plain English: Turbulence affects the shape of the stones, Noise affects the structure of the mortar. I can choose between original and improved noise, the first one is meant for compatibility with older Poser versions.

Softness defines the brick-to-mortar distinction, the higher the value the more brick blends into the mortar.

Tip: believable brick textures do need serious variation in brick color and brightness. Using additional (non-brick) textures for Diffuse_Value, or plugged into to Brick_Color slot, can help a lot in this. Especially the Clouds node (from the 3D Textures collection) might be a nice one.

Tile

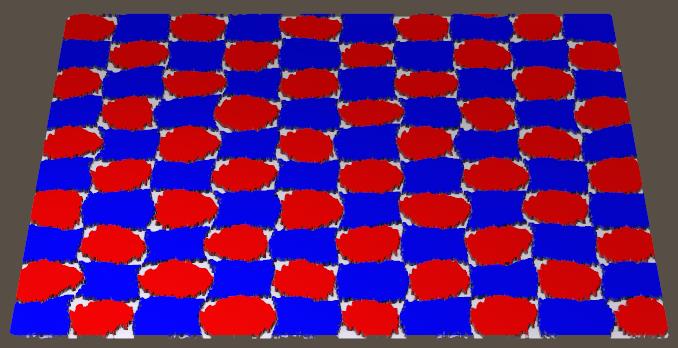
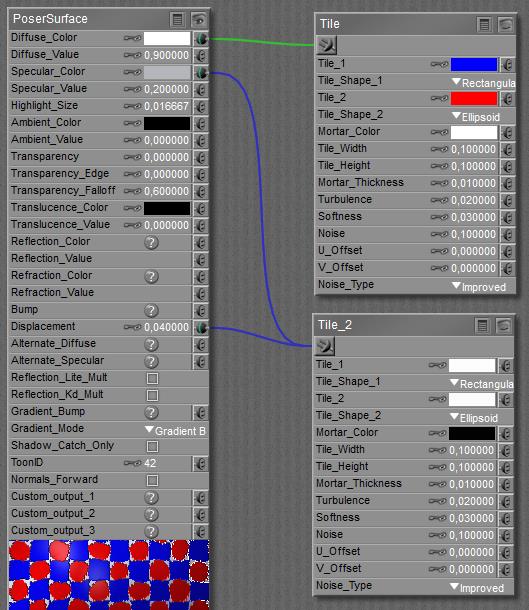
Although the Brick node can be used to make shiny tiles as well, all of those will be in a similar color, and all of them will be rectangular too. The Tile node makes a variation on this, by offering alternating colors, and roundish (ellipsoid) shapes as well.


Made with

Parameters are similar to Brick: Tile_Width and Height, and Mortar_Width define the main aspects of the texture, while U_offset, V_offset define the placement of the texture on the object. Note that all of those are expected to vary within the 0..1 bound.

Turbulence affects the shape of the tiles, Noise affects the structure of the mortar. I can choose between original and improved noise, the first one is meant for compatibility with older Poser versions. Softness defines the brick-to-mortar distinction, the higher the value the more brick blends into the mortar.

Weave

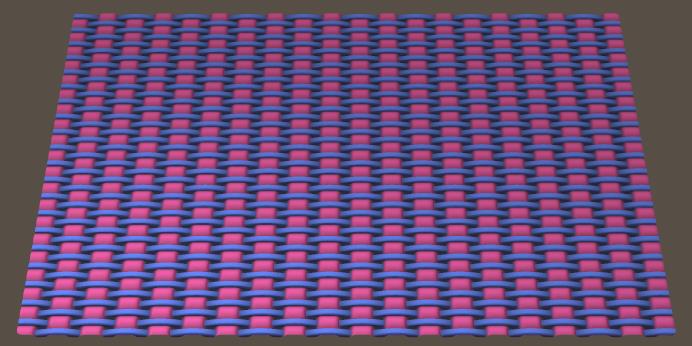
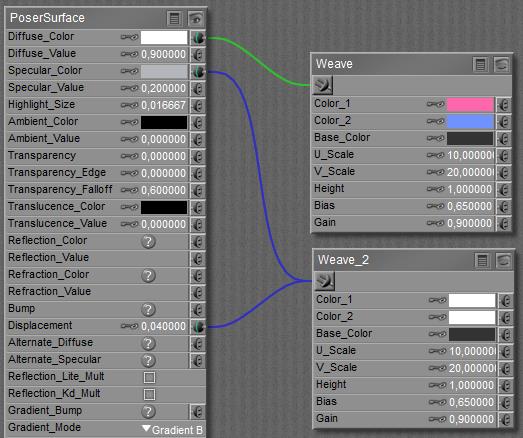
Weaves are meant for cloth, but of course one can make nice garden fences with it too. It’s just a matter of scale (and color, and material details). This:

Is made with

The colors speak for themselves, and the U_Scale and V_Scale determine the amount of threads on the surface (times two, as the object surface apparently has U and V from -1..1). So the plane shown above has 2x 10 (U-Scale) threads in Color-1, and 2x 20 (V-Scale) threads in Color-2 which then of course have half the thickness.

To my observation, the Height parameter has no effect at all. Larger Bias values create thicker and flatter threads, or: reduce the space between them. Larger Gain values sharpen the texture, higher values make more distinct threads, as for paper / wood strips while more fuzzy threads are fine for textile weaves. Bias and Gain vary from 0.0 to 1.0. Note: at other places Bias is defined as brightness of the underlying greyscales, and Gain is defined as its contrast, both as if applied by Photoshop or alike in a pre-processing stage.

Next >

Poser Materials IV Advanced Surface Definitions

The articles in this section discuss all Material Room nodes required for either procedural textures, and the ones explicitly aimed at node-tree building.

A procedural texture is not derived from an (eventually color filtered) external image or movie still, but is mathematically generated internally from surface or spatial coordinates. The nodes to accomplish such textures can be found in the 2D Textures and 3D Textures groups.

Materials are applied to objects, objects parts and more precise: to specific Material Zones within those objects and parts. This article  discusses the details.

Material Room supports the creation of quite elaborate node-trees, like a programming language into material definitions. This section will not address the art of such programming itself, but will present and discuss the building blocks alone. These can be found in the Variables  and Math groups.

The next subsection presents articles on defining the properties of (V) Non-objects (atmosphere, background, lights) as far as these are handled through the Material Room interface. The Appendix lists all Material Room nodes and relevant Render Settings, and their availability in the various Poser versions.

How does Poser handle my movies for texturing?

In principle, a movie is just a series of images. So – in principle again – a movie is dealt with the same way as an image. With a few differences.

As the movie file itself is not an image, and such an image file is required for preview, the image is extracted into the Texture Cache folder (in PNG format). And, when the Run in Background Thread option checked, the EXR file is created at about that moment too instead of at render time.

Now, which frame is extracted at what moment? All frames of the entire movie at the start? No.

The respective image files are extracted when they are requested for. This might be in preview, when I loop through the animation. Or it might be at render time, when each and every frame is dealt with. And in case only the even or odd frames are requested for (when the movie frame numbers follow some formula, or just a limited amount of frames is rendered anyway as set in the Movie Settings tab (Increment \ Every Nth Frame) in Render Settings) then only those are extracted.

Using movies for texturing certainly will load the Texture Cache disk space. The good news is: the files don’t need (and don’t have) the large resolutions which are required for high end stills. In most cases a 640×480 size might do, and full HD (1980×1024) can be considered rare for texture input.

The bad news is: one needs a PNG as well as an EXR. That’s about 4.0MB for 640×480 or 16MB for full HD. But more relevant, I might need a lot of them. A 10 sec animation makes 300 frames, that’s 4.8Gb on full HD frames alone in my Texture Cache. So it might take a while to generate all those files, and I’d better be sure I’ve got the space available when I push the Render button.

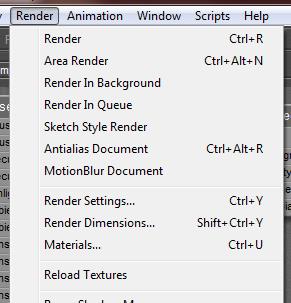
Note that when I use the Render > Reload Textures menu, the entire Texture Cache will be cleared and reloaded. This will regenerate the EXR’s for all static images, but will only extract the PNG (and make the EXR) for the movie frame required for the Preview. All other frames will not be generated until requested for.

Next >

How can I assign a movie to a material?

From the Simple interface to Material Room, there is no real difference between assigning a still image, or a movie. So, consult the article on images first, and when selecting a file via Texture Manager, just select the appropriate movie file. Various formats are supported, somewhat depending on the Operating System and on the video codecs installed.

Intermediate

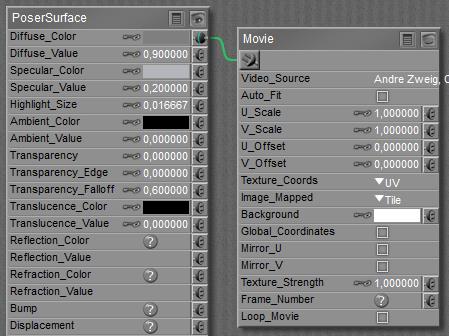
In the Advanced interface to the Poser Material Room, nodes are the essential building blocks. They are the graphical representation of mathematical function calls, calculation procedures turning parameters (inputs) to a result (output). For applying movies, the Movie node can be found in the 2D Textures group, and reads like …

Note: when a still image is assigned via the Simple interface, switching to Advanced will show an Image_map node attached. When via the Simple interface a movie file is assigned instead, switching to Advanced will show a Movie node.

When comparing the Movie and Image_Map nodes, I’ll notice that most parameters are similar. But the Movie node lacks filtering, as ‘None’ out of these is applied. And movies do have frames, like my animation. Without any further steps, both are just matched so frame 1 from the movie will be applied in frame 1 of my render, and so on. But the node offers the possibility to add some math into it, so I can let the movie run faster, or start ahead, of the rendered animation. As in

Where (Movie Frame) = 1* (2 * Scene Frame + 1)

As can be expected, Frame_Number in the Movie node refers to the frame in the movie, while the Frame_Number node itself (from the Variables group) refers to the rendered frame in the scene. And when the Movie is not long enough to deliver the required frame, it can start all over again. But that requires that the Loop_Movie checkbox is ON. Which it is by default.

Next >

How does Poser handle my images for texturing?

For rendering purposes, Poser internally works with 16-bits-per color (High Definition) inputs and results. For display and for most image exports or the render result, a translation is made to the (Low Definition, 8-bits-per-color) image formats like JPG, PNG, etc. In Poser Pro, export to a High Definition format (HDR, EXR) is possible.

For input, most images will be in Low Definition format as well, usually JPG from photographs. These are fine for preview, but for rendering they are translated first to EXR format, and saved at a temporary place

(Poser Temp Folder)\PoserTextureCache

where the Poser Temp Folder is set in the Edit > General Preferences menu, Misc Tab

More handling details are managed through the Render tab in General Preferences
After an image is assigned, or when a material with image references is assigned to a surface or an object is loaded with such material definitions, the translation from Low to High Definition is made as a first pass of the render process. Unless I have the Run in Background Thread option checked (it’s ON by default), then Poser saves me the waits and utilizes spare CPU capacity when available.

The Texture Cache is filled up while building the scene and rendering, and cleared when Poser exits (in a regular way). Except for the <so many> MB’s of most recently added images. This way, some translation is avoided when I reopen Poser to continue my work on the same scene. This Persistent Size can be set as well.
Note that an EXR file requires about 7 bytes per pixel, which is 5 to 10 times as large as the JPG’s they originate from. So a single hires (4000×4000) image as used for most character skins takes about 100MB disk space. This space requirement is something to keep in mind when setting Persistent Size, and of course all the required space for keeping all images from my entire scene needs to be available when the rendering process kicks in.

When an image is already translated into the Texture Cache, and then is modified in Photoshop or alike, such a modification will go undetected by Poser and the stack of available EXR files need to be refreshed. I have to do so manually, using the Render > Reload Textures menu.

You might be interested in the other article, on handling movie files.

Next >

How can I assign an image to a material?

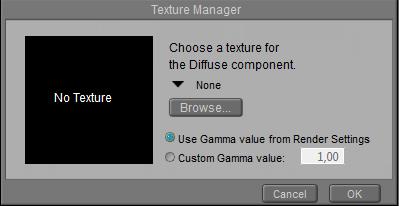
Assigning an (external) image to a material is quite a common action, whether it’s for light gels, background, or object surfaces. In Material Room, the Simple interface requires one click to open the Texture Manager window

=>

which lets me pick an image file (many formats supported) and (for Poser 10 / Pro 2010 and up) a Gamma value. As a rule of thumb:

  • When the component represents some kind of light towards the camera, which has to be added up to the light from other components, then the first (default) option is the right one. Think: (Alternate_)Diffuse, (Alternate_)Specular, Ambient and Translucence, Reflection and Refraction.
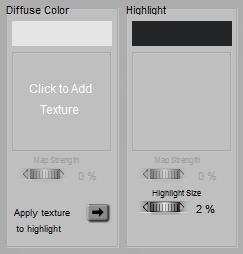
  • When the image represents just an amount of something and color is far from relevant (think: Bump/Displacement, Transparency, Highlight Size, …), then the second option should be selected with 1.0 as the right value.

Just a brief explanation for this: Gamma Correction, darkens the image before it’s applied and brightens the final render result for compensation. This brightens up the shadows to mimic the effects of radiosity from floors, walls , ceilings and the like, and from the scattering of light in a real, somewhat dusty atmosphere; effects which are hardly available in a Poser render. This Gamma mechanism also reduces the (risk of) overlighting when multiple sources of light (diffuse, specular, reflection, …) from a surface towards the camera are combined. Poser just adds them up and clips at 100%, while in real life our eyes adjust to the increased light levels.

But for the greyscale image-driven amounts, the render consequences suffer from the distortion: reduced displacements for instance cannot be compensated for in the final brightening pass. So, for these effects, the Gamma Correction has to be disabled by overriding the default value with a neutral 1.0.

Image management

When I already have various images in my scene, and when I do not want to recheck and reset all of them, Poser can help me with various scripts:
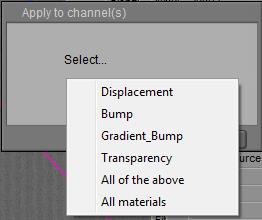
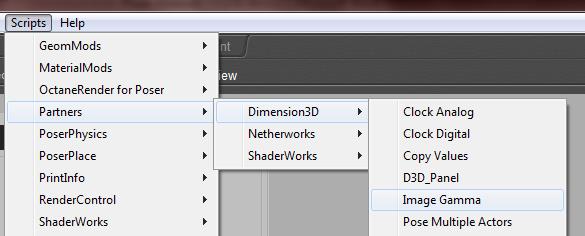


This leads me to …

where “All of the above” is the recommended option.

Note that images driving Edge_Blend and nodes alike have to be dealt with manually; these also should have their Gamma value set to 1.0.


And also (Poser 10 / Pro 2014 and up):

which presents:

Warning: when a single image file is referred to in multiple places, for multiple material definition components, and/or for various objects, then the image is imported and handled into Poser only ONCE. It’s this single instance which gets a Gamma value assigned, whatever way I choose. Changing the value at one place alters it in all other places, for that image.

Intermediate

In the Advanced interface to the Poser Material Room, nodes are the essential building blocks. They are the graphical representation of mathematical function calls, calculation procedures turning parameters (inputs) to a result (output).
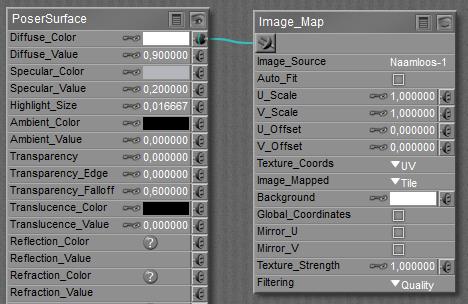
For applying images, the Image_map node can be found in the 2D Textures group, and reads like …

Clicking Image_Source opens the Texture Manager as discussed above, and enables me to assign an image file and a Gamma value. As said, addressing the same file in multiple nodes will still associate ONE gamma value to that value. When I use various values in the nodes, then the last one entered is the final value for all of them.

The next set of parameters (U/V_Scale, U/V_Offset, Texture_Coords, Image_Mapped plus the Global_Coordinates checkbox) all affect the mapping of the image onto the object surface. Just consult the manual for the meaning of the various options. Checking Global_Coordinates is meaningful in combination with the XY, XZ, YZ options of Texture_Coords, while the Mirror_U/V options are meaningful in combination with the Tile option from Image_Mapped: the images is tiled and the tiles are flipped successively.

For all places where no image pixel is available (due to the mapping parameters), the Background will be used instead. When Image_Mapped is set to Alpha then any transparency information from the image itself is used for this too, and Background might fill in some spots within the textured area as well.

Texture Strength works as follows: say the image map is connected to a color-swatch in PoserSurface. Then first the image is merged with white: Strength 100% means full image, 0% means no image at all. Second the result is filtered by the color-swatch, as usual. In other words, for an 80% Texture Strength, the final result consists of 80% color-filtered image, and for the remaining 20% of the color from the swatch itself.

Filtering comes into play at render time, when (usually) multiple pixels from the images become associated with a single pixel in the render result, especially when the rendering uses anti-aliasing itself (that’s Pixel Samples in the Render Settings). Or the other way around, and a single pixel in the image is used to fill multiple pixels in the result. Just that image pixel can be used (‘None’ for filtering) or info from its direct neighbors can be used as well (‘Fast’). The latter is fine for test renders, and for small sized animations for the web (say 640×480, regular YouTube). Looking one step further (‘Quality’) is the default, and recommended for larger animations (HD, DVD quality) and still images for the web. Looking another step further (‘Crisp’) takes even more pixels from the image into consideration, and might be of use for large scale, print-oriented render results. As usual, the higher the setting, the more memory and render time are required to finish the process.

Next >

What’s the Environment Map > Spherical Map node used for?

Nodes are the essential building blocks in the Advanced interface to the Poser Material Room. They are the graphical representation of mathematical function calls, that is: calculation procedures which turn parameters (inputs) to a result (output).

Intermediate

In order to show some kind of reflections in the render, the scene needs an environment to reflect. This might require the build of a complete scene behind the camera, which won’t show except for its reflections. As this can be quite tedious and far from cost-effective, one can use image maps instead. For just mimicking blurred reflections of far-away objects, skies and landscapes any simple projection (mapping) of an appropriate image onto the reflection component will do. This however should be considered unsatisfactory when either sharper reflection has to be considered.

Now, say, my scene is under a sky dome and on a ground floor, and an image is mapped to these environmental objects. In the scene, a single fully reflective object is present. Then: how would the dome and ground be reflected from that object (assuming there are no other things around to reflect)? Rendering full, crisp raytraced reflections from a complex shaped object can be time consuming.

This is when applying a “spherical environmental reflection map” becomes useful. Just plug the Sphere Map (the only node in the Lighting > Environment Map group) into the PoserSurface Reflection_Color (or Alternate_Diffuse) slot, and the image that might have been used for the sky dome into the Sphere-map Color slot. Now I’ll see the same reflections, but I don’t need the dome, and neither I need any raytracing for the reflections.

I might want to Color filter the image though, and I might want to Rotate it to match any sky dome actually used.

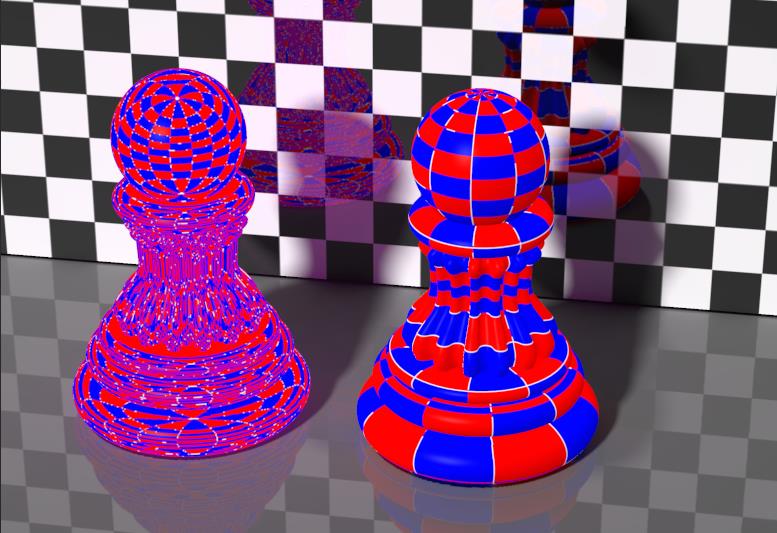
Now, is this any different from a regular mapping of the image around the object? Sure it is, have a look at this:

The right pawn has the tiling image mapped onto the object surface, in the Reflection or (alternate) diffuse component of the PoserSurface. The left pawn shows environmental spherical mapping, and looks like a mess at first sight. Unless I realize that the tiling image is mapped onto a (virtual) sky dome surrounding the scene, like the way the tiles are mapped onto the head ball of the right pawn. The ‘converging point’ where the tiles come together is not on the object itself, but somewhere straight above all objects, high in the sky.

Then such a colored sky dome is reflected by the left pawn, towards the camera. And that is what the spherical mapped texture is showing, in a correct way. Where image mapping usually either depends on the shape of the object (UV mapping) or the position of the object in the scene (XYZ mapping), this Environmental Spherical Reflection Mapping depends on the position of the object under the dome, relative to the camera. When either the object moves, or the camera moves (or both), the mapping will get adjusted.

Do we need it?

The obvious advantage is render speed, the obvious disadvantage is: it does not reflect any objects in the scene, let alone portions of the same object, since these are not in the image used. So, for stills of filled scenes rendered on modern, fast PC’s deploying IDL illumination and other raytracing demanding approaches, the use of the regular Reflect (or even Fresnel) node might be a better way.

But for those “shiny car on an empty road” advert-like animations, deploying this environmental spherical reflection mapping might be a game winner. And it might serve well in test runs too.

Next >