Dynamics II – 1 Quick Tours

This part intends to help you making the steps from a Beginning to an Intermediate user of the Hair and Cloth Rooms. It offers a Quick Tour around Hair Room, a Quick Tour around Cloth Room and a Quick Clues and Recipes chapter on resolving the most common Cloth Room issues, like sims going wild and meshes breaking up. Various Case Studies (see part I) also contribute to this goal.

Download this tutorial in PDF format (1.0 Mb).

As Hair Room is relatively simple – as far as theory is concerned, you just need to build experience by practicing it – everything beyond the Quick Tour chapter about it will be concerning Cloth Room. This is like the real world: digital clothing is a high end worldwide industry, digital hairstyling is not.

Dynamics II – 2 Quick Tour: Hair Room

The Cloth Room and the Hair Room do have some similarities. The layout of the user interface, with four panels, panel 1 defining the sim and panel 4 defining the dynamic parameters and starting the calculations. The presentation and organization of the panels by the way depends on the size of my screen. On a 1280×800 laptop I might miss the extra panel with various buttons, and the panels are in two columns 1+2 and 3+4. On a 1280×1024 desktop it’s completely different.

Panel 1. Growth Group

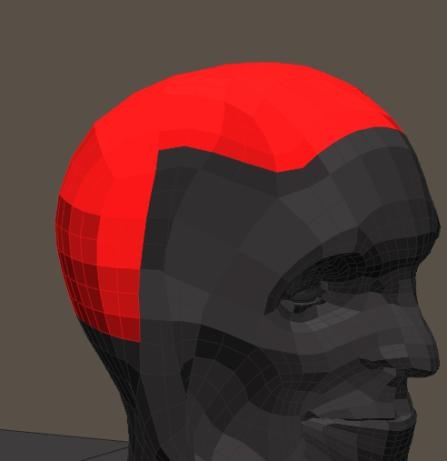
A Hair Sim is called a “Growth Group”. [New] adds a sim to the list of sims, [Delete] takes it out. The name of the group is the only parameter at this level, so we’ve got [Rename] to alter the setting(s). The little triangle presents the list of Hair Sims to pick from, and shows the selected one. [Edit] opens the Poser group editor in polygon mode. It requires either a prop or a figure and one of its body parts selected in preview, and from that prop or body part poly’s can be selected into the group. Applying the Smooth Lined or Flat Lined mode in preview helps selecting.

If no figure and body part are selected, Hair Room turns inactive, I can’t even create a New Group then. As far as Hair Room is concerned I cannot make a New Group for a Body (but: parts only), but I can try to make a group for a Camera. However, Cameras don’t have polygons so no group will be made effectively, but no message will tell me.

Let’s stay on track, and select part of Andy’s skull into the hair group. This will have the following effects:

  • A group with the appointed name is added to Andy. This implies that those polys are in the Head group as well as in the Andys_Hair group. I can separate those polys, turn them into a prop using the Group Editor, and save them with all the hair settings into the hair section of the Library.
  • A prop with the appointed name is added to the scene too, but this prop only contains the hairs which I’m going to define. Of course this prop is parented to the head.
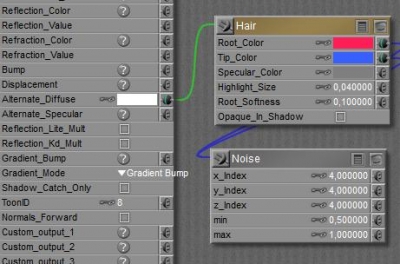
  • Those hairs get a material assigned as well: a neat Hair node plus some noise plugging into Alt_Diffuse.
Default Blonde Brown Red Black Grey Grass
Root color* RGB 165/151/110
HSV 30/56/129
Default HSV 10/90/50 HSV 5/160/80 HSV 0/0/0 HSV 0/0/80 HSV 75/220/50
Tip color * RGB 236/217/158
HSV 30/161/185
Default HSV 10/90/80 HSV 5/160/100 HSV 0/0/30 HSV 0/0/200 HSV 75/220/70
Specular 50% grey 20% 15% 25% 20% 30% 50%
Highlight 0.04 0.1 0.1 0.1 0.1 0.075 0.05
Root Softness 0.1 0.1 0.1 0.1 0.1 0,1 < 0.1
Opaque in shadow NO YES YES YES YES YES YES

* Poser HSV has a max of (240,240,240) and is used here, Photoshop HSV has a max of (360,100,100) and the parameters have a different meaning.
In Poser, full color is (any,240,120). In Photoshop, full color is (any,100,100).

Later on I’ll point out why having a single Growth Group for all the hair is not very handy. It’s generic practice to turn the selected part of Andys head into a “SkullCap” prop first, and to define several portions thereof as separate Growth Groups. Common portions are: Side left, Side right, Back, Top left and Top right.
Then this entire SkullCap can be saved into the Libraries Hair section. Recommended. This makes me end up with multiple sims, which I can recalculate one by one, or all in one using the menu: Animation > recalculate Dynamics > All hair.

Panel 2. Growth Controls

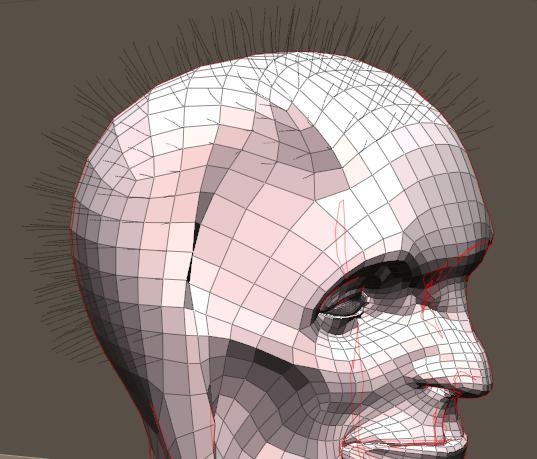
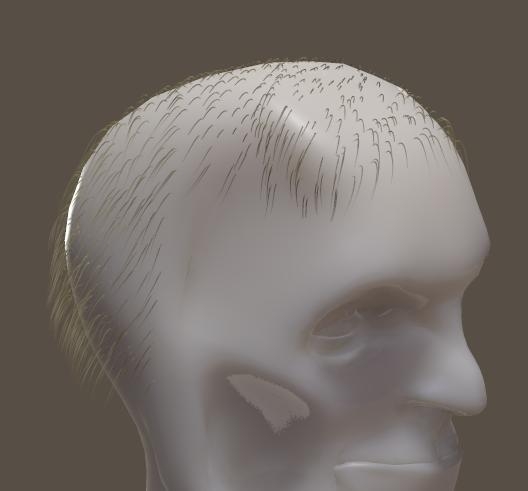
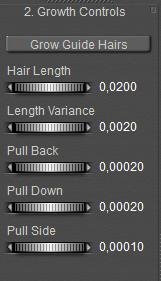
Next the selected Growth Group can be populated, I just [Grow Guide Hairs] and each vertex in the group grows one. When I like more guide hairs for more detail in the coupe, I have to refine the Skullcaps mesh density in a 3D editor.

A Guide Hair can be shaped etcetera, and then works as an example for surrounding generated “populated” hairs. This way I don’t have to model each hair individually while still having good control over the details.

The general definition holds for all those guide hairs; each time I change a value the preview gets updated, I don’t have to click the [Grow…] button every time.

Hair Length and Length Variance are in my own Poser units, so if my Poser is set to present them in meters, then 0.02 means: 2 cm. If I set them accordingly and change my units preference to inches, I’ll find the Length setting altered to 0.78 (after re-entering Hair Room or re-selecting Andy’s head).

Note that variance is absolute, so Length= 0.10 and Variance=0.05 creates hairs between 5 and 15 cm, but reducing Length to 0.01 creates hairs between -4 and +6 cm. I don’t think negative hairs grow inwards, but you’ll never know. So: don’t let your Variance exceed your Length setting.

The Pull parameters define the curvature of the hairs relative to the local (skull) coordinates. That is:

  • Pull Back affects the hairs aside and on top, but not at the back as these were pointing backwards already (minus Z direction)
  • Pull Down similarly will not affect eventual hairs under the chin, as a beard grows downwards (minus Y)
  • Pull Side does affect all hairs.

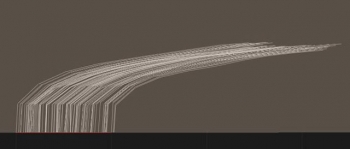
Note that this is the “natural” curvature preliminary to all further styling and dynamic effects like gravity and wind. The effects of these Pull parameters are related to the Hair Length, and to the amount of Verts per hair. In order to bend a 20cm hair fully backwards I need a ten times larger Pull Back value than for a 2cm hair. The other way around; short hair takes very small Pull values to show a considerable effect.

Length=0.1, Verts=5 Double length Double Verts

Panel 3. Styling Controls

Panel 3 presents some generic detailed settings, plus an advanced styling editor (click: [Style Hairs..]).

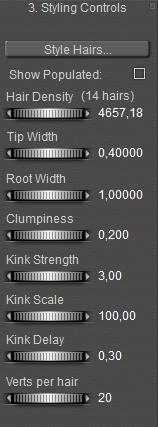
Hair Density controls the total amount of hairs, or: the amount of populated (and rendered) hairs per guide hair. Since showing all hairs can delay the preview, this can be turned OFF. Firefly renders will always show all hair, this option is preview only. Hair Density shows two numbers, the bright one next to the dial states the amount of hairs per square user unit. The default is 32,000 hairs per square PNU (Poser Native Unit = 8.6ft = 262cm) which is the equivalent of 4657 hairs per m2 or 3.0 hairs per inch2. So when various groups have matching hair growth, this number must be the same. The dimmed number between parentheses shows the amount of hairs that will be generated onto the hair growth area.

Hair thickness is controlled by Tip and Root Width. Hair will get thinner at the ends over time, so regular haircuts will leave thicker tips compared to long hair which sees a comb or brush only. Blonde human hair is thinner at higher density, black is thick with medium density, brown is medium thickness/medium density and red is medium thickness, low density. Animal hair is thick and dense, although most animals have an undercoat of short fine hair and an “overcoat” of thick longer hair.

Default Blonde Brown Red Black Animal Grass
Density 0.45/cm2 300/cm2 200/cm2 150/cm2 200/cm2 100/cm2 4 / cm2
Head / 500cm2 235 150,000 100,000 75,000 100,000 400,000 *) 400,000 **
Thickness 1.0 (mm) 0.05 0.10 0.10 0.20 0.50 2.0
Tip – worn long 0.4 0.03 0.05 0.04 0.06 0.01 0.2
Tip – worn short 0.4 0.04 0.07 0.06 0.12 0.1 1.0
Tip – haircut –long 0.04 0.08 0.08 0.16
Tip – haircut –short 0.05 0.09 0.09 0.18

*) for a medium size dog (Labrador) which measures say 4000cm2 in total. A small dog (Lab puppy) or a large cat measures say 2000cm2, a tiny cat say 1000cm2, a mouse say 20cm2.
**) for 10m2 grass area, as around a picknick table

Hair grows at a rate of 1 cm/month and lasts 30 to 60 months, so hair longer that 60 cm is exceptional. With on the average 100,000 hairs, lasting say 50 months, one loses / creates about 2000 hairs a month = 70 per day. Trivia.

In cases of straight (non-curly) short hair, animal skin, fur coats, grass etc this might be it. Hair like that has no dynamic behavior on wind and gravity, and can simply be used as is. With the Pull values, the density and the thickness and perhaps some additional styling for separate guide hairs (see: Hair Editor) the job can be considered done.

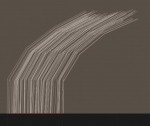
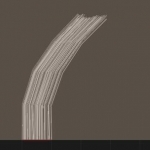
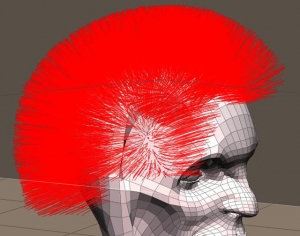
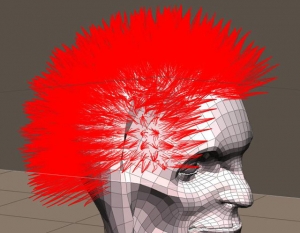
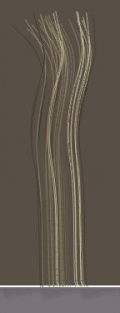
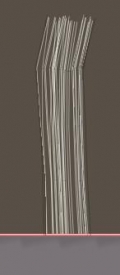
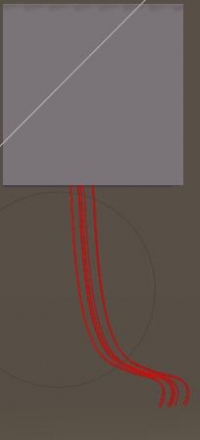
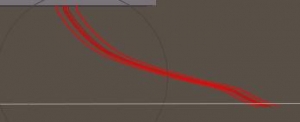
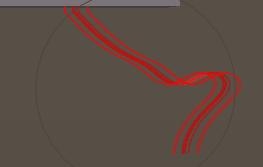
Clumpiness concentrates the populated hairs around the guide hair and make the hairs grow towards each other (figure, clumpiness=0 and 1)

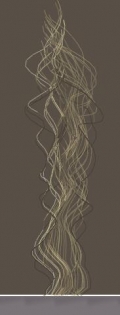
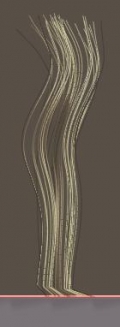
The Kink parameters define wave and curl. How much (Strength, amplitude, 10=very mild, 100=rather present, 1000=all over the place), how large (Scale, frequency. The higher, the more waves I get. 10=mild, 100=rather present, 1000=frizzy. Minimum 1) and where it starts away from the root (Delay – so the first part is straight, and curls can start at ears height or so. In %, so 90 will make the last 10% curly).

Default Strength 3 => 30 Scale 100 => 30 Delay 0.3 => 0.6 Verts/hair 50 => 5

Since each hair is a 3D mesh, low resolutions can hamper any detailed shaping. Verts per hair (from 4 to 100) can affect that. For a hair of 20 cm, 20 verts imply edges of 1cm between them. This is the body resolution of Android Andy, Vicky4 goes twofold (5mm). I guess that good hair should about equal the body density, which implies that 20cm hair requires 20 to 40 verts. I would double it in a close-up head portrait.

In the meantime, all hairs in the entire group are still treated similar. So:

  • Question: can I make hair shaving patterns?
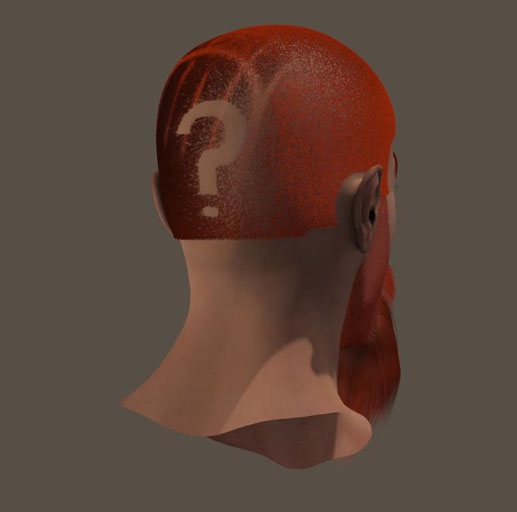
    Not as such, as it requires some image map to do so and the hair length is not image-map driven. Also, the concept of guide hairs that pass all their properties to populated hairs does not support the “shaving patterns” idea very well. But for short hair (which is always required to shave patterns) it might pay off to experiment with some image mapping in the Materials Room. Portions of hair can be made transparent then.
  • Question: can I make color patterns?
    Same as the above: it must be done in the Material Room, where root and tip colors can be made image-map driven. See the Case Study.
  • Question: can I vary the hair length?
    Well, a single SkullCap can consist of various Growth Groups, each having its own hair length setting. Next to that, each individual Guide Hair can get its own length from the Hair Editor.

Hair Editor

One major warning beforehand. The Hair Editor sets properties for individual guide hairs. All the settings (for the Growth Group at hand) will get lost the moment any change is made, dial is touched or value field is opened, in the generic Guide Hair settings in panel 2. This, by the way, is the only way to reset any settings from the Hair Editor.

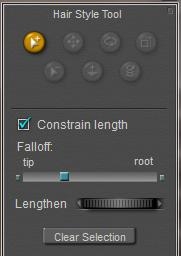
During the edit, a hair root will keep its place – and direction, as set with the Pull parameters in panel 2. So, selections are marked by the tips, and moving, rotating, twisting and so on affect the tips. That is: a portion from the tip towards the root as set by the slider underneath. Whether or not an operation also lengthens or shortens the hair, or keeps the hair length intact, can be switched on/off. Again, lengthening etc starts halfway the hair, according to the tip/root slider. Except for the Length dial, which affects the whole hair. All hairs can be dealt with individually.

Note that each guide hair represents a population of hairs around it, all those hairs will present themselves the same way. Details from twisting, lengthening nuances etc might get lost in the crowd.

And again: to un-style all hairs, I just have to click [Grow Guide Hairs] or to touch anything else in panel 2 and I’ll get new ones according to the settings in panel 2 and 3. I’ve found no way to un-style individual hairs, or selections.

Panel 4. Dynamic Controls

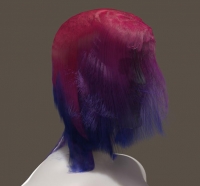
After growing and styling Andys hair I can expose it to gravity and wind, using the [Calculate Dynamics] button, and [Clear Dynamics] when I don’t like the outcome. I have noted that the calculation adds some draping frames itself, then takes the whole and nothing but the whole animation range, does not present any frame-timing in the progress meter and does not always respond very well to the Cancel button.

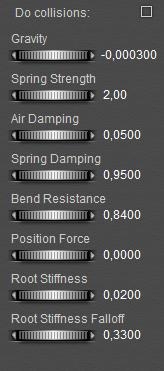
Do Collisions is worthwhile to check, also checking Collisions in the properties of the objects around the hair (like the head) is not only necessary but also present a performance killer: calculation times go up drastically. So I do my test runs with this option unchecked, and check it on when my satisfaction has gone up enough. Checking the option by the way only makes sense when there is something to collide, which is not the case for short hair and alike.

Next I’ll discuss the individual parameters, with their respective default. There is no [Reset] button to call in those defaults after playing around. Compared to Cloth Room, none of the Hair Room parameters makes real sense in a physical way, and none of them is properly testable either. I tried, putting a flag of hair in the stream of the wind generator. It did not produce workable results.

Gravity (-0.0003). As hair is organic its specific weight can be estimated at 1 gram/cm3, which translates to 0.0003 gram per cm of hair with an average radius of 1mm. Which is according to the defaults in panel 3, but quite a lot compared to nature. Ten- to hundredfold too high actually, as 0.1mm might be a better radius for real hair. However, -0.00003 (one magnitude down) fails to get the hair down properly, and -0.003 (one magnitude up) drags down the hair so much that most styling gets lost.
Blonde hair can be quite less (half), black hair needs more (double).

Air Damping (0.05) is a reasonable value – when comparing to cloth – given the weight and the amount of hairs per cm2 and considering that long hair in the wind is a few cm thick. Since a hair needs to be say 40cm long to make it from the forehead to the neck, I guess that shorter hair should get lower values.
But I have to make the changes and adjustments myself, as altering the parameters (like Length, or Density) does not change the effect of wind on the hair.

My guideline: the ratio Air Damping : Gravity is 170 for the default (Brown hair). Blonde hair (thinner, more hairs per cm2) has a higher ratio, up to 300, Black hair a lower ratio thanks to a higher weight (120) Red hair lower also (150) due to less hairs per cm2.

Spring Strength (2.0) & Spring Damping (0.95). The Damping is assumed to reduce the bouncing of the hair, and so it does indeed. The Strength itself is a dubious parameter. The manual is plain weird: increasing the value should increase the springiness of the hair. And the Damping should affect the elasticity. Tell me the difference.
Anyway, I don’t see any real effects, nor in result, nor in the generated animation, between 0.2, 2.0 or 20.0 for the Strength. At least the “springiness” helps to drape and settle the hair. I tend to leave these values as they are.

Bend Resistance (0.84) is the inability of a hair to bend along its length. This appears to be a very relevant one. At 1.0 it turns the sim into a complete freeze-up. At 0.1 the hair – and especially the generated animation – is very wavy, and in the wind it turns into a complete mess. For long hair (50cm) I even found locked movements at values as low as 0.75 and an unmanageable waviness at 0.50. There are no values from physics books, so it’s trial and error in this department.
That’s why I usually check OFF the collisions in my first test runs, as I need a lot of them. Test runs, that is.

Root Stiffness (0.02) & Root Stiffness Falloff (0.33). The Stiffness takes up the Hair Root characteristics as the Pull values set in panel 2, to the specified extent. The rest is taken by the other dynamic characteristics. And the Falloff tells for which part of the hair, so 0.33 takes it for the first third from the root, and 1 (aka 100%) locks the hair completely: the hair becomes stiff from the root to the tip.

Default
Stiffness 0.02 => 0.2 Falloff 0.33 =. 0.70


Position Force (0.0) determines to what extend the hair tends to stick in the start position, where it was styled into. Like hairspray, the more you use the less gravity and wind will have effect on your hair.

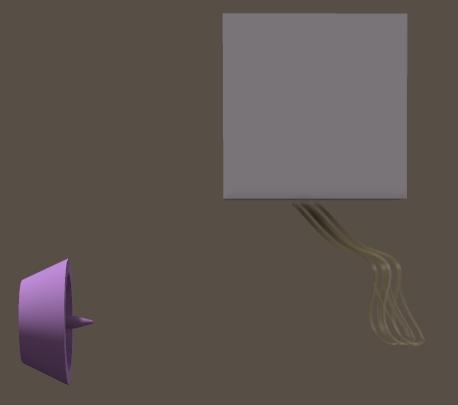
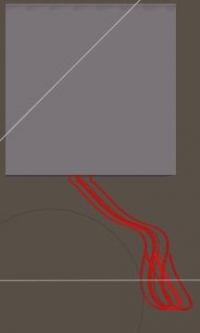
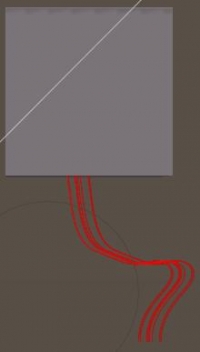
Let’s test it using a serious (0.001) Pull Side. A serious Position Force (0.03) keeps the hair into position during simulation. A reduced value (0.01) relaxed this a bit, a further reduced value (0.001) freed the hair bundle completely.

Blonde Brown Red Black
Gravity -0.00015 -0.0003 -0.0003 -0.0006
Spring Strength 1 1 1 1
Air Damping 0.045 0.051 0.045 0.072
Spring Damping 1 1 1 1
Bend Resistance 0.6 0.6 0.6 0.6
Position Force tbd tbd tbd tbd
Root Stiffness 0.1 – 0.01 0.1 0.1 0.1
Root St Falloff 0.01 0.03 0.02 0.04

Last Words

Compared to Cloth Room, Hair Room presents a wealth of simplicity. Each sim addresses one well determined set of polys, guide hairs are determined by mesh density, and actually are the only elements that are manipulated in panels 2, 3 and 4. There is no way to convert conforming hair into dynamic, poke-through is no issue for hair and collision is checked on/off in Pose Room itself. So sims hardly go wild or crash unless I take the wrong set of parameters myself. They only might take time when there are many collisions involved.

Since there is nothing to convert, I either can load an existing dynamic hair object (and adjust it) or create one myself. And as I have to set all parameters myself as well, problems and bad results are either to blame on the toolkit – which is not going to change lightly – or on my own lack of experience to handle it. That is something I can change, but not by reading more on principles and theory.

This is where the Case Studies kick in. Which is where hair materials are discussed as well.

Dynamics II – 3 Quick Tour: Cloth Room

The Cloth Room presents four panels, numbered 1..4, and they have to be visited in that order at least once. That is: I’ve got to start in panel 1, I’ll always end in panel 4 to click [Calculate Simulation], I can’t make sense out of panel 3 without a visit to panel 2 first, etcetera. Once under way, I can jump back and forth at will.

Panel 1. Cloth Simulations

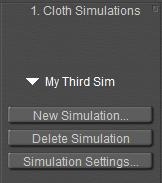
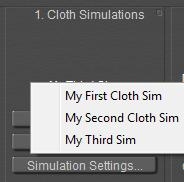
In this panel, I click [New Simulation] to add a new simulation (“sim” for short) to the list. The properties panel presents some magical settings for the calculation algorithm, but for now I just enter a meaningful name. And I add some more sims, just to get a feel for that list, which is part of the Poser scene and gets saved with the scene file.

=>

The triangle opens the list so I can pick one to work on, and then its name is shown in the panel. [Delete Simulation] removes the sim from the list, [Simulation Settings] just re-opens the settings panel to alter the name and the other settings. I’ll deal with them later, in Sim Engine \ Collision tests (part III). So this panel links the sim to any other sims in the scene.

Panel 2. Cloth Object

In this panel of the Room, I can define the contents of the sim at hand. This links the sim to the Poser scene. The sim works with two categories of objects: Cloth Objects and Collision Objects.

Cloth objects
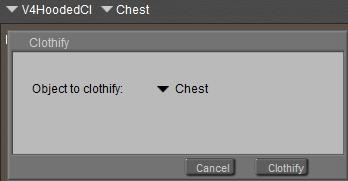
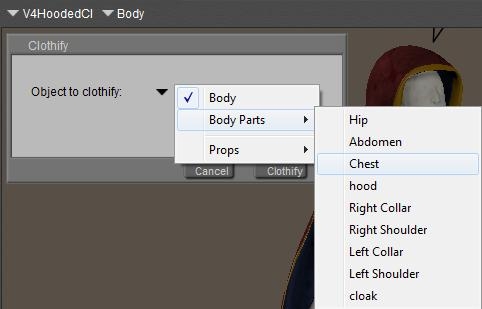
Cloth objects are 3D meshes (made out of vertices, edges, polygons), and the sim can move and deform them while they collide to themselves, to each other and to the collision objects. I select a figure or prop in the scene, eventually a named part of it, and click [Clothify].


Or I just click that button, and it gives me the whole (Body) or part (both for the selected figure only!) or props in the scene.

When there are more figures in the scene I’ve got to select one in the Poser preview window, then I can clothify (a part of) it. I cannot switch to another figure while handling the clothify list at the same time, nor does the list tell me which figure I’m working on. Yes, when I’m clothifying multiple figure parts with the same name from different figures, I’ve got a problem. They all have a Chest and a Hip etc so I’ve got to watch the preview window very well.

So each sim has its own list of clothified (sub)objects, or: cloth elements. Of course [Unclothify] removes a cloth element from the list of the sim at hand.

Troubleshoot: the lists of body and bodyparts are obtained from the group definitions in the underlying OBJ mesh file. For various reasons some groups may be present, but are sort of empty from a clothing point of view. In that case, these groups cannot be clothified. In the example above, I can select Body from the list but the clothify selector keeps on returning None. Then I have to pick the cloth parts separately.

Note that there is hardly any need for fancy tricks to turn a piece of clothing into dynamic. Forums are full of “hybrid clothing” but the general idea is that you can load a clothing set, conform it to a figure, then pick one piece of that set only and turn just that part into dynamic by simply clothifying it. Okay, I know, general ideas don not work out as expected in all cases, and sometimes more issues might come up. I’ll deal with them later, in Meshes and Sims \ MultiCloth (part III).

Collision objects

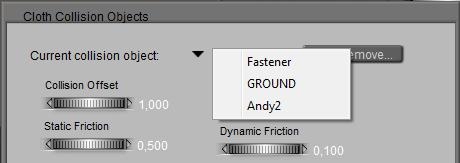
Collision objects are 3D meshes also, and although Poser itself can move and deform them during an animation, the sim will take their position and shape for granted (although varying over time). Clicking the [Collide Against] button gives me a full hierarchical view on the scene, and I can click anything I want at any level of detail. Simply selecting Universe will add anything to the collection of Collision Objects for the sim at hand.

Some notes:

  • I’m not obliged to have a Collision Object, the sim runs perfectly without although the cloth will not collide to anything at all. Having at least one sim (panel 1) and at least one cloth object (panel 2) is obliged.
  • When I select objects that the cloth will never collide with, I’m just increasing my calculation time somewhat without additional benefits. It won’t hurt though. When I don’t select objects which the cloth will or does collide to, the cloth will just fall through them. It’s up to me to find the balance.
  • The Poser GROUND is an object which can be a Collision object but cannot be a Cloth element. It just misses from the list of props when I [Clothify], and when I deliberately select it and use [Clothify], it just won’t, without a message.
  • A (part of a) mesh cannot be a cloth element as well as a collision object (in the same sim). Clothifying removes it from the list of collision objects automatically. Unclothifying puts it back, but only if it’s part of a figure which by itself is in the collection of collision objects. Once clothified, I can check them in the hierarchical scheme of elements but they just won’t be added to the list of Collision Objects, and the checkbox will be blank next time I open the list again.
  • When an object (or part thereof) is made invisible in the preview, it will not be taken into account in the calculations. Neither as a cloth element, nor as a collision object. So, before running sim calculations, helper objects should be made invisible so they can’t affect the result. But objects that just should be left out of the render result should be made invisible after running the calculations.
    In Poser 9 / Poser Pro 2012, objects can be made Invisible to Camera instead.

    For example, in older versions of Poser I ran the calculations, and I solved some minor poke-through issues by just hiding the bodypart which was fully covered by the cloth anyway. Then, for whatever reason, I wanted a rerun of the calculation. This usually was a disaster, because I always forgot to unhide that body-part first.
    With the new Poser versions I don’t have that issue anymore. I don’t hide, I make Invisible to Camera.

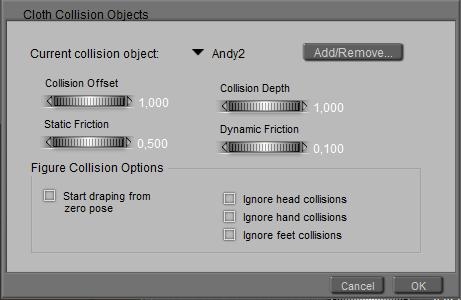
The window I’m in now has a triangle showing the list of Collision Objects, at the prop / figure level, without the underlying details. I can select one (which shows), and for that one I can set specific parameters: Collision Offset and Depth (see Sim Engine \ Offset+Depth (part III)), and Static / Dynamic Friction (see Real World \ Friction (part III)).

Each Collision object has its own set of parameters (for the sim at hand), so any change in these is specific for that Collision Object. A global doubling of, say, all collision depth values for whatever reason hence need to be done for each object in the list separately.
This is something that usually goes wrong: a sim calculation falls apart, I want to raise the collision depth, and only do so for the object selected instead for all the relevant ones.

The Cloth Objects panel shows (triangle again) the list of clothified elements, and the one selected. For this selected one, I can add more details in the next panel of the room.

Panel 3. Cloth Groups

In this panel, the details of a cloth element can be further defined, if I want to. For the 3D mesh at hand this works on a vertex level, and there are four ways to exclude a specific vertex (usually: a group of vertices) from the sim calculation itself.

  • Choreographed group
    the vertices follow the moves and deforms which are defined in Poser for that (part of the) cloth mesh, that is: follow their own settings in the animation. They can move by themselves, hence: choreographed, as I am the choreographer when defining the animation. This includes all moves that result from being conformed to an animated figure, or follow from some parent/child relationship with another object.
    For example:
    I like to represent a towel, which hangs on the wall at one corner of it, then falls off and lands on the ground.
    • I animate the towel. First for a lot of frames it’s at the same height at the wall, then it comes down. I ignore all effects from hanging at its corner, I just animate it as a whole.
    • I clothify the towel (or clothify first, animate later, Poser does not care), make it collide to the ground, then I [Edit Choreographed Group] and I pick just one vertex in the corner. Now this vertex will follow the towel animation, and all other vertices in the towel will be involved in the sim.
    • I [Calculate Simulation]. The single corner vertex will stay at its place for a lot of frames and the rest of the towel starts to hang down diagonally. Then the corner vertex comes down according to is animation, the cloth comes down accordingly but meets the ground and starts folding a lot. That’s it.
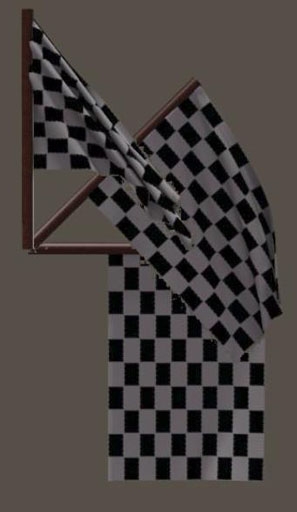
    • So, to hang a banner or so in the scene, I can just leave the cloth object unanimated, select the upper row or just a single vertex or whatever (left and right upper vertex will hang on two points) into the Choreographed group, and run the sim. Without any choreography of themselves the selected points stay put, and the rest deforms according to the sim.
  • Constraint group
    the vertices follow the moves of the underlying collision object which they are pinned to. By stapling a piece of cloth onto a pole I can make a flag, by attaching dress straps onto a girls shoulders I can force them to stick. However, I cannot stich pieces of cloth together when these are both in the cloth elements list of the same sim.
    This way I can fix a banner or towel too, I just introduce a pole (cylinder), place the cloth object against (or even a bit into) it, and I add the top-row of corner vertex to the Constrained group instead. As long as the pole is not animated by itself, the points from the cloth are stuck in the scene but as soon as the pole gets moving, the pinned points of the cloth will follow.
    The main differences with the choreographed group are therefore:
    • I need a pole, and it needs to be one of the collision objects, and it needs to touch the cloth
    • I animate the pole, not the cloth
    • Anything that changes the cloth outside the simulation, like morphs, poses, animations, whatever will be ignored and overruled by the simulation. In the Choreographed case this already was the case for most of the cloth, but now it also holds for the remaining points in the constraint group, pinned to the pole. The simulation makes them follow the pole now, even if the cloth was not parented or conformed to it.
  • Soft decorated group
    this is meant for pockets, belt loops etc which are attached onto the cloth, and can deform so they follow the moves and deforms from the sim calculations too, but indirectly. The cloth itself is deformed and the decoration follows.
    Note that “attached onto” is something different than “integrated into”. I’ve got to be able – at least virtually – to rip the decorations off without leaving holes in the cloth. In 3D mesh terms: they have to be separate sets of vertices. A pocket or so which is integrated into the cloth mesh results from displacing a set of vertices either explicitly in the 3D model, or by a morph upon that model, or by a displacement map.
    The first way is fruitless; all that kinds of explicit vertex displacements will be undone by the cloth simulation. The morph is something else: just turn the morph-dial to 0, run the animation, and turn the morph-dial to 1 again (tip by PhilC, thanks). The displacement map is something to try, but like the morph: the underlying cloth might deform a lot and the result might not be that realistic.
  • Rigid decorated group
    this is meant for buttons etc which are attached onto the cloth, will follow the moves of the underlying cloth but will not deform themselves.
    As with soft decorated: the vertices of those groups are not included in the sim calculations but are added back onto the cloth afterwards. This is why I must not make holes in the cloth when defining those attachments: it will cause the sim to run on cloth with holes in it.

The main thing however is in the Dynamic Group(s). There is always one: the “_default_” contains all the vertices which are not put anywhere else. But I can define some more myself. So, each cloth element consists of at least one dynamic group, and one of each aforementioned groups which might be empty. Each vertex in the cloth is in one group only. The sim calculations actually run on the vertices in the dynamic groups (only!). So why does one need more than one dynamic group?

Panel 4. Dynamic Controls

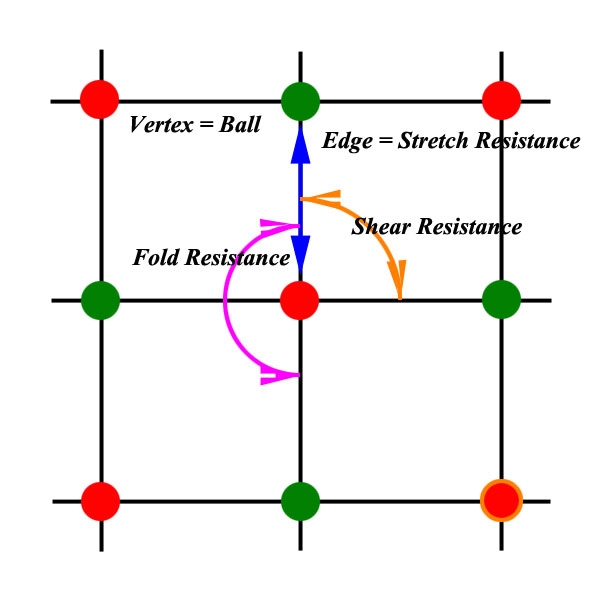
In panel 4, the sim relates to the real world. For each dynamic group in each cloth element in each sim, the physical properties of cloth behavior are defined (see the scheme). This is why a dress made of linen, lace and leather parts can get different behavioral properties for each kind of material used.

This is also why the group editor, used in the previous Cloth Groups panel, offers an Add Material option. I like to have a part of the dress that looks like leather, to behave like leather too. More on physical properties in chapter Cloth-Sim Side (part III)
and chapter Cloth-Real World (part III).

The [Reset] button just refills the physical properties with the default values, and [Clear Simulation] discards the results for that sim derived earlier. [Calculate Simulation] does the job, and presents a progress meter which also tells you the time (in sec, with a lot of irrelevant decimals) it took to handle the calculations for the previous frame. Large values indicate problems, unusable results and instable calculations ahead. A sign to break up the calculations and try different settings. More on that in chapter Quick clues & Recipies. Poser 9 / Pro 2012 offer the feature that when a sim goes wild completely, the calculations are terminated and an error message is shown.
[Play] does the same as the play button in the animation panel, the [Esc] key stops the play and returns to frame 1.

Animation

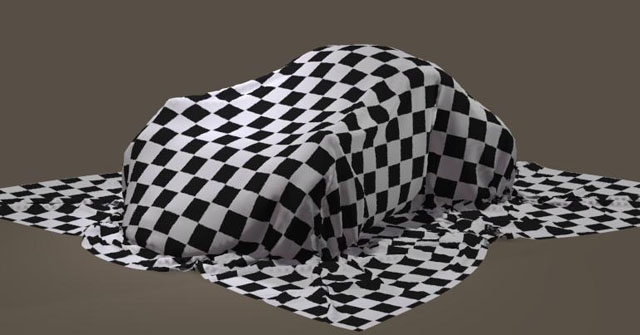
Cloth needs time to drape and to settle, Poser handles time through animation. In the simplest case of a sheet of cloth over a car or statue, I’ll have to start with the cloth held above it, and let it go. After a few seconds (each lasting 30 frames) the cloth collides with the object, the folds and wrinkles kick in and I get my result.
From a technical point of view, the cloth vertices have to change position. This requires some velocity and time. The velocities have to build up, as the cloth vertices stand still at the start. This requires acceleration, and time as well. The acceleration comes from forces acting upon the cloth, and those forces either are presented by the Cloth Room (gravity, wind), either by the interaction between the cloth and objects (friction), either within the cloth itself (resistance to stretch or fold).

So, given the position of the vertices in the cloth (determining its shape and position), given the forces acting upon them, the cloth and so the sim routine need time to get the job done. Time as in: animation frames, like a piece of cloth needs time to fall on the ground in real life as well. Poser time. That’s a different sort of time than my time, waiting for the sim to step through the frames, and spending time on the calculations. But of course, the more frames, the longer I’ve got to wait for the result.

While getting a result for a single image takes Poser time, I can make animations as well. While objects and body parts move along, the cloth shape keeps adjusting itself to the new situations that present themselves frame after frame. From the notes above, I appreciate that the first series of frames is needed to settle the clothes, and then the scene itself can take its own route.

For clothes on posing figures, and for cloth in more complicated final positions, we might need a process that’s somewhat in between just giving time for the cloth to settle, and a full animated sequence for the sake of it. A girl in a dress being seated requires the cloth to flow gently between her back and the chair, and then between her thighs and the seat. Like in the real world: it’s hard to get your clothes on while being seated and sitting still, so is the case in Cloth Room. I’ve got to animate the girl, and perhaps the chair as well, to get the desired results. The same with tucking in a blouse or shirt into some jeans. Ever tried that yourself while taking a deep breath at the same time? It does not work, you’d better exhale firmly, so there comes room for the blouse or shirt between the body and the pants. The same with strapping a belt around a waist while wearing a dress. No-one puts on the belt first and tucks the dress in, everyone wears the dress first and then tightens the belt.

Note that conforming and morphing clothes can take a rather good start position , and need far less animation and settling time than non-conforming cloths (props) that miss these features and have to start at zero (T-) pose or so.

To my experience, the best results can be obtained by looking how thing work in the real world. Things that work out there, often come handy in Cloth Room. Things which do not work out there, might not work in Cloth Room either. Generally, this is my approach in handling Cloth Room, and in problem analysis. What do all the settings mean in real life, and will it work out then? When that’s unlikely, I alter the appropriate settings accordingly.

In the meantime, Poser is software. It will not get angry or disappointed when I pull it some legs, or just cheat. I’m not presenting any theories on that, I will give examples instead. In a number of elaborated Case Studies (part I), related to this tutorial.

Additional notes on the panels

  1. Panel 3: all vertices start in the _default_ dynamic group, and when they are assigned to another group they get removed from the group they were in. So, all vertices are catered for, and each one is in one group at the time only.Bug report: Except for vertices in the Rigid Decorated Group, which are NOT removed from another group. The other way around does work properly (when in the Rigid group and then put in the Soft group they disappear from the Rigid group). Therefore, vertices can be in one group only PLUS in this Rigid group. Not repaired in Poser 9 / Pro 2012 yet.
  2. Panels 1, 2 and 3 present lists by an arrow and the selected item next to it. The list opens when clicking either of them. Except for panel 3, where the arrow is mute. So click the item-name instead. Repaired in Poser 9 /Pro 2012.
  3. Panel 3: All [Edit … Group …] buttons open the editor panel. The top half is quite straightforward, I can recommend the Add Material option for multi-material cloth pieces. If have not done much work with the bottom half yet. Note that there is a decent chapter on the Group Editor in the Reference Manual.
  4. Panel 4: [Reset] does not reset the Stretch Damping (bug reported end of 2010). Its default value is 0.01

Please note that when you change a cloth item in panel 2 (or by selecting it in the preview window itself), this Group Editor panel does not follow!! It still points to the earlier cloth item, so you might end up looking at the wrong group. Just re-click one of those [Edit … Group …] buttons in panel 3 for a refresh.

What’s more to say?
Well, in practice people experience various problems and like to have a magic bullet, or at least a recipe, or a clue where to look. For that purpose, I’ll present:

And of course, there is more detail and background information to enhance the use and understanding of the Cloth Room. For that purpose, I’ll present (in part III):

  • How a cloth sim relates to physics parameters in general (Cloth Parameters – Sim Side)
  • What the physics parameters mean in real life (and what the related Poser values are) (Cloth Par – Real World)
  • How a single sim relates to all the other sims in the collection (List of sims)
  • How a single cloth sim calculates (sim engine)
  • How a cloth sim relates to the 3D mesh of the cloth elements (Mesh behavior in short)

In Pose Room, I am boss. In Cloth Room, reality is. For some, Pose Room and Cloth Room are both about clothes, and one is an advanced case of another. For Poser, Pose Room is about figures, and just for me: some figures are clothes. For Poser, Cloth Room is about cloth simulation, and just for me: some cloth are clothes. I know about clothes, Poser doesn’t at all. It’s Cloth Room, not: Clothes Room.
For me, Dynamic Clothes relate to Conforming Clothes as a Formula 1 car relates to a bike. Both have two pedals, gear switching in the steering wheel, sporty clothes are handy and for both a helmet is required. Both have their use, and Ferrari (read: SM) is not going to build a “F1-car for bikers”, and a handy “F1 dashboard wizard” will never happen, I guess. I would appreciate it, but we have to learn to live without, I’m afraid. Sorry.

Dynamics II – 4 Quick clues and recipes

The quick clues and recipes come without explanations and without fine details. These can be found in the detailed chapters in the tutorial.

Cloth Room tips

The Real World connection

Almost everything in Cloth Room is based on grams and centimeters. Collision Offset and Collision Depth for instance, are cm. Cloth Density: gr/cm2. And so on. So people using different Poser settings (like inches), using scripts for determining and adjusting sizes and distances (which work in Poser Native Units, 1PNU=262 cm), and translating real world measures to Poser parameters, do have to take care of units. Cloth Room does not follow your user unit settings.

When timing is involved, be aware that Cloth Room ignores all frame-per-second settings in the animation palette or movie export, and works against 30 frames per (real world) second.

People who (also) use the Gravity script in the Poser menu should be aware that this script

  • Uses a gravity constant which is 20% off (compared to Earth surface = Cloth Room)
  • Has a minor flaw in the algorithm which make objects move a bit too fast

Collision Offset

Each figure (but not: figure part!) that’s part of the collection of Collision Objects has a Collision Offset and a Collision Depth. The Collision Offset does not affect the sim calculations as such, but does affect the result as it creates a distance between the collision object and the final cloth position. So it represents cloth thickness, in some way. Values are in cm. Low values (e.g. 0.25) are fine for lace and silk, and make the cloth follow the body contours quite closely. Sweaters will do better at 0.5, the default 1.0 is fine for thick cloth over cars and sculptures, 2.0 might be required for thick winter coats.

Poser limits the values to 0.1 … 10.0 cm, and there are practical limits to the low as well as to the high end:

  • When too high, the result looks unnatural, thick, does not follow the body details, visually unattractive
  • When too low, one might experience poke-throughs, especially after rendering (and not showing in preview)
  • When the cloth has to maneuver in between two collision objects, it needs space to do so. Examples: figure sitting on chair, dress with a belt around it. This limits the upper values: the sum of the offset for the body and the offset for the belt have to be quite less than the distance between those.

Collision Depth and Sim options

Collision Depth will not affect the final result but is essential in the calculations. Although Offset and Depth are not related, setting Depth about equal to Offset makes a nice first step. Only that, nothing more. When the Depth value is too low, the sim might become chaotic, collapsing and during the calculations the time-per-frame as reported by the progress meter will go up enormously. Poser 9 / Pro 2012 will issue an error message and stop the calculations, when things grow out of hand.
Each countermeasure will increase calculation time and might improve the change of success. In order (use one, if it’s not enough add the next):

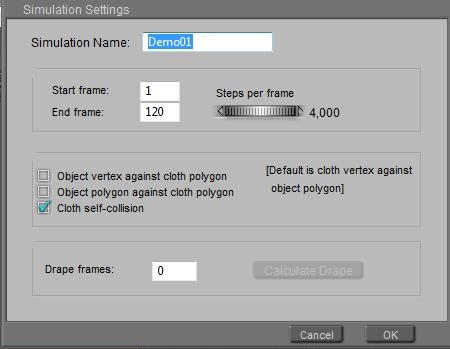
  • In the settings of the sim itself, check the first “object vertex against cloth polygon” option.
  • In the sim settings, check the second “object polygon against cloth polygon” option.
  • Increase Collision Depth. I tend to double it (0.5 => 1.0 => 2.0 …) once or twice before taking the next step. Poser limits the values to 0.0 … 10.0 cm, and there are practical limits to the low as well as to the high end:
    • When too small, the cloth might poke-through in an unrecoverable way (cloth going wild)
    • When too large (above 8), the sim might become unstable as well
    • When the cloth faces multiple collision surfaces at the same side, it has trouble to tell them apart and the vertices end up at random positions. For example: cloth over fingers (which are just 1 cm thick), cloth on thin chair seat, … – the depth for an object should not exceed (half) its thickness.
  • In the sim settings, increase Steps per frame. I tend to double it (2 => 4 => 8 …) until my issues get solved. Poser limits the values to 2…33333 (the manual is wrong at this), the latter implies a simulation in steps of 1-millionth of a second as there are 30 frames per second. However, doubling this number also doubles the time to calculate through one entire animation frame (as reported by the progress meter) and hence also doubles the total time to calculate the sim.

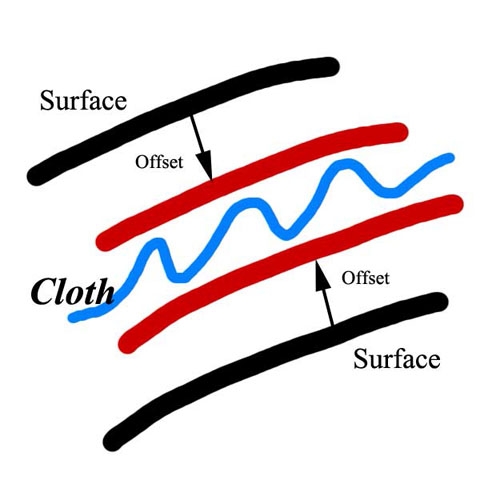
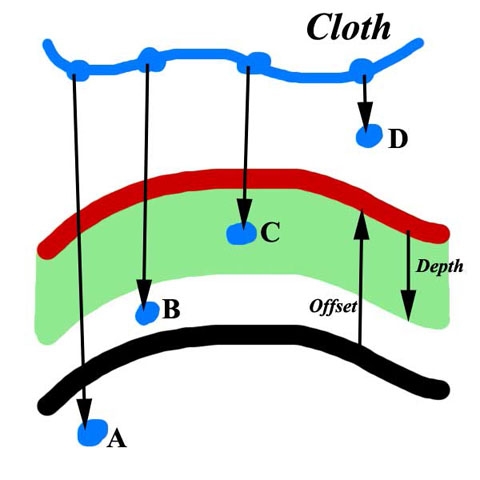
See figure. After one step vertex D has not made it to the surface-after-offset, and will not be taken into account for collision check. Vertex made it, and will taken into consideration. But B and A will not be treated, as the Depth value is too small for that. With a thicker Depth, more vertices will be captured (B, and eventually A). With smaller stepsize, the vertices will travel less, so D and C might get ignored for the right reason but B and A will get caught.

As a rule of thumb, the Collision Depth times the Steps per Frame should be twice as large as the relative speed (in cm per frame) with which the cloth and the collision object(s) move towards each other. For example:

When Vicky changes pose from standing to sitting within 30 frames (1 sec), some body parts, and the surrounding cloth with it, might move as much as 60 cm, so as fast as 60 cm per second = 2 cm per frame towards the couch underneath.
As the default collision depth (1.0 cm) and the default steps (2) just make 1.0 *2 = 2.0 cm per frame, this is not good enough and need to be doubled at least. Doubling depth is the most attractive (requires the least calculation time) but might be limited by various practical considerations, or might – for the same reasons – even be reduced to a value below 1.0cm. Then the Steps have to go up accordingly, to compensate.

In various forum threads (Renderosity), RobynsVeil and KobaltKween have reported a successful use of: Offset = 0.25 and Depth= 0.2, while having the sim options checked. In my view the first value is fine for lingerie and fine clothes (as they use), and indeed when applied to sweaters some poke-through issues were reported around sharp bends (elbow etc). The Depth is indeed of the same magnitude of the Offset, and since the sim options are checked things might work out well as long as the body-moves are not too fierce. Given the poses applied, I would not exceed 1 cm for the Depth anyway so doubling Depth twice is some limit here, maybe even less. Hence in case of the simulation going wild, I would start raising Steps quite soon.

Object thickness
As said, the Collision Depth for an object should not exceed (half) its thickness, otherwise the sim might get confused at which side to land the vertex. The sim also gets very confused when it can see right through the object, e.g. when

Collision Offset + Object Thickness < Collision Depth

Look at this, Offset 1cm, Depth 4cm, Box Scale 600% (=1.50 x 1.50 mtr)

Box thickness 10% = 15cm Box thickness 1% = 1.5 cm (< Depth – Offset)

When the box becomes too thin, the cloth falls through it and ends up at an Offset distance… from the bottom, defying gravity. Great fun. But what happens when the object is single sided and does not have a thickness at all?

Nothing.
Whatever my settings are, from Offset=10/Depth=0.0 to Offset=0.1/Depth=10, the cloth does not fall through. For a single sided surface, there is no other side in the scene and Poser seems to treat that as an object of infinite thickness.

Animation

Hence, I have to check my animations against reality. Can the moves be made in the time I set for them in the animation? Normally Poser does not care but Cloth Room offers a physics simulator which relates closely to the real world. When one cannot make fast moves in a tight thick leather outfit, and one cannot run fast or dance fiercely in a wide long velvet dress, then the cloth simulation does hardly support it either and it will be hard to get the calculations done properly. This is all about balancing the animation with the Cloth Properties in panel 4.

Regarding Collision Depth

The other issue, raised above, was balancing animation speed with Collision Depth. Again: the Depth (in cm) should be quite larger than the distance travelled by a vertex during one step in simulation. So that’s speed (cm/sec) times time (1 / 30*steps). But don’t overdo, I don’t have to elongate the animation just to slow down the moves to get the calculations done. This is exactly what Steps per Frame is for: smaller steps through time, without the need to adjust time itself.

For example, I want my posing girl to make a cartwheel in a long dress. Then her feet will travel a distance of 5 to 6 mtr, depending on her length (pi (3.142) * body length). Usually, making a cartwheel lasts shorter than 1 sec so the cloth at the ankles makes 600cm/sec, about. When I’ll discuss the cloth parameters (Parameters – Sim Side and Parameters – Real World, part III) we’ll see that pushing cloth with such a speed at the default cloth settings through air takes about three times the gravity force, so the cloth feels and behaves as three times as heavy. If the cloth is a bit elastic too, the sim will take it all over the place.
And… if I’d set the Collision Depth to 1 cm, cloth at that speed will pass through that detection layer within 1/600 sec = 1/20th frame, so I’ve got to set my Steps per Frame accordingly (rather over 20, so say 32 might do).
In other words; move gracefully, keep it realistic, and watch the speeds.

Regarding Poke-through

At the start, and during the calculations, the objects should not poke through the cloth. They don’t in real life, and so they’d better not do so in cloth room either. It’s ugly in the final result, and when groups of vertices structurally end up at the wrong side of a collision object this may get worse and worse. Small deviations by single vertices usually can be resolved, which is why we’ve got to tick the “object vertex against cloth polygon” and the “object poly against cloth poly” sim settings.
We also saw that there should be enough room for cloth to maneuver between various objects, or parts thereof.

Sounds simple, but the consequence is that a minimum distance for all collision objects and parts thereof should be observed, for each single frame of the animation. As is the case in real life. So the objects certainly should not poke through each other, and through themselves. This implies that one has to pay real attention when animating a figure from a standard standing pose, towards a sitting pose with arms and legs bends. Upper arms should never come to close to the upper body, under arms should never touch the upper legs and the upper legs should never interacts as well.

For some poses this is not an issue. For most poses, my intervention is required, I cannot do with just a T-stand at the start and the final pose at the end. I have to adjust arm and leg positions in between too. And I need some time, 30 or 60 frames perhaps, to get this animation done properly plus say another 30 or 60 frames to make the cloth settle.
The point is, Cloth Room offers some additional animation by itself as well. Draping, an amount of extra, non-editable frames before the Poser animation starts at frame 1.

The Drape can start in the Frame-1-pose, in which case the figure won’t move but only the cloth drapes, or in T-stand in which case the drape sequence animates from there till the Frame-1 pose. This can be set per figure, in panel 2, (un)check Start Draping from Zero Pose. By the way, it’s available for poseable objects only. Not for props.

But as I cannot affect the animation during the drape sequence, this help only makes sense for animations which do not introduces any risks on self-poke-through of body, arm or leg. Otherwise, draping might turn out to be counterproductive.

Animation Overshoot
Say I want to jump from the ground onto the seat of a chair. So I bend my knees a bit, then I stretch them out, and when landing I bend them a bit to absorb the shock and stretch them a bit to normal again. As a result, my center of mass lowers say 10cm, then raises say 60 cm and then lower 10cm again to make an effective net raise of the 40 cm between the floor and the seat.

Overshoot is good, for making believable animations. Overshoot is not always that fine for cloth sims. It creates additional body movements, which might help the cloth to settle but might be counterproductive as well, or just elongate the required animation towards the final pose. On top of that, the overshoot positions of the various objects, bodies and body parts might raise the risk of collision between them, or even self-poke-through during the movements. Those can be disastrous for a decent sim calculation.

The way out is to linearize the animations involved. Use the animation panel, select the elements that need investigation or adjustment, and click the Linearize button to make straight robotic movement trajectories instead of the smooth natural ones. This works for still images, because who cares about the animation details. For animations the robot-like movements might be undesired, then the overshoot might be better reduced. All in case of issues, there is no need to repair things which are not broken. And again, this kind of fine tuning cannot be done for draping before the animation starts.

Dynamics III – 1 Intro

Get your PhD in Clothing

Dynamic Clothes and Hair are really a different piece of cake than just loading a dress or a hairdo from the Poser Lib, and clicking Conform To… .
Oh, and it’s CLOTH Room, not: Clothes Room.

Download this tutorial in PDF format (2.5 Mb).

This is the in-depth section on Cloth Room details, presenting some real understanding of cloth simulation and cloth parameters, related to the real world as well. Understanding clothes means understanding real world, which sometimes implicates using some basic high school physics (mechanics, geometry) too. Sorry for that.
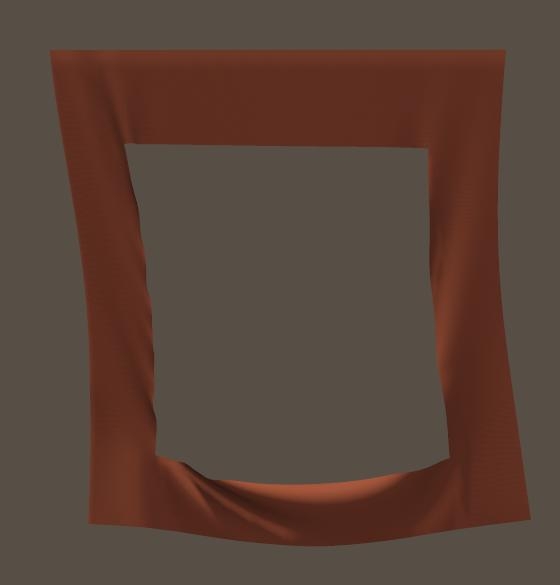
The main complexity of Cloth Room is that Dynamic parameters, mesh characteristics, real world physics and computer simulation peculiarities all interact to mimic cloth behavior to a believable level. The Sim Side kicks off this part of the tutorial by looking at things from a Cloth Room user perspective: which dials, what values, etc. The next Meshes and Sims chapter comes from the other side: what can be expected when meshes of different geometries are used in simulations with various parameter settings, for the cloth as well as for the simulation itself? What are the causes of the artifacts and problems, and what to do about them? In my opinion, high end garment makers as well as artists pursuing high quality results can benefit from raising their awareness to this level.

The last Real World chapter of this part tries to find real world values for the various cloth behavior settings (dynamic parameters), tells how I did it and how you can find some yourself. And all limitations thereof. This is the physics and math heavy one. When you feel uncomfortable with that, just skip it, or scan over it, or pick the tables with results only.

Dynamics III – 2.0 Cloth Parameters – the Sim Side

Most people realize that the Cloth Room parameters for density, friction, resistance, damping and so one are essential in discriminating one type of cloth material from another. But what do they mean? What are proper values? Can we insert textbook values, and which textbooks to use? How do they affect the sim process, and the sim result? Which dials to turn, and how much, to accomplish specific effects? And so on. Let’s find out.

But first, let’s consider our limits in this.

  • Real cloth either comes as non-woven (leather, fleece, rubber…) or woven.
    Non-woven material can have various internal structures. Leather is organic (cells), fleece is long fibers pressed together, rubber is an oil residue (long molecules) and so on.
    Woven materials have various internal structures as well. Thread material (cotton, silk, polymer…), thread thickness, weave structure, weave tightness, and so on are discriminating factors. And one can discuss whether knits are special weave structures, or something separate.
    For a lot of those elements detailed information seems to be available, but unfortunately not for the ones making up our daily clothes. Special purpose clothing, industrial cloth use, high performance cabling, fire resistance, enhancing tires, and more. Even for regular clothing fibers the most interest is whether spindles of them can keep up with the tensions in a high speed sewing machine. Nothing for our practical Poser use.
  • Real cloth, especially the woven kind, comes as a mix. For example: cotton threads vertically, but polymer threads added in horizontally for enhanced stretching in that direction. Or for enhanced non-stretching, or for enhanced longevity (anti-wearing). This enhancing really makes a difference. Or thin threads in one direction, thicker threads in the other direction, while being 100% cotton. Cloth is not that homogeneous.
    So even if we would know the details of the individual components it would be hard to determine the behavior of the final fabric from that.
  • Real cloth behavior is translated to a concept that can be understood and described easily using some basic physics laws, like the “spring net” idea of balls, tension and torsion springs. Unfortunately, even simple fibers do not behave completely according to those basic physics laws, and springs are only a limited representation of them. Better representations however are much harder to describe – especially in layman’s terms and in basic physics math. So we, just Poser users, have a choice between a decent understanding of a bad representation, and a bad understanding of a decent representation. Of course we like the decent understanding, while Poser likes the decent result. So even already before any software supplier has got involved, the gap between user and software has become unbridgeable. It’s not your fault, it’s not their fold, we all just want good results fast in a well understood way without the need of a real PhD in cloth physics.
  • That (spring net) concept is translated again, into a computer simulation. This is a world on its own, with finite elements instead of the infinitesimal small elements in nature. With shortcuts to save time and resources. With artifacts in the solutions because their worlds have boundaries, finite sizes, and the algorithms don’t converge to the last digit.
  • And then, Poser comes with a 3D mesh (OBJ). Should it be taken into account? Should vertex density, polygon size, edge length and direction be given some meaning?

So, the cloth behavior describing parameters can be loaded with real world numbers. But a lot of them will hardly be available for real world every day clothing, from lace lingerie to plated armor outfit, from fur coat to suits, shirts and jeans. And if we use those numbers anyway, the parameters might hamper the simulation itself to get a decent result in due time. And their effects might change on various mesh structures. Hence, real world values are a good point to start. Then we might find a need for adjustments.

In the meantime all this is not about theory. This is us discovering Cloth Room. It’s not Virtual, it’s Reality. For me this implies that when I get weird results, it’s either in the simulation algorithm, or in my interpretation of reality. I do need a proper understanding of real life cloth, to bring Cloth Room to life.

Dynamics III – 2.1 Parameters for Simulation

Some of the parameters only mildly affect the final result, but mainly affect the animation, the cloth movement towards that result. The other parameters have less effect on the animation. This is relevant when I want to make an animation as such, or a still image without long simulation runs. So before I start with looking at the relationship between the parameters and the real world, let’s discuss what they do in the sim itself.

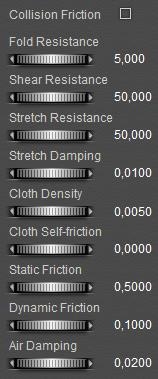
Air Damping affects the flow of the cloth through the Poser atmosphere; it dampens and slows down those motions. A low value enables the cloth to move better at high speeds and thus makes the calculation less crash prone. Recommended for still images. A high value dampens all waving and swaying, gives the cloth a heavier feel (recommended for animation) and shortens the length of the required simulation (speeds up the workflow). For stills I reduce the value as much as possible until I need the damping to shorten the calculation time or when a reduced swaying improves the end result.

Friction affects the movement of cloth over an object. A low value enables the cloth to move faster and smoother (recommended for stills) and gives either the cloth or the object the feel of smoothness (for animation). A high value gives the feel of roughness (for animation) and sort of glues the cloth to the object so it stays put on a curved surface. This way the straps of a dress will stick on the shoulders, a hooded cape will stick on the head. For stills I reduce the values until I need the gluing.
The cloth movement part is affected by Dynamic Friction, the gluing part is mainly affected by Static Friction but the sim needs the Dynamic Friction too so I’ll make them about equal or so. Up till now I’ve found no effect of the Cloth Self-friction on whatever process or result.

Stretch and Shear Resistance affect the elastic behavior of the cloth. The sim needs them to get the cloth in place, high values hamper the draping of the cloth and make that I need longer simulations (more frames) to get a result. They also give a cloth some stiff impression in still and animation. Low values make the cloth jumpy, increase the risk of crashing calculations and the need for long animations to get a stable result. Low values also deform the cloth which might be unnatural in many cases. The jumpiness is reduced by increasing Stretch Damping. Generally I make them as low as I can afford while not having the deformation, and then I increase the Damping to reduce the time to settle.

Fold Resistance definitely affects the result in still images, it’s far less critical in animation because the cloth and its folding change continuously. Low values make many small folds, high values make a few large ones and give the impression of weight and thickness. Actually, when I want to show variation of clothing pieces and suggest material properties (like: silk blouse, leather skirt), then this is the parameter that makes the difference.
As low fold resistance makes the cloth wiggling during the animation. It might call for longer simulations to settle and stabilize, while high values hamper the settling of the cloth and therefor call for longer sim durations as well. So I need some Stretch-Damping equivalent here, which can be found in adjusting… Air Damping.
The last but not the least is Cloth Density. By itself it does not have any effect on the result or process, not on the still image, not on the animation. But like in nature, in Poser too various other effects are proportional to it. In Poser, Air damping, Fold resistance, Stretch damping, Shear and Stretch resistance all behave about proportional to Density. That means, when I double both Air damping and Density, the ratio stays the same, and so does the effect on the sim. In nature, and in Poser cloth sims, on result as well as animation. So by just reducing Density I effectively increase the effects of the other mentioned parameter values while keeping their relative proportions intact. That is why Density after all is the most effectful parameter of all.

For Air damping this “keeping proportions” is the case exactly. For the resistances (Fold, Shear and Stretch) this is about right too. Changing Density however does not alter the effects of Friction, which again is according to nature. So by reducing Density I effectively reduce the effect of the Frictions, proportional to say the Resistances and Dampings. The Frictions and Dampings have the most effect on animation, and hence on the sim calculation process and the length of the animation required to get a stable result for stills. The Resistances have the most effect on the final still image result.

A last word: the behavior of cloth in the process and in the result is sensitive to changes in the values of the parameters, but hardly to small changes. Major steps, order of magnitude changes do the job. So when altering values for a better result or process, I make tenfold steps like 0.1 – 0.01 – 0.001 etc. Or twofold steps, like 0.01 – 0.02 –… – 0.32 – 0.64. These make a noticeable difference. Tweaking the last digits do not.

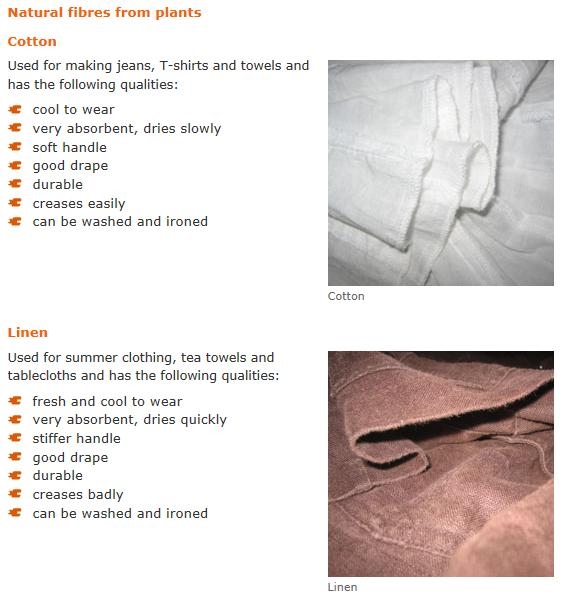
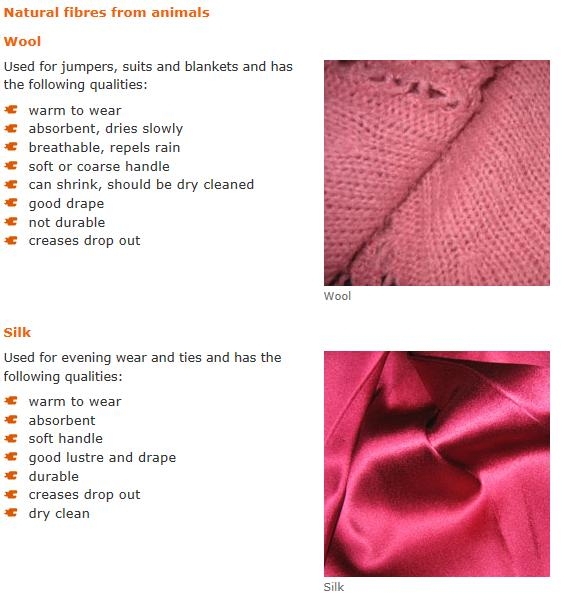
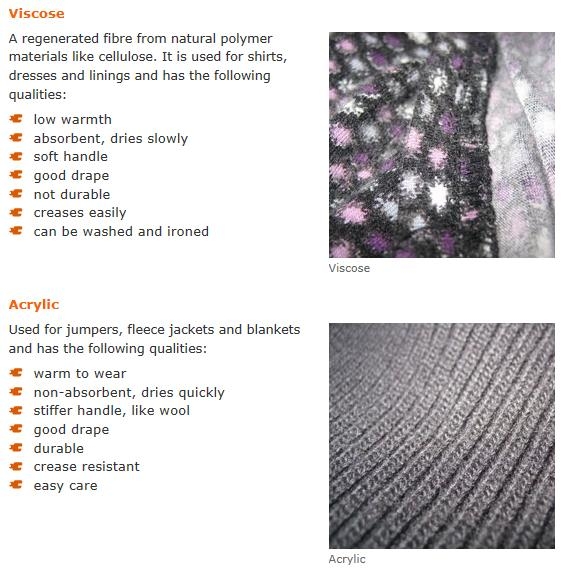
Images from BBC – GCSE Bitesize

Dynamics III – 2.2 In other words

For practical use getting a proper feeling for the effects of the cloth parameters is more important than a deep scientific understanding. Therefore, a similar story as above in different words, and some extra notes.

Fold Resistance handles the forces in the plane / parallel to the cloth that push the fibers out of the cloth-plane. Forces perpendicular to the cloth don’t make folds, but bends. Effectively, increasing Fold Resistance makes the cloth thicker and more elastic. I just make order-of-magnitude steps through the range (0.5 – 5 – 50 – 500) to see meaningful effects.

Shear or/and Stretch Resistance handle the pulling forces in the plane / parallel to the cloth. Increasing them make the cloth thicker and less elastic. Stretch works in the horizontal / vertical directions as if I’m pulling the fibers in the weave, Shear works in a diagonal way, all referring to the weave of course. Again, I make order-of-magnitude steps to experience the effects.

Elasticity does not mean stretch but means: bouncing and wobbling during the simulation. I need some to position the clothes better, but if it’s too much the result needs a lot of frames to stabilize. Stretch damping reduces elasticity, but at serious values (0.1 and up) only. I can change it to correct for the elasticity-effects of changing Fold/Shear/Stretch resistance.

Increasing mesh density (vertices per cm2) makes thinner cloth with higher elasticity. So when I mark the edges or shirts and dresses with high-vertex-density areas, the cloth will behave exactly the other way around as I intended.

Cloth density, measured as grams per cm2 (whatever you Poser unit settings are!) does affect Fold/Shear/Stretch behavior. In the result, doubling density doubles the stretching (relative elongation), as does halving the Stretch Resistance.
Cloth density however does have serious impact on the elastic behavior of the cloth during the calculations, as if I’m attaching extra weights to a rubber band. Assign density 0,5 (100-fold the default) to a cloth with all defaults on the other parameters, preferably to a diagonal tris’ mesh structure (which is quite unstable by itself), and you’ll have a chord bungee-jumping all on its own weight only, not even close to coming to a rest at frame 10,000. Absolute fun for some animations, but a nightmare for decent clothing purposes.

I still have not found any effects of the cloth-self-friction parameter. Static friction not only affects the cloth at stand-still but at low speeds also and does not follow physics textbooks to the letter. The default 0.5 seems not too bad for cloth on skin, but smooth materials require very low settings (silk on a hard-plastic mannequin might do 0.01).

Dynamic friction is different from the physics textbooks but after all unit-conversions, the textbook values do well for parameter settings. The default silk on a polished table goes well with the default 0.1 but cloth on skin does about 0.7.
Friction is not affected by density, but friction tests require that the cloth is kept from deforming which demands higher values for fold/shear/stretch-resistance and stretch damping. Which are affected by cloth density. But that’s for tests.

Air damping is measured in grams per cm2 per second. Increasing it reduces the freedom to move wildly and fast through the scene. Very high values, like 0.1 and up, will make underwater effects. At the same time, when my cloth is waving and swinging around, air-damping is the only force that stops it from doing so. Hence, when I reduce this parameter too much, the result has a very hard time coming at rest which introduces the need for longer animations in the sim.

Cloth density has a direct inverse effect on this air damping: twice the density implies half the damping effect, as long as the movements are gravity driven. If the cloth moves are driven by the figure’s moves, density will have no effect. The figure has to work twice as hard to push the cloth forward, but that will happen unnoticed.

Higher air-damping will show more sensitivity to Wind Force. Wind Force amplitude 1 means that a cloth at default parameters will hang at 45 degrees, so the side force equals the down force from gravity. We’ll have more on that later.

Gravity in cloth room follows the laws of physics. The constant reads 9.8 * 100 / (30*30) = 1,089 cm/frame2 as from converting the Earth constant from m/s2 to cm and frames at 30 fps.
The gravity script in the Poser Script menu however is based on a different value and does not take additional effects like air damping into account. Therefore it should not be used in conjunction with cloth room results. I have not tested Poser Physics yet on this.

Dynamics III – 2.3 Values on the Net

While chapter Real World will discuss the parameter values that represent various clothing materials in life, I can imagine that you’d like an overview to get a head start.

The origin of most values was in www.poserfashion.net (before it got hacked, you can find the Original in Internet’s WayBackMachine), a website on 3D clothing that started even before Poser introduced the Cloth Room (see chapter Cloth sim in perspective on history, part IV). PhilC and SvdL extended the list, while also presenting a mechanism to create preset collections. Either through assigning mat’s (PhilC, free on his site www.philc.net) of though a scripted user interface (SvdL http://www.renderosity.com/mod/freestuff/details.php?item_id=38542).

In all cases marked (*), SvdL deviated from the poserfashion values, and added cloth types and a parameter. In all cases marked (**) PhilC deviated from SvdL. In all unmarked cases, they agreed. The Poser Default is added for reference.

.. Default Burlap Cotton Leather Rubber Silk Wool Denim* Gossamer* Heavy leather* Latex* Velvet
Fold res 5 150 15 50 20
40*,20**
2,5 40 15 / 20** 1 800
800/5**
600/50 215
Shear res 50 500 225 200 35 50 150 240 1 800 200 100
Stretch res 50 250 75 200 10 50 100 75 1 800
800/50**
1
1000**/1
50
Stretch damp 0.1 0.1 0.1
0.0*,0.1**
0.1
0.01*
0.1 0.1 0.1 0.1 0.1
0.01**
0.01 0.8 0.1
Cloth dens 0.005 0.01
0.009*
0.01
0.005*
0.05
0.005*
0.075
0.02*
0.005 0.01
0.005*
0.005 0.02 0.02 0.4 0.03
Cloth self fric 0 0.4 0 0.4 0.7 0.2 1.0 0.0 0.2 0.75 0.4 0.02
Static fric 0.5 0.6 0.5 0.5 0.6 0.3 0.8 0.5 0.3 0.5 0.5 0.6
Dyn fric 0.1 0.4
0.1*
0.1 0.3 0.3 0.1 0.6 0.1 0.1 0.3 0.3 0.2
Air damping 0.02 0.01 0.02 0.01
0.02*,0.01**
0.005 0.04 0.02 0.02 0.75 0.02 0.75 0.02
Scale*   100 50 50 50 100 100 50 100 100 100 50

Note that the Scale parameter is not supported by the Cloth Room dials, and that PhilC/SvdL sometimes discriminate between values in U and V direction (like Latex Fold Res = 600/50), which is not supported by the Cloth Room dials either.

On top of that, I’d like to note that some parameters are very hard to obtain for real life clothing (how do you measure the amount of folding and the fold resistance?) and that some parameters or combinations seem quite unrealistic to me (how can Gossamer and Heavy Leather have the same density while Gossamer has a 40-fold air damping?). Why does Gossamer has a Stretch Damping of 0.1 according to SvdL and 0.01 according to PhilC while they agree on all other parameters? Why are the Posernet values taken for granted while they were published before Cloth Room came to life? Why do all the density values deviate so much from my simple measurements (chapter Real World)?

Dynamics III – 2.4 Cloth Parameters – do it myself

Let me try to establish some reasonable Cloth Parameters myself. In doing so, I use the details presented in Sim Calcs in the Mesh, especially on the effects of thicker threads and more tightness in the weaves.

Cloth is not rock or metal, it has an organic background: silk, wool, cotton, skin (leather) or oil derivative (rubber). All those materials have a specific weight of about 1000 kg/m3 when crushed together, about the same as water. Perhaps some thick leathers or rubbers weight more, but we’re not making clothes from those materials.
As a result, a Cloth Density of 1 (gram/cm2) matches a piece of cloth of 1 cm thick, so this parameter can be interpreted as cloth thickness as well, in cm, when grasped firmly (note that wool and fleece include some air, squeeze that out first). A basic shirt has a thickness of 0.5mm = 0.05cm. A 3mm leather belt can be assigned 0.3. And so on.
The Density only has to be corrected for weave tightness, like in silk (quite tight) and in laces and loose weaves (holes in the wall). So a lace shawl from thicker cotton could do 0.1 (1mm for the cotton) * 20% (for the structure that makes 80% void) = 0.02.

Tight structures will not let the air flow through, so the tightness comes in again while Air Damping is proportional to Cloth Density too. Let’s set a normal structure’s tightness to 100% (shirt, jeans), so that’s 0.05 for the shirt with a thickness of 0.05cm. And we’ve seen 20% for lace, then I can assume 125% for flags (they’re made to catch wind), 150% for leather/rubber and 200% for fine silk. The higher the value, the more it will float on air.

From the behavior of Wind Force in Poser (see Real World), I can infer that Amplitude values below 100% can be applied linearly, and values over 100% should be applied squared. So for my cotton lace shawl, air damping should be 0.02 (density) * 20% = 0.004. For fine silk, thickness can be as low as 0.0025 cm * 200% tightness => 0.005 density, and 0.005 * (200%)2 => 0.020 air damping. Note that the silk values are the Poser default ones.

The Frictions are independent of cloth density, and Self-friction can be ignored (or just dreamed up, if that feels better). A reasonable value for a basic shirt rubbing over skin seems to be 0.7 for Dynamic and a bit more, say 0.8 for Static Friction. So the question shall be: are the clothes so tight around the body that they are rubbing indeed, or is there enough space to make the clothes hover over some air layer? When that’s the case, the friction values can be reduced to say 0.2 for Dynamic and 0.3 for Static. Note that the higher the friction, the less response we’ll get from the gravity pulling the cloth down, and draping it in place.

By just using a ruler, I found out that I needed to pull very hard to stretch a part of my shirt from neutral to extreme, which produced a 2-4% elongation. Poser tests showed a 1% elongation for a piece of cloth hanging under its own weight, for the default settings. Is my 70cm shirt really stretching 0.7 cm when I hang it out? Normal cloth is not that stretchy. Cotton fibers can be stretched up till 7% until they snap, which does not sound stretchy to me either.

After tenfolding the density from the default 0.005 to the 0.05 of the shirt, I should tenfold the Resistances as well to get similar results. But that would drive the Stretch and Shear Resistances to 500 which I’ve just found too low, and 1000 is the max value for those settings. They will certainly lock up the simulation. Tenfolding the Fold Resistance would make it 50, but I know that light silk is the default material, and silk is a very smooth folder compared to basic shirt fabric. So I make Fold Resistance 200.

Now I’ve got my values for my shirt, but I’ve also got the feeling that these values are too high to make the sim run properly. Luckily, I’ve found that parameters are proportional to density while keeping the behavior, so I’m free to reduce all parameters a tenfold, except the Frictions. I decide not to adjust for the mesh structure. So:

My Shirt

My Sweater

My Straitjacket

Transparency

Original

Adjusted

Original

Adjusted

Original

Adjusted

Original

Adjusted

Fold Res

200

20

20

20

500

25

0

1

Shear Res

1000

100

100

100

5000

250

0

5

Stretch Res

1000

100

100

100

5000

250

0

5

Stretch Damp

0.1

0.01

0.02

0.02

0.5

0.025

1

0.1

Cloth Density

0.05

0.005

0.06

0.06

0.15

0.0075

1

0.05

Self friction

0

0

0

0

0

0

0

0

Static friction

0.3

0.3

0.5

0.5

0.4

0.4

0

0

Dynamic fr

0.2

0.2

0.3

0.3

0.2

0.2

0

0

Air Damping

0.05

0.005

0.005

0.005

0.5

0.025

0

0.002


My (thick home knit) Sweater folds, shears and stretches extremely well, and when I let loose after some stretching, it wobbles a bit before it comes to a rest. So all these values are low, compared to My Shirt. Knits of course have a low Air Damping; wind can blow quite through it. The hairy wool threads make somewhat larger Friction values. Since the values are not extreme, I don’t see a real need for adjustment.

My Straitjacket (J) is made of thick (1.5mm), stiff cotton: no shear, no stretch and hard folding. Thanks to the very tight weave I doubt it will have large Friction, but air will hardly flow through which raises the Air Damping. The extreme Resistance values require an adjustment to make the sim run, so I altered the values a twenty-fold.

Transparent clothes

When cloth is absent and leaves a hole in the mesh, the cloth simulator can handle that. It just sees a new edge in the midst of the clothing, and seals with that accordingly. But in various cases, the whole mesh is presented to the cloth sim and leaving out parts is dealt with by using 100% transparency in the materials. Shortening dresses and pants, opening sides or back portions, it all can be handled that way.

For the cloth sim, this is not the biggest issue as I can select an area by material, assign it so its own dynamic group, and give it its own set of behavioral parameters. But… which ones?
Simply stated, as there is supposed to be no cloth, it should not resist anything. So I’ll tend to zero out Fold, Shear and Stretch Resistance, the Frictions and Air Damping. I’m reluctant to zero out Cloth Density as well. In the first place, it would not eliminate gravity. Second, it would generate incredible accelerations due to other forces, thanks to F = m*a (force = mass times acceleration). So actually I turn things the other way around and eliminate the effects of other forces by assigning density its highest value: 1. Stretch Damping I’m not sure of, the higher the value the faster it gets the energy out of the cloth, once it got in. Which is fine for the transparent area, but not for the edges of the non-transparent parts.
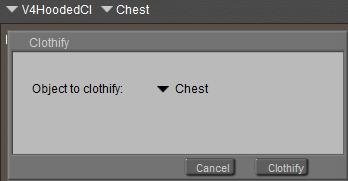
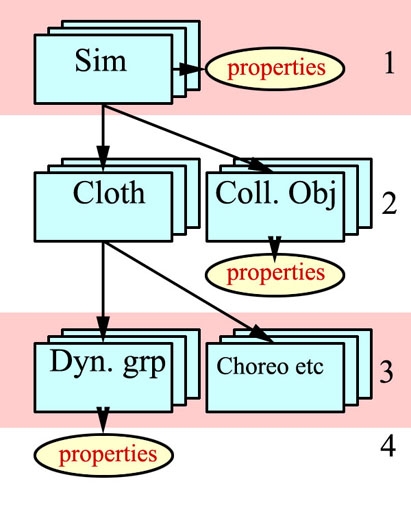
Sounds good, eh? But it won’t work out. The pitfall is in the remark “it would not eliminate gravity“. And this gravity will continue to pull the cloth vertices down, since cloth room does not take the surface texturing into account. It pulls the transparent vertices as it pulls the other ones.

Therefore I should raise Cloth Density and Stretch Damping considerably, and lower the Resistances a lot, but not to their extremes. I should just make a serious difference, tenfold or so, to the surrounding cloth. And I’d better assign Air Damping some value to dampen the swaying of the cloth, just to shorten the length of the simulation. Again, it should be lower than the surrounding cloth for a good effect, but I should not go to the extremes.

See the table. From the default values, I tenfolded (up) the Stretch damping and Density, and tenfolded (down) the Resistances and Air damping. This means that the all-important ratios between Density and things changed a hundredfold. Frictions could be zeroed out, no sweat.

On making the hole
In Pose Room I used the Group Editor to create a group in the object, and assign it a material “HoleMat”. In materials Room I assigned 100% transparency to HoleMat, and zeroed out the other channels. In Cloth Room, I created a new Dynamic group (panel 3. Cloth Groups), and assigned it the HoleMat in the definition (via [Edit Dynamic Group]).