Like a real-life camera, the Poser camera presents us: Focal or Lens Blur (sharpness limits), Motion Blur (speed limits), Field of View (size limits) and even more limits.
Focal Blur
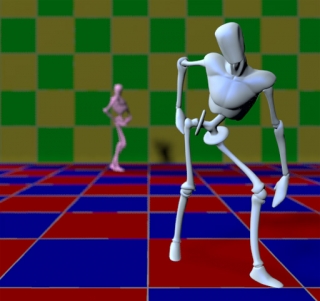
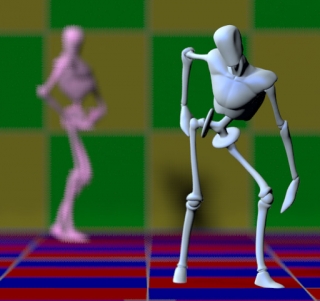
Focal Bur, or Depth of Field, is in reality the result of focal length, diaphragm (fStop) setting and shutter speed, while also fStop, shutter speed and film speed (ISO) are closely related. In Poser however, there is no such thing as film speed, and the Depth of Field is determined by the fStop setting only. Whatever the shutter speed, whatever the focal length, they won’t affect the focal blur.
| 20 mm, fStop 1.4: | 120mm, fStop=1.4: |
In a real camera, the change in focal length would have brought Pink Andy and the back wall in a sharp state as well. In Poser, the blur remains the same. And because the back end of the scene is brought forward when enlarging the focal length, the blur even looks like it’s increasing instead of the other way around.
Motion Blur
Shutter Open/Close both have values 0 .. 1, Close must be later that Open. The shutter time is measured in frame-time, so if my animation runs at 25 fps the frames start at 0.00; 0.04; 0.08; then Open=0.25 means the shutter opens at 0.01; 0.05; 0.09 or: 0.25 * 1/25 = 0.01 sec after frame start. Similarly, Close=0.75 means that the shutter closes at 0.03; 0.07; 0.11 or 0.75 * 1/25 = 0.03 sec after frame start and therefor 0.02 or 1/50 sec after Open. Contraring to real-life cameras, shutter time does not affect image quality like depth of field, it only affects motion blur or: 3D / spatial blur, in animation but in stills too.
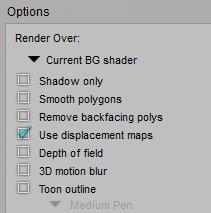
So, a shutter speed of 1/1000 sec translates to a 0.030 value in a 30 fps animation as 0.030 / 30 = 0.001. For stills without motion blur, I just leave the defaults (0 and 0,5) alone. For anything with motion blur, I should not forget to switch on 3D Motion Blur in the Render Settings.
More parameters
The other two parameters: hither and yon, have no physical reference. They mark the clipping planes in OpenGL preview only. Everything less than the hither distance will be hidden, and everything beyond the yon distance will not show either. That is: in preview and in preview render, when OpenGL is selected as the delivery mechanism. Not when using Shreed (the software way of getting previews), not when rendering in sketch mode, not when using Firefly.
| Hither = 1, Yon = 100 | Hither = 10, Yon =20, near and far ends don’t show in preview. They do show in Firefly render. |
This can have a surprising effect. When the camera is inside an object, but less than the hither distance away from the edge, you won’t notice it in the preview because the objects mesh is clipped out. But when you render, the camera is surrounded by the object and will catch no light. This gives the “my renders are black / white / … while I have the right image in preview” kind of complaints.
It sounds stupid: how can one land the camera inside an object? Well, my bets are that it will happen to you when you’re into animation. Smoothing the camera track will give you some blacked-out frames. Previewing the camera track through the Aux camera, and/or adding a ball object on top of the camera entry point (watch shadows!!) can help you to keep the view clear. Just setting the camera to Visible in the preview might not be enough.
Having said that, let’s have a look at the various camera properties.
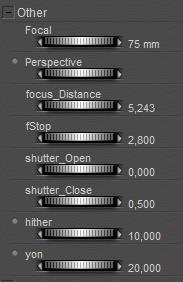
- * Focal (length) refers to zooming
- * Focal Distance and fStop refer to focal blur, and requires Depth of Field to be switched ON in the render settings.
- * Shutter Open/Close refer to motion blur, which requires 3D Motion Blur to be switched ON in the render settings.
- * Hither and Yon set limits in the openGL preview.
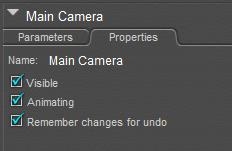
- * Visible implies that I can see (and grab and move) the camera, when looking through another one. By default it’s ON.
- * Animating implies that changes in position, focal length etc. are key framed. Great when following an object during animation, but annoying when I’m just trying to find a better camera position during an animation sequence. I tend to switch it OFF.
- * And I can disable UNDO per camera. Well, fine.
Field of View
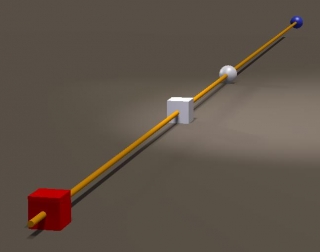
In order to determine the Field of View for a camera, I build a simple scene. Camera looking forward, and a row of colored pilons 1 mtr at the right of it, starting (red pylon) at 1 mtr forward. So this first pylon defined a FoV of 90°. The next pylon (green) was set another 1 mtr forward, and so on. Then I adjusted the focal length of the camera until that specific pylon was just at the edge of the image.
| Pylon | Color | Focal(mm) | FoV (°) | Pylon | Color | Focal(mm) | FoV (°) | |
| 1 | Red | 11 | 90,0 | 9 | Blue | 115 | 12,6 | |
| 2 | Green | 24 | 53,1 | 10 | Red | 127 | 11,3 | |
| 3 | Blue | 36 | 36,8 | 11 | Green | 140 | 10,3 | |
| 4 | Red | 49 | 28,0 | 12 | Blue | 155 | 9,4 | |
| 5 | Green | 62 | 22,5 | 13 | Red | 166 | 8,7 | |
| 6 | Blue | 75 | 18,8 | 14 | Green | 178 | 8,1 | |
| 7 | Red | 87 | 16,2 | 15 | Blue | 192 | 7,6 | |
| 8 | Green | 101 | 14,2 |
For simple and fast estimates, note that (pylon nr) * 12,5 = Focal(mm), like 6 * 12.5 = 75, where (pylon nr) is (meters forward) at one meter aside. As an estimate. I can use this for further calculations, e.g. on the size of a suitable background image.
Example 1
I use a 35mm lens, which gives me a 36-40° FoV, and my resulting render measures 2000 pixels wide. Then a complete 360° panorama as a background would require 2000 * 360/36 = 20.000 pixels at least, and preferably 40.000 (2px texture on 1 px result). With a 24mm lens the preferred panorama would require 2* 2000 * 360/53.1 = 27,120 pixels.
Example 2
In a 2000 pixel wide render, I want to fill the entire background with a billboard-like object. For quality reasons, it should have a texture of 3000 (at least) to 4000 (preferably) pixels. When using a 35mm lens, every 3 mtr forward sets the edge of the billboard 1 mtr left, and the other edge 1 mtr right. Or: for every 3 mtr distance from the camera, the board should be 2 meters wide. At 60 mtrs distance, the board should be 40 mtrs wide, left to right, and covered with the 4000 pixel image.
Non-Automatic
Modern real life cameras do have various modes of Automatic. Given two out of
- sensitivity (ISO, film speed),
- diaphragm (fStop) and
- shutter speed (open time)
the camera adjusts the third one to the actual lighting conditions, to ensure a proper photo exposure.
Some 3D render programs do something similar, like the Automatic Exposure function in Vue.
Poser however, does not offer such a thing and requires exposure adjustment in post. For instance by using a Levels (Histogram) adjustment in Photoshop, ensuring a compete use of the full dynamic range for the image. Poser – the Pro versions – on the other hand, support high end (HDR/EXR) image formats which can survive adjustments like that without loss of information and detail.
The Poser camera is aware of shutter speed, but it’s used for determining motion blur only and does not affect image exposure. The camera is also aware of diaphragm opening, but it’s used for determining focal blur only and again, it does not affect image exposure. The camera is not aware of anything like film sensitivity, or ISO. It’s not ware of specific film characteristics either (render engines like LuxRender and Octane are). With this respect, the Poser camera is limited as a virtual one.
