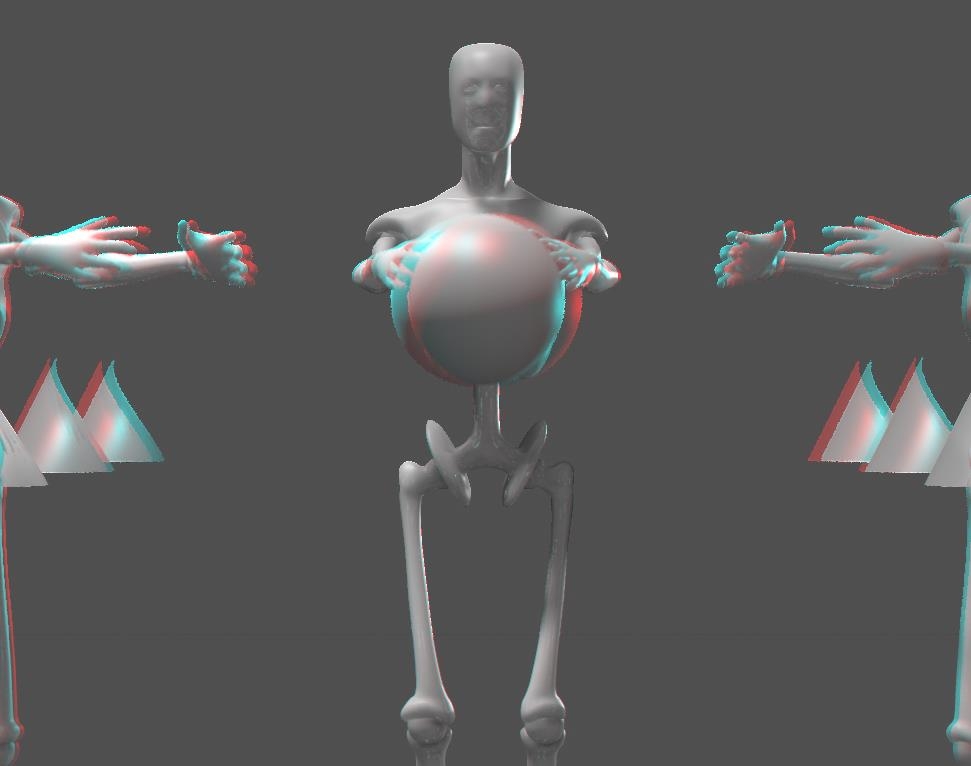
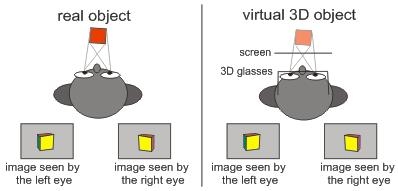
Once I manage to get images out of my 3D software like Poser or Vue, I might ask myself: “can I make 3D stereo images or animations as well, like they show on 3D TV or in cinema?” Yes I can, and I’ll show you the two main steps in that process.
Step #1 is: obtain proper left-eye and right-eye versions of the image or animation
Step #2 is: combine those into one final result, to be displayed and viewed by the appropriate hardware
Combining Left- en Right Images
In order to make more sense out of step 1, I’ll discuss step 2 first: how to combine the left- and right eye images.
Anaglyph Maker
For still images, this can be done in a special program like the Anaglyph Maker, available as a freebee on the internet http://www.stereoeye.jp/index_e.html. It’s a Windows program. I unpack the zip and launch the program, there is nothing to install. Then I load the left and right images
And I select the kind of 3D image I want to make, matching my viewing hardware. The Red-Cyan glasses are most common, as Red and Cyan are opposite colors in the RGB computer color scheme. Red-Green however presents complementary colors for the human eye but causes some confusion as Magenta-Green are RGB opposites again. Red-Blue definitely is some legacy concept.
When I consider showing the result on a interleave-display with shutter-glasses, or a Polarization based projection scheme, Anaglyph Maker can produce images for those setups as well. Those schemes do require special displays but do not distort the colors in the image, while for instance the Red-Cyan glasses will present issues reproducing the Reds and Cyans of the image itself. This is why images in some cases are turned into B/W first, giving me the choice between either 2D color or 3D depth. Anaglyph Maker offers this as the first option: Gray.
I can increase Brightness and Contrast to compensate for the filtering of the imaging process and the viewing hardware, and after that I click [Make 3D Image].
Then I shift the left and right images relative to each other until the focal areas of both images coincide. The best way to do that is while wearing the Red-Cyan glasses, as I’ll get the best result immediately.
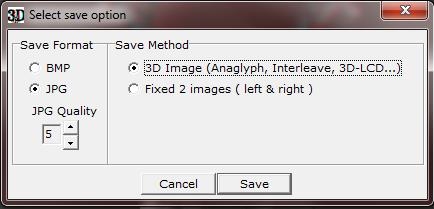
Now I can [Save 3D Image] which gives me the option of saving the Red-Cyan result
Or the (uncolored) left and right images, which are shifted into the correct relative positions.
Photoshop or GIMP or …
Instead of using special software, I can use my imaging software instead. For single stills this might be tedious but for handling video or animations it’s a must, as there is no Anaglyph Maker for handling all movie frames in one go, while Premiere or so are quite able to do that. And then I’ve got my own 3D stereo movie.
- 1. Open the Right-eye photo (or film)
- 2. Add a new layer on top of it, fill it with Red (255,0,0) and assign it the Screen blending mode
- 3. Open the Left photo (or film) on top of the previous one
- 4. Add a new layer, fill it with Cyan (0,255,255) and assign it the Screen blending mode
- 5. Merge both top layers (the Left + Cyan one) into one layer and assign this result the Multiply blending mode. Delete the original Left+Cyan layers, or at least make them invisible
- 6. Shift this Left/Cyan layer until the focal areas or the Right/Red and this Left/Cyan combi align
- 7. Crop the final result to lose separate Red/Cyan edges, and save the result as a single image.
Please do note that I found that images with transparency, like PNG’s, present quality issues while non-transparent ones (JPG’s, BMP’s) do not. Anaglyph Maker supports BMP and JPG only. I can swap Left and Right in the steps above, as long as the Right image is combined with a Red layer (both start with ‘R’, to easy remembering), as all Red-Cyan glasses have the Cyan part at the right to filter the correct way.
Obtaining Left-eye and Right-eye images
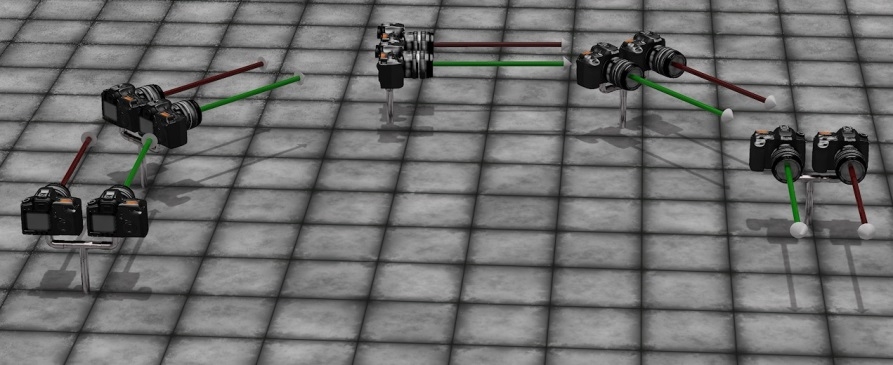
Although in real life dedicated stereo cameras can be obtained from the market, this is not the case for 3D software like Poser or Vue, so I’ve got to construct one myself. Actually I do need two identical cameras, a left-eye and a right-eye one, at some distance apart, fixed in a way they act like one.
(Image by Bagginsbill)
The best thing to do then is to use a third User Cam, being the parent of both, and use that as the main view finder and if possible, as the driver of the settings of both child cameras.
Such a rig guarantees that camera movements (focal length adjustments, and so on) are done in sync and are done the proper way. Like rotations, which should not take place around each individual camera pivot but around a pivot point common for both eye-cameras. In the meantime, the User Cam can be used for evaluating scene lighting, composition, framing the image and so one before anything stereo is attempted.
Les Bentley once published a Stereo Camera rig on Renderosity. You can download it from here as well, for your convenience. Please read it’s enclosed Readme before use.
Now I’ve grasped the basic principle, the question is: what are the proper settings for the mentioned camera rig? Is there a best distance between the cameras, and does it relate to focal length and depth of field values? The magic bullet to these questions is in Berkovich Formula:
SB = (1/f – 1/a) * L*N/(L-N) * ofd
This formula works for everything between long shot and macro take, is great for professional stereoscopists working in the movie industries, and helps them to sort out the best schemes for anything from IMAX cinema to 3D TV at home, or 3D gameplay on PC. It relates the distance between both cameras, aka the “Stereo Base” SB with various scene and camera settings:
- * f – focal length of the camera lens (as in: 35mm)
- * a – focal distance, between the camera and the “point of sharpness” in the scene (as in: 5 meters = 5000mm).
- * L, N – refer to the nearest and farthest relevant objects in the scene, as in: 11 resp 2 meters. On the other hand, both can be derived from Depth of Field calculations, given focal distance and f-stop diaphragm value.
- * ofd – on film deviation, as in: 1.2mm for 36mm film. What does it mean? When I superimpose the left- and right-eye shots on top of each other, and make the far objects overlap, then this ofd is the difference between those shots for the near objects. Or when I superimpose the shots on the sharp spot (as I’m expected to do in the final result), then this ofd is the deviations for the near- and far objects added together. This concept needs some translation to practical use in 3D rendered images though. I’ll discuss that later.
So for the presented values: SB = (1/35 – 1/5000) * 11*2/(11-2) * 1,2 = 0,083 meters = 8,3cm which coincides reasonably with the distance between the human eyes.
For everyday use in Poser or Vue, things can be simplified:
- * the focal distance a will be much larger than the focal length f as we’re not doing macro shots, so 1/a can be ignored in the formula as it will come close to 0
- * the farthest object is quite far away from the camera, so L/(L-N) can be ignored as it will come close to 1
- * the ofd of 1.2mm for 36mm film actually means: when the ofd exceeds 1/30th of the image width we – human viewers – get disconnected from the stereo feeling, as the associated StereoBase differs too much from the distance between our own eyes.
- * It’s more practical to use the focal distance instead of the distance to the nearest object, as focal distance is set explicitly for the camera when focusing.
As a result, to make the left and right eye images overlap at the focal point, one image has to be shifted with respect to the other, for
(Image shift) = (Image width) * (SB * f) / (A * 25)
With image shift and image width in pixels, StereoBase SB and focal distance A in similar units (both meters, or both feet), and focal length f in mm. For instance: with SB=10 cm = 0.1m, f=35mm and A=5 mtr a 1000 pixel wide image has to be shifted 1000 * 0.1 * 35 / (5 * 25) = 28 pixels.
For a still image, I do not need formulas or calculations as I can see the left and right images match while nudging one image aside gradually in Photoshop. But in animations, I would not like to set each frame separately. I would like to shift all frames of the left (or right) eye film for the same amount of pixels, even when focal length and focal distance are animated too. This can be accomplished by keeping SB * f / A for constant, by animating the StereoBase as well.


