The Poser Firefly renderer presents us a shipload of additional settings, in order to sacrifice the resulting quality (a little bit) at the gain of better resource utilization (a lot). Do keep in mind that the renderer – based on the Reyes algorithm, from the last decade of the previous century – had to perform well on single threaded PC’s, running at a 100MHZ clock and memory banks in the sub-Gb range. Current machines run at tenfolds of those numbers, in all areas.
Image sub-resolution
Anti-Aliasing
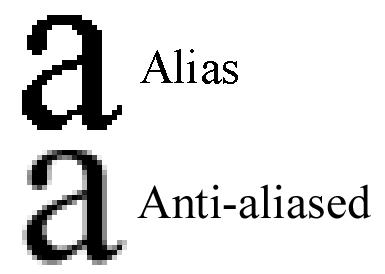
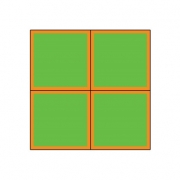
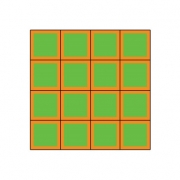
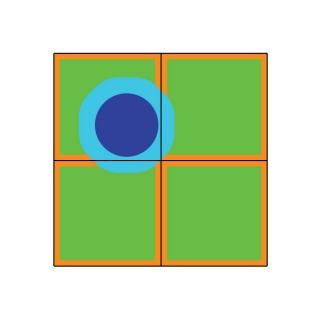
Anti-aliasing (or AA for short) is a well-known technique to avoid jagged edges made by the individual pixels along a skewed line in the resulting image. AA introduces additional sub-pixels to be calculated around the main one, and then the color of the main pixel is derived from itself and its neighbors.
The Pixel Samples setting determines the amount of neighbors for each pixel, higher settings make better quality:
- 1, only the main pixel is taken into account, no Anti Aliasing takes place
- 2, the four neighboring pixels are taken into account, it requires 2 times as much pixel renders
- 3, eight neighboring pixels and the main pixel itself are taken into account, it requires 4 times as much renders This choice delivers “pretty good” results for any kind of electronic publishing (TV, Web, …)
- 4, sixteen neighboring subpixels are taken into account, requiring 8 times as much pixel renders
- 5, twenty-four neighboring pixels plus the main pixel itself are taken into account, requiring 16 times as much pixel renders. This one is blowing up your render time, and delivers “extremely good” result of any kind for high end printing. Especially in this area one has a choice between
- a high pixel count (high dpi number, say 250) with modest AA (say 3) and
- texture filtering (say Quality) settings, and a modest pixel count (say 125) with high settings for AA (say 5) and texture filtering (say Crisp).
The first can be expected to render longer with lower memory requirements: more render-buckets with less sub-pixels per bucket. Actually, I never use 5 for high end printing results: I prefer to render at a larger image size. So, the default value 3 is considered one that hardly needs adjustment: it does do AA, it takes the main pixel itself into account and is fit for all electronic and most print publication. Use 1 for draft renders, switching off AA in the results.
Micro polys
The basic routine of Firefly is to break a mesh down to micro-polys, which then are assigned a texture fragment, and are rendered accordingly. The Min Shading Rate denotes the minimum amount of pixels in the final render result that are covered by a single micro-poly. In other words, this setting sets a minimum size for the micro-polys and stops Poser from subdividing any further. Lower settings make better quality, and blow up memory use while rendering.
So, the value 0.1 implies that each micro-poly is (at least) 1/10th of a pixel in size. At most, so this 0.1 relates quite well to the default “3 Pixel Samples” setting for AA. It does not make much sense – very specific scenes excluded – to keep the 3 pixels for AA while reducing the Min Shading Rate to 0.01 allowing at most 100 microploys per pixel in the final render. The extra information is not going to be used while taking up a lot of memory for the micropolys. Inversely, it does not make much sense to keep the 3 pixels for AA while increasing the Min Shading Rate to 1 allowing for at most 1 micropoly per pixel. Where is the extra information for the Anti-Aliasing coming from then?
Reasonable combinations seem to be:
- Pixels = 1, Min Shading Rate = 1.00 to 0.50 – good for drafts
- Pixels = 3, Min Shading Rate = 0.10 to 0.05 – the default
- Pixels = 5, Min Shading Rate = 0.02 to 0.01 – the extreme
Note that the Shading Rate relates the size of micro-polys to the size of pixels in the render result. This implies that when we set larger render dimensions, each original poly and object in the scene will get broken down to a finer granularity automatically.
Texturing considerations
Say, I’m rendering out to a 1000×1000 image result. In the middle, I’ve got a head, or a ball or any other object, which takes say 500 pixels in the render. To surround that object with a texture, that texture needs to be 1000 pixels in size to match the output resolution. Half of the pixels will show in the image, half of them will be hidden facing backwards. From information theory (Nyquist etc, sampling statistics) it is known that one should have a texture quality for input which is at least two times the quality of the output. Hence, the head needs a texture map of 2000 pixels in size, at least. And anything over 4000 might be overkill.
If the head takes a smaller portion of the resulting render I might not need such a large texture map, but when I consider to take a close up facial portrait, I might need more. Because when the resulting render of 1000 pixels shows only half the head (or more precise: 25% of the head as it shows half of the visible part facing the camera), then I’ll need 2 (Nyquist) x 4 (the 25%) x 1000 = 8000 pixels for a good texture map, which runs into the Poser limit of 8192 for texture sizes.
Also, when I consider larger render results, I might need larger texture maps as well. How does all this relate to the other findings above?
The 3×3 Anti-Alias requirement will subdivide the 1000×1000 render result into 2000×2000 subpixels, and this two-folding neatly matches the Nyquist pixel-doubling requirement for good texture maps. So the AA and the texture mapping are on the same level of detail. Since 5×5 Anti-aliasing can be seen as a limit, resulting in 4000×4000 subpixels, the fourfold texture sampling can be seen as a limit too. That’s why I said above: anything over 4000 might be overkill in that situation.
When an object is broken down to micro-polys, and one micro-poly matches more than one pixel in the texture map, and/or more than one pixel in the resulting render, we can imagine some loss of quality. So I want a few micro-polys per pixel in both cases. A Min Shading Rate of 0.5 gives me micro-polys of half the size of an output pixel which can be considered Low Quality (draft), but a value of 0.1 gives micro-polys of 1/10th the size of an output pixel, which is enough to support a serious 3×3 AA requirement. Since a decent input pixel (from the object texture map) is 50% to 25% the diameter of an output pixel, I’ll have 4 to 16 input pixels covering the output pixels. A Min Shading Rate of 0.1-0.05 will generate say 10 to 20 micro-polys covering an output pixel. Good match. So this value is enough to support good texture mapping and offers a few micropolys per texture-map-pixels without being overkill.
Conclusions on Resolution
- 1. The default settings for Pixels (3) and Min Shading Rate (0.1 – 0.05) are good for all quality results. Settings could be reduced to 1 / 0.5 for draft renders. Settings could be increased to 5 / 0.01 for high-end printing when increasing render size is not considered.
- 2. However, for high end printing, increasing render size is the preferred route over raising the settings.
- 3. Object texture maps should offer at least 2, at most 4 times the render resolution. That is: an object which takes 50% of the render width / height should be surrounded by a texture which offers at least twice as much pixels (width/height) as the resulting render.
- 4. This way, Render resolution, Texture resolution, Anti-alias rate (pixels) and Min Shading Rate are mutually balanced, all supporting the same quality level.
Divide & conquer
In order to handle the rendering by a multi-core, multi-threaded machine, each render is chopped in pieces; the buckets. Each bucket delivers a square portion of the result, say 32×32 pixels, although at the edges of the render the buckets might be less wide, less high, or both (in the corner). Each bucket is handled as a single thread CPU process with its own set of memory, addressing its own set of objects in the scene. And when there are either too many threats running in parallel, or each thread takes too much memory as it’s too crowded or too textured, on might face memory issues while rendering.
Max bucket size
In order to address these issues, one can either reduce the amount of threads running in parallel (in the Edit > General Preferences menu, Render tab) or the Bucket size. One might expect that halving the bucket size reduces memory requirements to 25%, while quadrupling the amount of threads required to perform the render. The latter won’t make a difference as each thread handles just 25% of the previous render size. In reality, neither will be the case, because the bucket-rendering takes some objects from neighboring buckets into account by adding a (fixed width) edge around it: the bucket overhead.
For example: Say the bucket-edge is 8 pixels wide, and I consider a 64×64 bucket, then it will render (64+2×8)2 instead of 642 pixels, that is 156% of its contribution to the result. But when I consider a 32×32 bucket, it will render (32+2×8)2 instead of 322 pixels, that is 225% of its contribution. So resource requirements will be 225/156=144% higher than expected. Memory demands will not drop to 25% but to about 35%, while rendering will take say 45% longer due to overhead increase. When I consider a 128×128 bucket instead, it will render 126% of its contribution, memory requirements will go up 4*126/156 = 324% instead of 400% while processing will take 126/156 = 80% of the time – that is for the rendering part of it, not the preparation passes for shadow mapping, and SSS or IDL precalculations.
So reducing bucket size should be done when facing memory issues only, and even then the question is whether such should be done manually. This is because the value entered in Render Settings is a maximum value. Poser will use it as a limit, but will reduce the bucket size dynamically when facing excessive resource issues. So altering the value is a manual override of the Poser behavior, which only makes sense when Poser itself falls short.
On the other hand, increasing bucket size will have some flaws too. When the rendering is chopped in too few pieces, you will soon run out of threads to load your CPU cores, and they remain idle till the last one is finished. In other words: your CPU resources are used less efficient.
My recommendations:
- * On a 32-bit system, use 32 for most renders but reduce to 16 for very crowded scenes or increase to 64 in scenes with just a few figures and props.
- * On a 64-bit system, double those values, and double again when there is plenty of RAM available.
A note on render hotspots
Some renders present a spot in the image where rendering takes all the time, that one bucket is slowing down the entire process. Reducing bucket size maybe of help then, when it concerns an area that can be distributed over multiple threads. When it really concerns some kind of small spot, even the smallest bucket will hold up everything, and reducing bucket size is not the solution. It’s not causing harm either, though, for that render.
The question is: what is causing the hotspot, and are other cures available? Sometimes, object- or material options might be reconsidered:
- * When it concerns hair, conforming or dynamic, it should have its Light Emitter property checked OFF This might affect the quality of the rendered hair, in which case compensation-method should be considered. Something which adds in AO for a bit extra depth, perhaps.
- * Some shiny surfaces, like teeth, could do with specular only and don’t need full reflection
Things like that.
Max displacement bounds
Displacement mapping might change the size of an object. Poser has to take this into account in order to determine whether or not an object is relevant for the rendering of a bucket, even when the object itself resides outside the bucket area. The object-size should be increased a bit, then. Poser does a decent job in doing so, using the material settings, and using the bucket edges as discussed above, but might fall short in cases. In those cases, the details of the displacement seem to be chopped off at the boundaries between buckets.
This can be fine-tuned in various ways, and increasing bucket size is one of them. Similarly, decreasing bucketsize increases the risks for the mentioned artifacts. Another measure is blowing up the object size a bit extra. The Min Displacement Bounds in Render Settings does so for all objects (with displacement mapping) in the scene. The Displacement Bounds in the Object properties do so for the individual object specifically. And the first overrides the second when the latter is less. As a result, the object or all objects take a bit more space, and I’ll have more objects per bucket on the average which might increase memory requirements and render time a bit. Setting a value is relevant only when the artifacts pop up, as Poser does a good job by itself except for very complex shader trees (material node setups). But setting any (small!) value does not do any harm either except from the additional resource consumption.
Note that both Min Displacement Bounds and object Displacement bounds both are in Poser Native Units, whatever your Unit settings in the General Preferences. 1 PNU = 8.6 feet = 262.128 cm, or: 1 mm = 1/2621.28 = 0.0003815
Image handling
Toons
The Poser Firefly render and material system offer loads of options to produce photoreal results: Subsurface Scattering, Indirect Lighting, Focal and Motion Blur to name a few. On the other hand, the shader tree offers a Toon node, and the Render settings offer an outline function. In my personal opinion, mixing the Toon and the Photoreal options gives some misplaced feelings. One might need reflections, and some softening of shadows and highlights in a toon render. But does one need Subsurface Scattering and Indirect Lighting? Your render, your call.
Sharpening
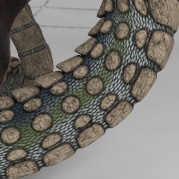
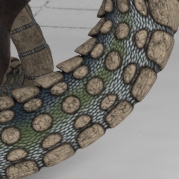
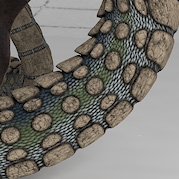
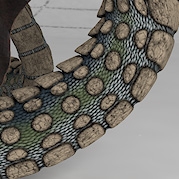
Of course one can sharpen render results in post, but the filter presented here is applied in an earlier stage: while the result is build up from subsamples, like anti-aliasing. Anti-aliasing will blur the render a bit to take the jags out of the edges, but that affects the fine textured areas as well. The filter brings back those details to some extent.
The values mean:
- 1. no filtering
- 2. limited sharpening, fine for female skin, rough outdoor clothes and textures with mild detail
- 3. stronger sharpening, fine for male sin, fine indoor clothes, short animal fur, lots of detail and the like
- 4. extreme sharpening, disadvised
As the purpose of sharpening is: to bring back the details and color contrasts from the texture maps into the resulting render, the SINC option performs best.
| SINC, filtering 1 | SINC, filtering 2 | SINC, filtering 3 | SINC, filtering 4 |
Snakeskin texture, from not filtered (left) to overly sharpened (right).
Tone mapping and Gamma Correction
Correcting images for Gamma and Exposure is a world in itself; I dedicated a special Understanding Corrections tutorial on this.
Exposure Correction, or: Tone Mapping, can be done in post as well for still images, and in most cases it’s not used. Doing it in Poser is a benefit in animations, as it’s applied to all frames on the go.
Gamma Correction, available in Poser Pro 2010 and up, and Poser 10 and up, is a different story. It works rather different from alike processes in post. It hardly affects the main colors in the render result but it certainly softens the highlights and shadows from lighting and shading the objects around. To some extent, Gamma Correction (GC) as implemented in Poser is a way to deal with the far too strong effects on shadows and highlights from the infinitely small direct lights, as used in 3D renders. But so is Indirect Lighting (IDL). This leaves the question whether two steps in the same direction are not just one too many. Should GC and IDL be used in combination, or should one use either the one or the other?
Well, in scenes using IDL, additional direct lights usually provide specularity (as IDL cannot provide this). They also provide local lighting effects, like photographers are using flashes and reflectors to brighten up their shots. In those cases, GC does have a role too. Also, IDL mainly affects the overall lighting level in the scene when large objects, especially a SkyDome, are emitting light all around. In those cases, GC might not have a role. So, the extent to use GC in IDL lit scenes is up to you. You might go for the full amount (value 2.20), or for none at all (switch it off, or set the value to 1.00), or for somewhere halfway (set the value to 1.50 then, or try 1.20 or 1.80 instead).
Saving results
Poser stores its render results in 16-bit per color (48 bit per pixel + transparency) EXR files, in
C:\Users\(your account, might be admin)\AppData\Roaming\Poser Pro\10\RenderCache
Poser can translate those when exporting to the 8-bit per color BMP, TGA, JPG (all without transparency) and the TIF, PNG or even PSD (all with transparency) format, and the 16-bit per color HDR or EXR format (Poser Pro only). Lossy formats like JPG are recommended only when the render does not require any additional post processing anymore, otherwise the lossless TIF, PSD and hires HDR or EXR are recommended instead. Saving to lossy formats should be the final step.
After rendering, the final result is dithered a bit to eliminate banding in subtle gradients and various antialias situations. For the results exported in HDR/EXR format, this is something unwanted, as it might intervene with additional processes in post. The render setting HDRI-optimized output skips this dithering when checked. Note that this will lead to suboptimal results when exporting in any 8-bit per color format.
Poser Pro also can export various aspects of the render separately, like Diffuse, Specularity, Depth and more. This is behind the Auxiliary render data option. This way, all those aspects can be merged in post. Merging in the shadows was already discussed above in this tutorial. More on this in my separate tutorial on Poser Render Passes.
Other options
Presets
One can define a series of settings for various steps in the workflow (draft, intermediate, final for web, final for print), and for various types of result (Toon, Photoreal, …). And then save and load those settings as presets.
Raytrace Preview
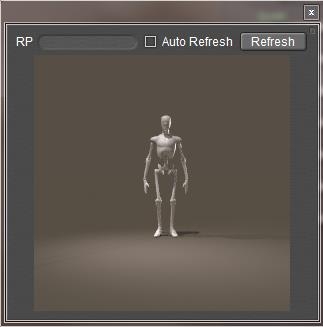
Progressive Mode is a new option to Poser 10 / Poser Pro 2014. It greys out various options from the render settings, and leaves a few which affect the result of the Raytrace Preview window. The ones greyed out will get a standard setting or value, the manual does not tell us which.
Do note that the Raytrace Preview will use those standard values even when they’re not greyed out by the Progressive Mode switch. The switch is just an aid in managing the behavior for this new Preview window.
Do note that when Progressive Mode is left switched ON when rendering, those standard settings are used for the render result as well. This presents you a result which is a larger version of the contents of the new Raytrace Preview window. Switch Progressive Mode OFF to enable the other options again.
My personal observation is that this Raytrace Preview does not work out very well with IDL lit scenes. It does give some clues on the lighting levels, but the result itself is far too coarse for anything else. It does work out great in diret lighting though, and… it’s a Raytrace Previews after all, not an IDL Preview.
Launch
From the Render Settings window one can call for the Render Dimensions (= size of the result) dialog, as the similar Poser menu option is out of reach when the Render Settings window is active. Also the rendering can be sent to Background or to the Queue (Poser Pro), instead of running in the foreground. Or the settings can just be saved. That is: to be used when clicking the Render button at the top right of the Document window.
