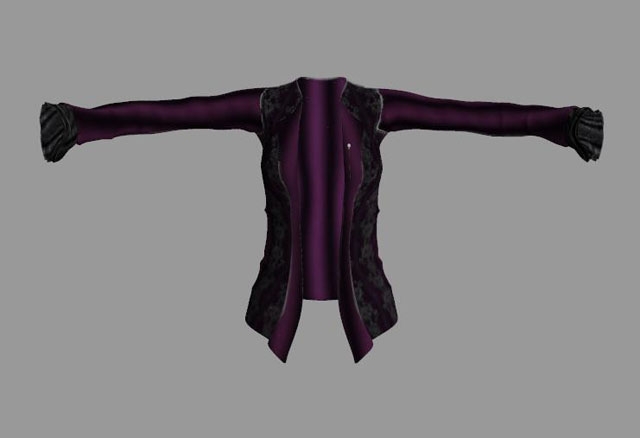
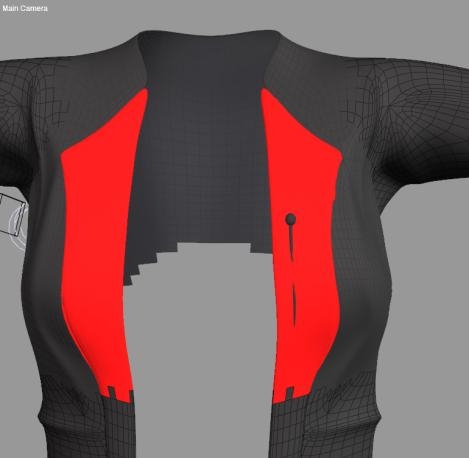
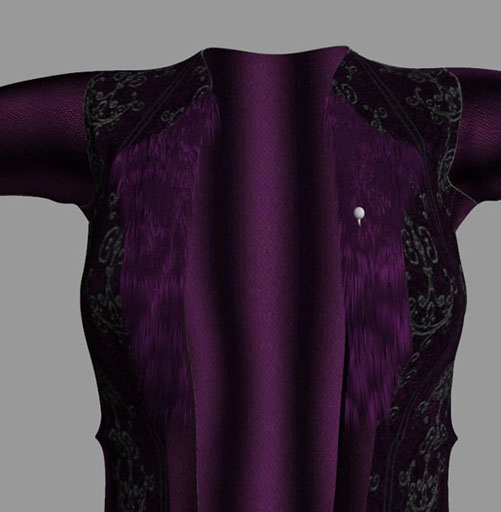
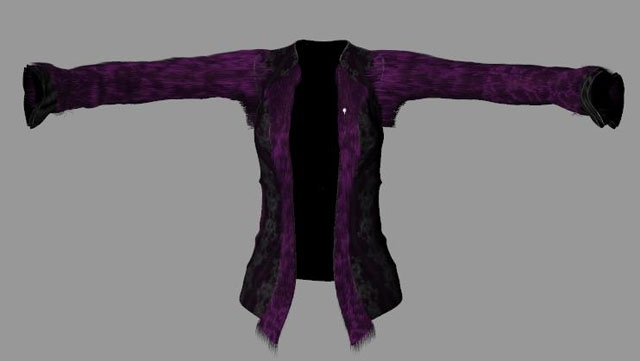
This is the jacket from the Witch Hunter for Vicky4.
It has some decorated parts on the sleeves and the front, and I’m going to “furrify” the smooth parts. This is not very different from handling the purse, but let’s look before we leap.From a fur point of view, the jacket has a Left Sleeve with the hairs growing sideways (positive X, to our right), a Right Sleeve with the hair growing sideways (negative X, to our left) and a Body. Each of these is built from three mesh components:
- Left Sleeve = Left Collar + Left Shoulder + Left Forearm
- Right Sleeve = Right Collar + Right Shoulder + Right Forearm
- Body = Hip + Abdomen + Chest
As I found out by clicking around on the jacket. In the Materials Room I found portions for
- A Pen, that’s some jewelry sticking upon the left front of the jacket
- Sleeves, that are the ultimate ends at the arms
- Jacket, everything else
Each sleeve – from arm pit to wrist – measures about 50cm long x 40cm circumference = 200cm2, the body measures about 70cm high x 100cm circumference = 7,000cm2, minus 20% for the open front minus 20% for the decorated parts make say 4,000cm2. From the 7,000cm2, half of it sits at the back of the body, which leaves 4,000 – 3,500 = 500cm2 for the front side of the jacket. We’ll need this info to set the haircount to reasonable values.
Setup
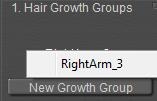
I enter the Hair Room, select the Right Collar (mesh group / subobject / bodypart), start [New Growth Group], name it (“RightArm1” for instance), click [Edit Growth Group] to collect the polygons for the group, and just [Add All] to finish. Perhaps I’ll need to do some more detailing later on, but this gives me a start.
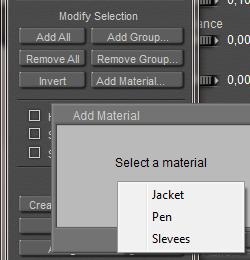
I select the Right Shoulder in preview, repeat the procedure (“RightArm2”, select Right ForeArm, repeat the procedure (“RightArm3”) but instead of using [Ad All] I click [Add Material], as I want to exclude the decorated ends. Those ends were assigned to a Sleeves material group, so I select this, and then click [Invert] because I just want the other part. While the jacket has object-groups and material-groups which technically are independent, I must create hair-groups for each separate object-group, and I can use the material-groups for further selection within that object-group. Like above, Sleeves addressed both left and right end but while working on the right arm object, I could address the right part of the material group only.
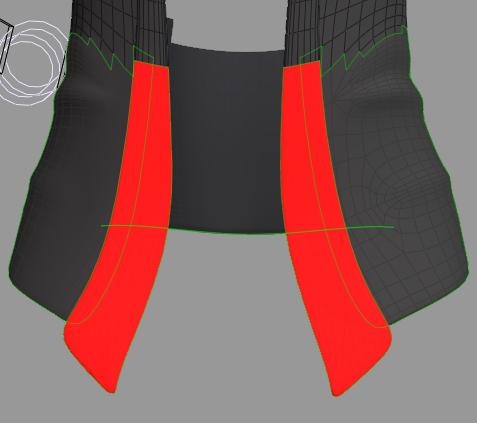
And I cannot make one single “Right Arm” hair group, I end up with three parts. When I select the Right ForeArm in preview, then hairgroup RightArm3 is accessable only.This way I also build my LeftArm1/2/3 hair groups, and also make my JackBody1/2/3 groups out of Hip, Abdomen and Chest. For defining JackBody1 from the Hip etcetera, I manually select the relevant portions as I’m avoiding the decorated parts and – for the moment – I don’t need hair on the back for my current renders.
Using the mouse for selections requires some practice. Adding, deleting and turning cameras is a must for the fine details. Sometimes it pays to make larger selections, and exclude (using the [-] option) some polys later. Some people might prefer a tablet for this kind of work.Sometimes handling logic brings a way out. Excluding the Pin on the chest part could be done easily, by selecting the jacket part completely, then inverting (to everything but…), then adding all polys with the “Pen” material like I did with the Sleeves material before, and Inverting again.
Time to save now.Growing fur
My next step is to grow fur on one area (say: Chest = JackBody3) , adjust it till I like it, and then (manually) copy my findings to the other areas. So I select that part of the jacket (preview), as well as the hairgroup (panel 1), and deploy panel 2 to [Grow Guide Hairs] with a length of 3.5cm, a Variance of 0.5cm (so: hairs will be 3-4 cm), no Pull back or Pull Side but a serious Pull Down supported by enough Verts per Hair. Kinks and Clumpiness could be zeroed out, and I vary the hairs between 2 (root) to 1 (tip) mm.
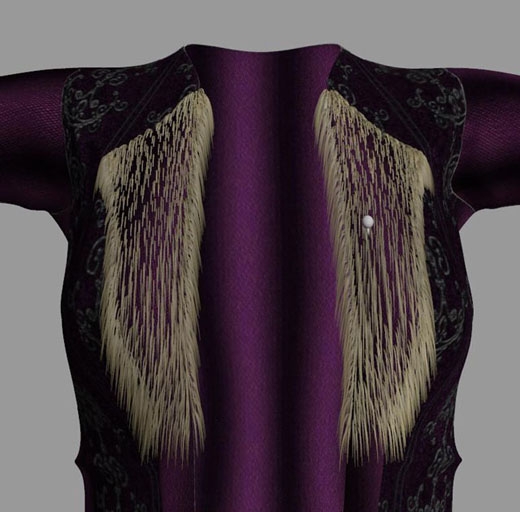
It renders like this:
From this I learn that it’s better to exclude the polys from the hair groups that do not face the front, but face up, down or sideways instead. The hairs from the side do not contribute to a nice result.When re-selecting the bodypart for re-editing, be sure that you’ve got the object part (here: Chest) and not the hair-prop JackBody3. The first one contains the Hair Growth Group including all settings, the second contains the (guide) hairs that result from that. Check Hide Other Objects in the group editor to get rid of the hairs while (re)selecting.
Then I need to color the hair, and I need to set the hair density to a proper value. The full front of the jacket was estimated 500cm2, so this third part might be 180cm2 and with 200 hairs/cm2 that makes 36,000 hairs. To be halved or doubled depending on coloring.
Handling the material
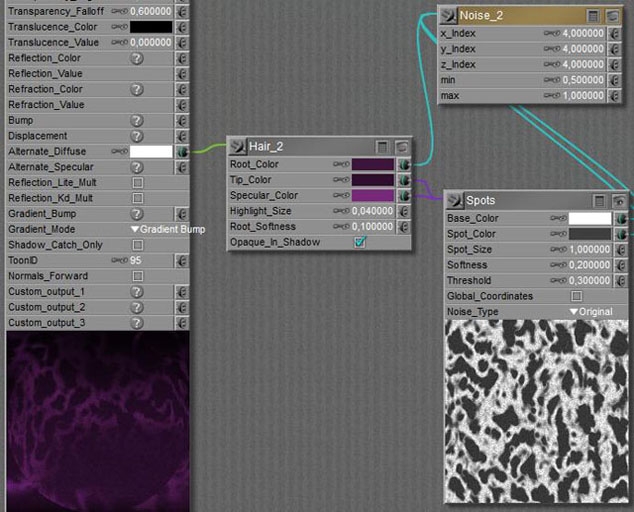
I selected the Root color to match the purple surface RGB=(60,20,60) while making spots of darker tips RGB=(30,10,30) and added the same spots to a bright specularity RGB=(120,40,120), all in the same hue.
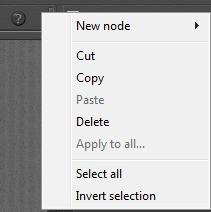
- With the triangle at the upper right corner: Select All
- Copy
- Then select any other hair Prop (the prop, not the growth group body part),
- And with the same triangle-menu: Paste
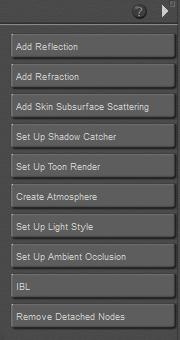
- Then, from the list of buttons: [Remove Detached Nodes] to clear the original hair material
- Select another hair prop, paste again, remove original nodes, and so on.
Details galore
Hair was quadrupled (144,000 for this area) and I’m still convinced that the top inner side, and the top outer side can use a shave. This is due to the high density of small polygons to make a smooth bend in the jackets form. With a guide hair per vertex, and populated hairs per guide hair, many small polygons mean: many hairs in that area.
- Hair length 0,0350
- Variance 0,0050
- Pull 0,00012
- Density (72.000 to 144.000)
- Tip 1
- Root 2
- Verts 32
The arms have the hair pulled sideways instead of down, require far more pull and mind the +/- sign for the proper direction.
This still leaves room for perfection:
Around the Right and Left Collar or: RightArm1 / LeftArm1 elements, hair (polys) should be deleted and/or hairs should be shaved using the Hair Editor, and hair Pull and Density have to be looked into. Plus the details for shaving mentioned already for the upper/inner portions of the jacket. As usual, the devil is in the details, and so is our time.