When I run a simulation calculation, a few things happen that are worthwhile to be aware of. Each sim runs in a number of iterative steps, there are two or more of those steps for each frame in the animation. The animation – even if nothing moves or animates – generates the time for the cloth to drape properly, driven by gravity, some wind perhaps, and various frictions and forces within the cloth element, between the cloth elements, and between the cloth elements and the collision objects. The basic idea is that when the cloth is draped well at the start, and the figure gradually moves into a more elaborated pose, the cloth will follow and will drape to that pose accordingly.
The sim settings even offer a Drape-period, intended to have the collision figures change from the T-pose into their frame-1 pose. Or to give the cloth draping a head start, while the collision figures are not moving at all. The advantage of this is that a cloth-sim specific animation is added without disturbing the scene animation as such, the disadvantage is that the movements during the drape period cannot be affected. So arms can cross bodies or legs and ruin he sim instead of helping it forward. When the sim runs during my own animation, I can prevent issues like that by fine-tuning the animation itself before I run the sim calculations.
Hence in general I start with my figures in T-pose at frame 1, give them 1 sec to take a normal pose in normal clothes, or 2 sec for a complex pose far from the T-pose or when in tight, complex or heavy clothing, and maybe even 4 sec in the case of all together. The main issue is: can the pose – in the real world – by a normal, trained – life! – person be made in the period set for it while wearing those kind of clothes?
Okay, the calculations kick in and all parameters describing the physical reality combine with the sim algorithms to make a cloth mesh change shape and position: all its vertices are affected. This is the easy part, and cloth simulators can do it quite efficient. And from the Poser animation, the collision object movements are obtained as well. All this is done per simulation step, defined by: the number of steps per frame and 30 frames per second. So for 4 steps per frame and an animation of 60 frames, the calculation loops 4×60=240 times to cover 60/30=2 sec of animation.
After moving all vertices for that step, the next step is: collision detection.
Collision Offset
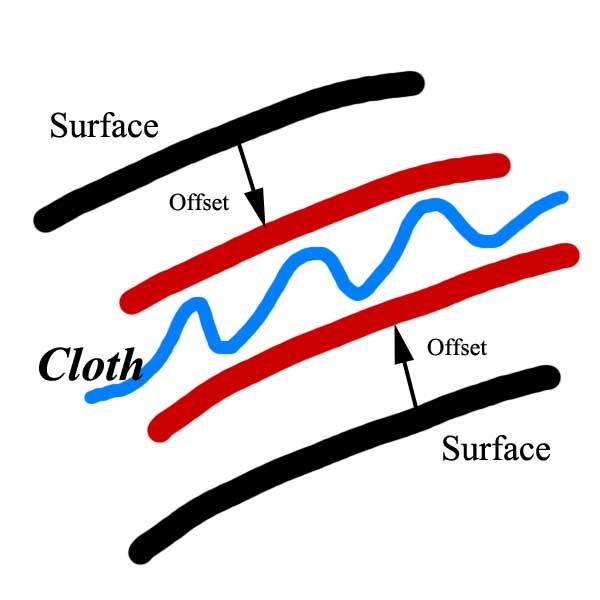
The collision object surface gets a virtual version, by offsetting it towards the cloth surface. Therefore the collision will take place at some distance between the two, which gives the cloth some thickness. There is no extra calculation required, the setting itself does not affect PC resource usage.
- When the offset value is set (too) high, the result might become visually unattractive and artificial, and the cloth will hardly follow the contours or the body underneath. The Poser upper limit of 10cm hardly makes sense, but even say 2 cm is quite sufficient for emulating a thick overcoat. The default 1cm is meant for thick cloth over a car or statue (note: we’re in Cloth Room, not: Clothes Room). In practice, 0.5 is fine for sweaters and alike and 0.25 will do for lingerie and fine clothing.
- When the value is set (too) low, the result might show poke-throughs in the render. One reason for that is that the sim does not take render settings into account, and does not take care for polygon smoothing or displacement mapping. And as the cloth and the underlying object will have different mesh densities, they will behave differently in that respect. Another reason is that the body parts perform some strong bends which cannot be supported by the elasticity of the cloth, it just cannot stretch that much. Or the cloth just misses the resolution, it does not have the polygons available in that area to make the bend. All this might be a reason to consider a higher offset value.
- An issue occurs when a piece of cloth has to maneuver between two surfaces, like Vicky sitting on a chair with some skirt in between. The skirts needs the offset distance to Vicky’s thighs, and the offset distance to the seating of the chair, so when the distance between Vicky and the chair becomes about or less than twice the offset the sim does not know where to more the cloth vertices to. And “not knowing” usually imply: random results, and accidents waiting to happen. This issue might force you into reduced offset values, or might force you to alter the scene for instance by moving the chair a bit down and back, or by shrinking it a bit in one direction (say Y) while growing it in another (say: Z). But then you’ve got effects in the visual results.
- A second issue comes with the concept. When a piece of cloth surround a body(part), then each cm offset will increase the circumference with about 6cm which will generate stretch forces within the cloth, except when the cloth itself has been widened beforehand. But that’s about 5% extra for a dress or sweater, 10% extra for the legs of pants, and 15-20% extra for sleeves.
This is one of the issues when clothifying conforming clothes: they either do not support the extra widening, nor does Poser support the relaxed stretching in one direction while not stretching that easy in the other direction (otherwise, sleeves that widen easily will lengthen easily as well, which is not what we want). At least, not in a simple way.
Collision Depth
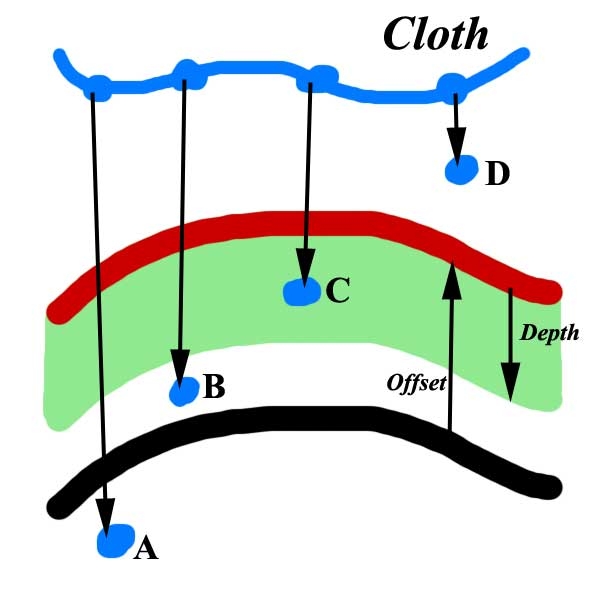
To find out for which vertices collision calculations have to be performed, a layer with the thickness defined by Collision Depth is imagined around one of the surfaces (cloth or collision object, does not matter, all movements and positions are relative anyway), and the vertices of the other surface are tested against it.
- Simplified: about all vertices within that layer are taken for further investigation, and all other ones are not. Of course the actual method is a bit more elaborated, but this is the idea. The larger the Depth value the more vertices are investigated upon, and the calculation times will go up accordingly.
- When the Depth is (too) high, the layer becomes too thick and the mechanism runs an increased risk on “false negatives”, vertices that should not be considered for further treatment but nevertheless gets some, with sometimes erroneous results. Hence a limitless expansion of the Depth does not resolve all issues. Though, despite the Poser maximum of 10cm for this parameter, I rarely use values over 4cm myself.
Perhaps an even better rule is: start with the Offset value, and double this once or twice but not more. -
When the Depth is (too) low, a vertex that approaches the other surface with a high velocity has a change to pass through unnoticed.
See the figure: vertices A and B might pass through unnoticed, C is captured and D does not collide.
For instance, in 1 second, with 30 frames a second, and 2 sim steps per frame, each step covers 1/60 of a second. So when Vicky and a skirt around her thighs come down towards a chair over a distance of 60 cm within that 1 second, then within the 1/60 of that sim step the vertices move 1 cm towards the colliding surface.
Not that much you think, but when the Depth is just 0.5cm the vertex might be at one side of the capturing layer in say some step N, at the other side of that layer in the next step, and won’t be marked for investigation at all. From that moment on, the cloth has entered the inside of the body and it’s just a matter of time for the simulation to crash.
This is where increasing the Steps per frame value becomes of help: it further limits the distance the vertex can travel, and increases the change of being captured by the Depth-trap considerably. For the example above: doubling the Steps from 2 to 4 reduces the time between steps to 1/120th of a second, reduces the distance travelled by that particular vertex to 0.5cm, and so when the vertex in outside the detection layer in step N, it just will be in in the next step but won’t pass through unnoticed. And the sim-crashing stops right there.
Doubling the Steps Per Frame roughly doubles the calculation time for the whole sim. This makes it quite an unpopular – but quite effective – method. -
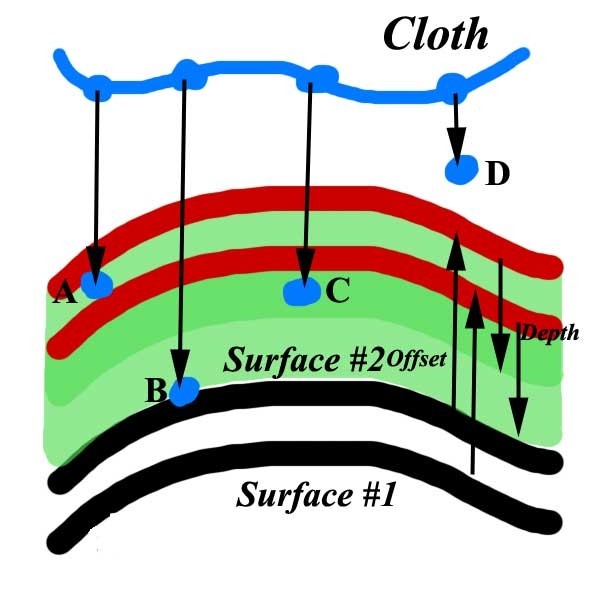
An issue occurs when the cloth approaches two surfaces (at the same side) which are quite close together. For a thin object, this means that the collision warning method sees both sides of the object and gets really confused when the detection layer is too thick. As it seems to collide against both surfaces, the final result gets a random component and the vertex might end up at the wrong (back) side of the object.
See the figure: vertex A is captured in the surface#2 handling, B will end up at the wrong side as being captured by the surface#1 handling, and C might go either way.
Therefor I avoid depth values which are larger than (half) the distance between two of those nearby surfaces. This puts a maximum value to the practical use of Depth. The downside however is that I have to start ramping up the Steps per frame value earlier.
Don’t underestimate this. The front and back side of finger surfaces are about 1 cm apart (a hand on chest makes the shirt go wild), chair seatings might be less than 1 cm thick (and the dress falls through), and if a coat collides with a shirt and a body, both are less than 0.5cm apart. Reduce the collision depth and increase the steps per frame, and take the increased calculation times for granted. Repairing crashing simulations take longer.
Notes on the Reference Manual
- The Collision Offset parameter determines the distance between a cloth object and a collision object at which the collision detection calculations begin. Increasing this value can help avoid accidental collisions, especially during animations, because Poser requires a little time to calculate actual collisions. Increasing this value too high can consume extra computing resources.
- The Collision Depth parameter specifies how close the cloth object must be to a collision object in order for a collision to take place. Increasing this value increases the distance at which the cloth and collision object will collide. This is useful when creating clothing, because the cloth will be kept away from the figure. Increasing this distance makes the cloth appear more static but avoids having body parts penetrate the cloth (such as a leg poking through a skirt).
The correct definitions are exactly the other way around. Offset determines the thickness between cloth and object, help reduce poke-through and can make the cloth look static, while Depth defines the collision handling process and can require more resources.
- The Collision depth and Collision offset dials are limited to minimum 0.1cm and maximum 10cm.
Collision Depth has a minimum of 0.0 mm
- Before adjusting these settings, be sure to enable the Object vertex against cloth polygon and Object polygon against cloth polygon options in the Simulator Settings dialog. You may also try reducing the Steps per frame value from its default of 0.2 to as little as 0.005.
It’s proper policy to check those options before increasing Steps per Frame. This parameters is limited to whole numbers from 2 to 33333.
- The Collision Depth and Collision Offset dials emulate thickness by “extruding” the cloth inwards by the amount of Collision depth units and outward by the amount of Collision offset units. Thus, the cloth now has a “thickness” of collision offset + collision depth. Any specified collision object intersecting this volume will be treated as a collision.
Actually, offset and depth are parameters for the collision object (in a specific sim). The object is extruded towards the cloth with an amount Offset, and then this virtual surface gets an inward thickness Depth. All cloth vertices in and around this area are seen as collision candidates and prone to further evaluation.
Collision tests
Once the vertices are labeled for further testing, those further collision tests come in flavors:
- The default one is called “cloth vertex against object polygon” and it works fine for cloth with high mesh densities against objects with a low(er) mesh density. This usually is the case when we throw a large cloth over a car or a statue, or a table cloth over a table.
- The next one is called “object vertex against cloth polygon” and does the opposite, so that one works fine for high density body’s colliding with low(er) density clothes. For clothing, this is a normal situation. Most clothes I see passing by show vertices 2 to 5 cm apart, while Vicky’s body itself shows vertices only 0.5cm apart. In practice, this extra option hardly adds to the calculation times but hardly adds to the solution as well.
- The serious one is called “object polygon against cloth polygon”, is more calculation intensive but far more effective as well. It also captures vertices that were about to escape by passing through the Depth layer, and therefore, with a bit of the previous option as well, is some alternative for increasing Depth and/or increasing Steps per frame.
This is why I mentioned those options first in my “recipe” chapter (Quick Clues and Recipes, part II), and this is why the Poser Reference Manual states that when you consider increasing the Steps you’d should check these options first. They might just do the trick and are far less computational intensive.
The calculation pass
As said: each loop starts with a physics/ real world related pass through the vertices. Such a pass can be made in two ways:
- The new position, velocity etc. for the vertices in pass N are derived from the previous pass N-1, but the new information within pass N is not used until the next pass N+1.
This makes all vertices considered equal so let’s call this the “symmetric approach”, but there will be two full intermediate results (N-1 and N, N and N+1, …) which have to be stored and the simulation will converge gradually to its final state as a lot of the intermediate information is not used. - The new position etc. for a vertex in pass N is also derived from the new positions, velocities etc. of the already handled vertices in the same pass. Now only one intermediate result has to be stored and all available information is used so the sim converges faster to its final state. Of course, this is the way Poser does the job.
But this way it matters in which order the sim calculates through the mesh, as vertices are not equal: one is first, others are later, hence: the “asymmetric approach”.
Say, one vertex is pulled down, by gravity. Then the vertex next to it will also be pulled down, but will also be pulled in the direction of the first mentioned vertex. So forces start skewing a bit, and not all mesh structures are equally happy with those diagonal forces. - Who cares? Well, for cloth pieces falling on cars, or a lot of clothing following an animation sequence, the result will not be exactly as in real life but still quite believable. The “asymmetric approach” is quite handy for practical use, though scientific sims always want the best match to real life and take the symmetric route.
But the effects become noticeable in simple straightforward cases, like draping a banner down.
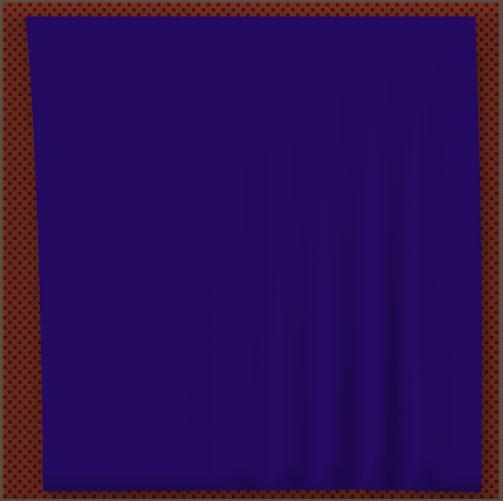
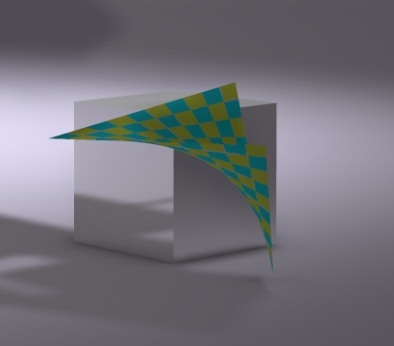
For instance, the image shows what happens with a simple square cloth made of little quad polys just hanging down under its own weight. It skews to the bottom right, with some extra tension at the left side and more folds in the right half.
I’ll tell you: the sim loop starts at the bottom right, and then goes to the left and up. That is: against the UV coordinates, from high to low. Left or right is a choice, but bottom up makes sense as the usual driving force behind cloth sims is gravity, pulling down.
Something you can do about? Well, it mainly happens with rather low (10 or less) settings for Shear and Stretch Resistance. You can raise them, or dampen the effect by raising the Stretch Damping, or take it for granted when it does not hurt the final result too much. But at least; it’s the sim itself, it’s not you.
Sim details
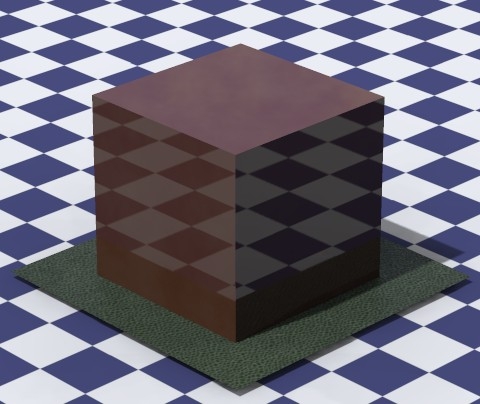
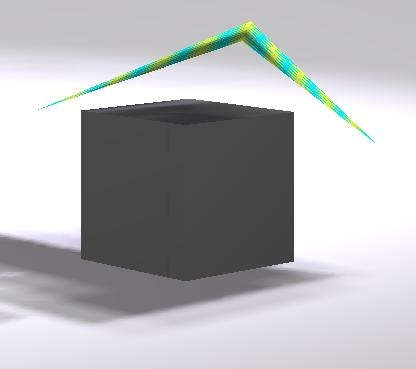
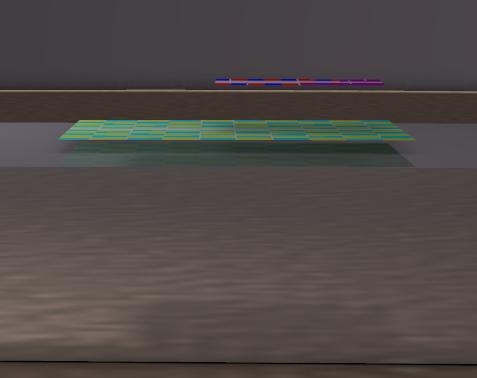
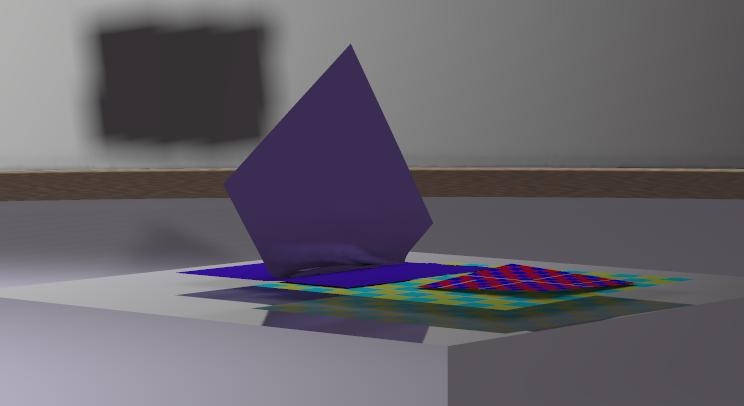
This is a simple cube (images by Bagginsbill), and a simple four-vertex square piece of cloth. With no additional options checked, the cloth falls right through the cube. This can be expected, as “cloth vertex against object polygon” is the default setting, and no cloth vertex touches the cube surface while falling down.
This shows that the sim mechanism does not perform any additional subdivision within the cloth, it just works with the mesh information.
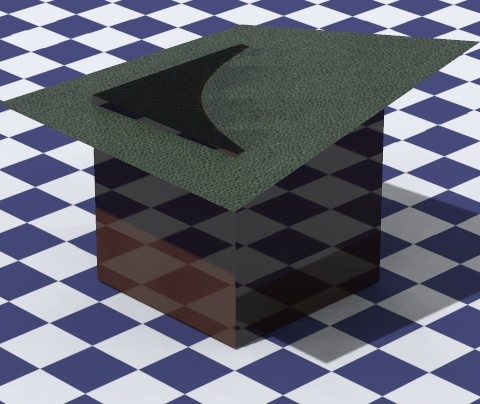
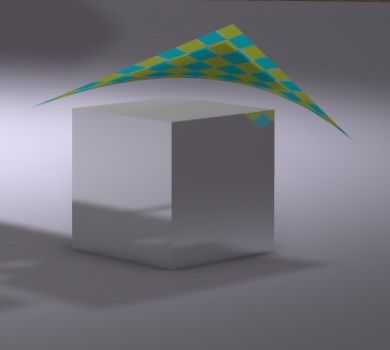
With “object vertex against cloth polygon” checked the cloth is stopped by the cube, with an artifact. Three corners seem to fall through a bit, and the fourth one does not. Why is that?
Well, each time first the position of a vertex is calculated from the forces, velocities and other physical aspects. Apparently, in this case, the vertex ended up just below the surface level of the cube. Then the collision detection kicks in. For the first cloth vertex down and three up, no cube corner passes the cloth polygon. Nor does this happen when the second and third cloth vertex come down. But when the forth cloth vertex comes down, all four cube corners pass the cloth poly. Collision detected! And that forth vertex is put back at the offset height above the surface.
Why is the image showing things a bit different then?
That is because the renderer is smoothing and slightly curving the surface, while the sim calculations do not. When I connect the lower left corner of the cloth and the upper right one b a straight line, the upper left cube corner will be underneath. The Poser preview hardly smoothes either. As a result, the renderer might show poke-through while the preview does not, or the other way around, while the sim thinks it’s doing fine given the options checked and the time and step sizes that the calculations was allowed to use.
Why aren’t the lower vertices falling down anymore? What makes this a stable solution?
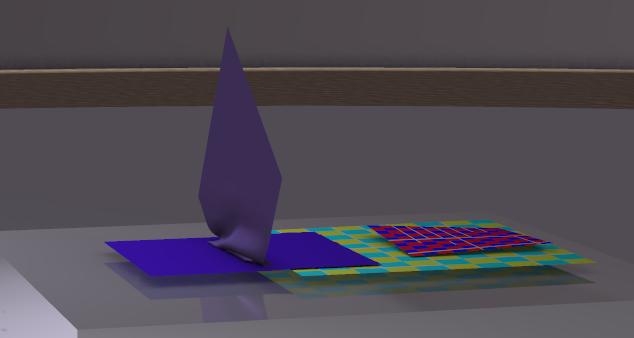
So I tried again, different offset (5cm). The preview shows that this is about the minimum distance of the cloth above the surface, but above the surface only. Over the edges of the surface, the vertices are looking down at the ground. The sharp fold is smoothed out in the render. End 100 frames later, the solution is not that stable after all, and the cloth sails to the ground.
By just expanding the box I made the cloth fall right onto the surface. All issues were gone, and all four cloth vertices ended somewhat above the cube surface, at a distance dictated by the Collision Offset for the cube.
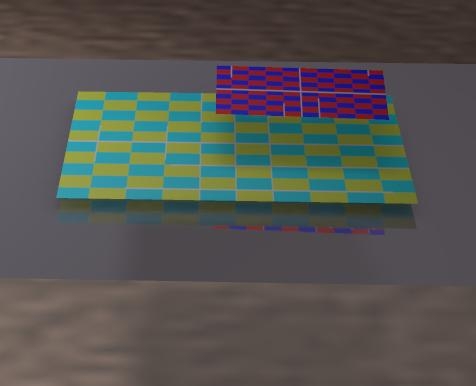
Now I was a bit curious to the cloth self-collision mechanism. Two simple four-vertex cloth pieces ended up on top of each other. One at the offset distance above the cube. The second a 7cm distance above the first, a distance that did not change whatever parameter I adjusted.
However, such a thing did not happen when I used two pieces of cloth with a high resolution of vertices (100×100 quads instead of one), it did not happen when a third piece of cloth was added to the sim, and also more elaborate setups did not show this hovering behavior any more.
In other words:
watch out for the overly simple pieces of cloth. A piece of 10,000 polys behaves different that a piece of one poly.
