What’s the Special > FastScatter node used for?

Nodes are the essential building blocks in the Advanced interface to the Poser Material Room. They are the graphical representation of mathematical function calls, that is: calculation procedures which turn parameters (inputs) to a result (output).

Intermediate

Like all special nodes, the FastScatter node also provides diffuse, specular and eventually more as an all-in-one offer. Just black-out (or nullify) the regular Diffuse, Specular and other properties of the PoserSurface, and plug the node into Alternate Diffuse.

FastScatter is an early, simple – and according to the manual outdated – way of representing SubSurface Scattering. It does not use the subsurface scattering as referred to in the Render Options.

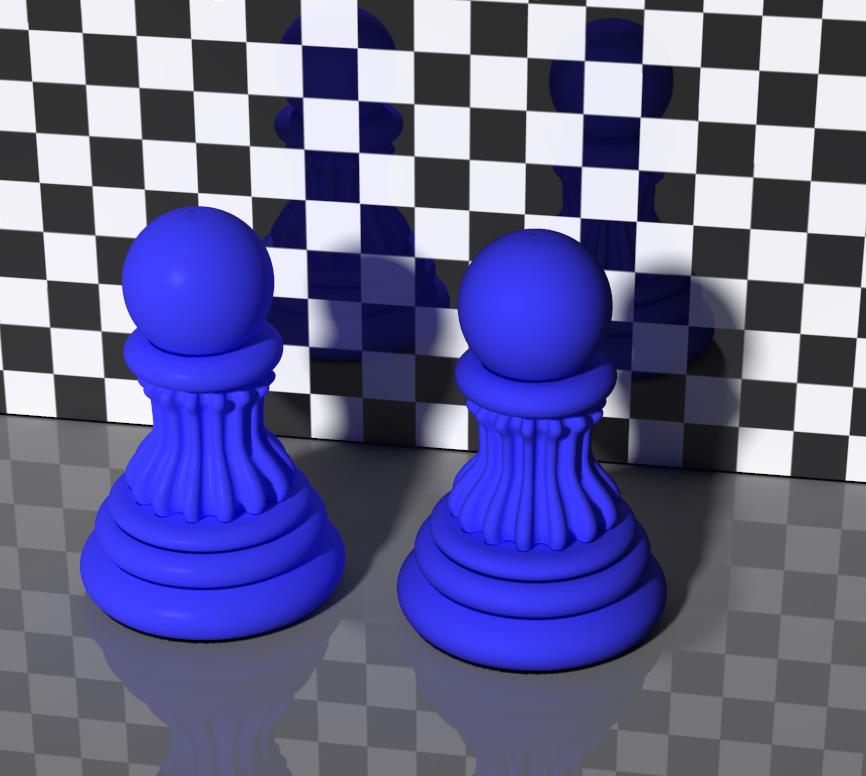
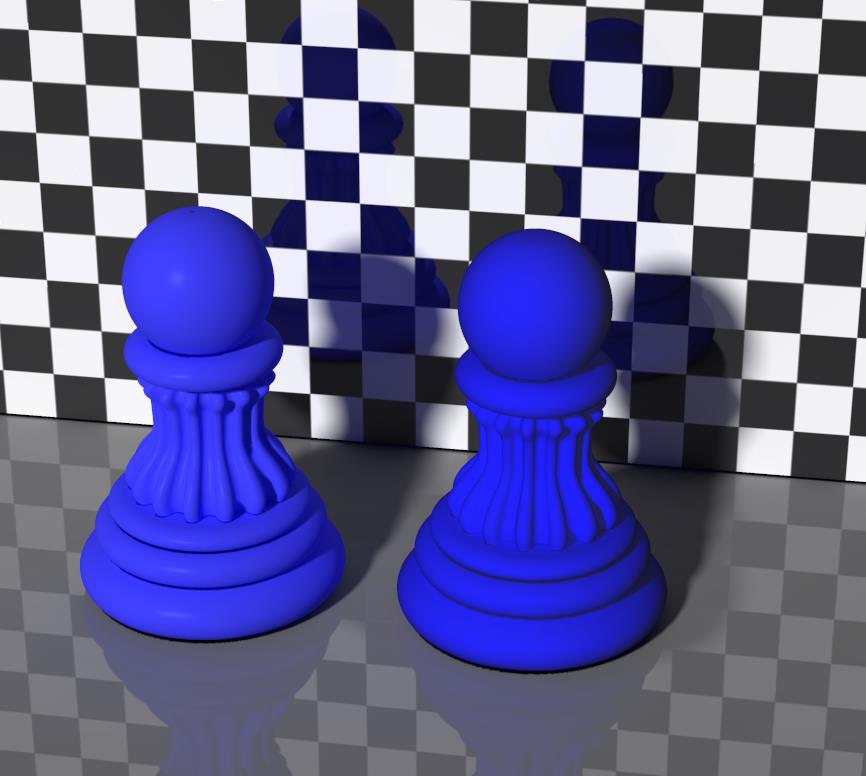
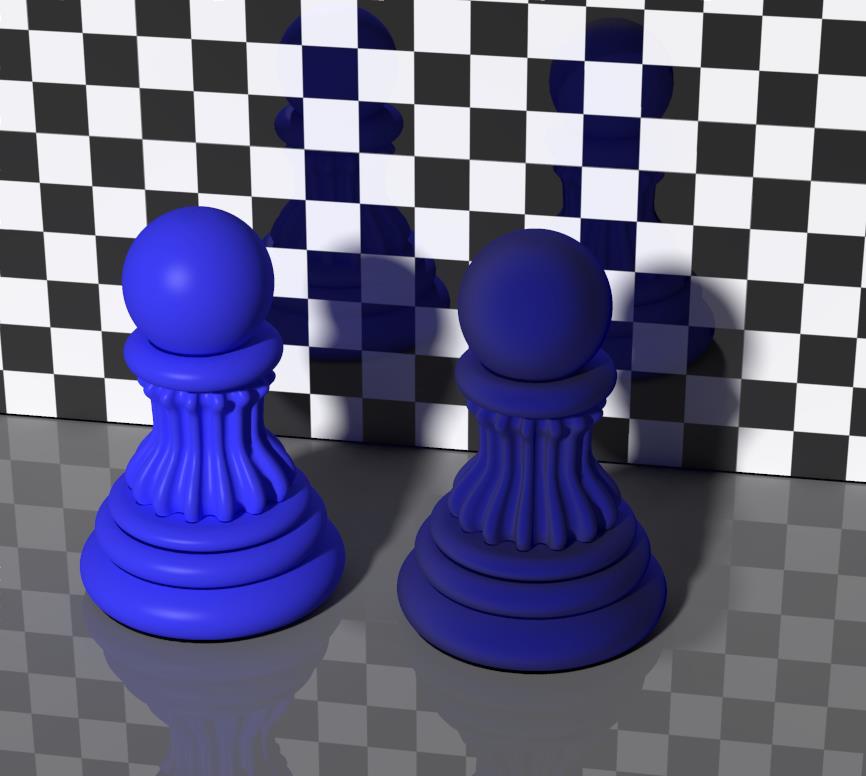
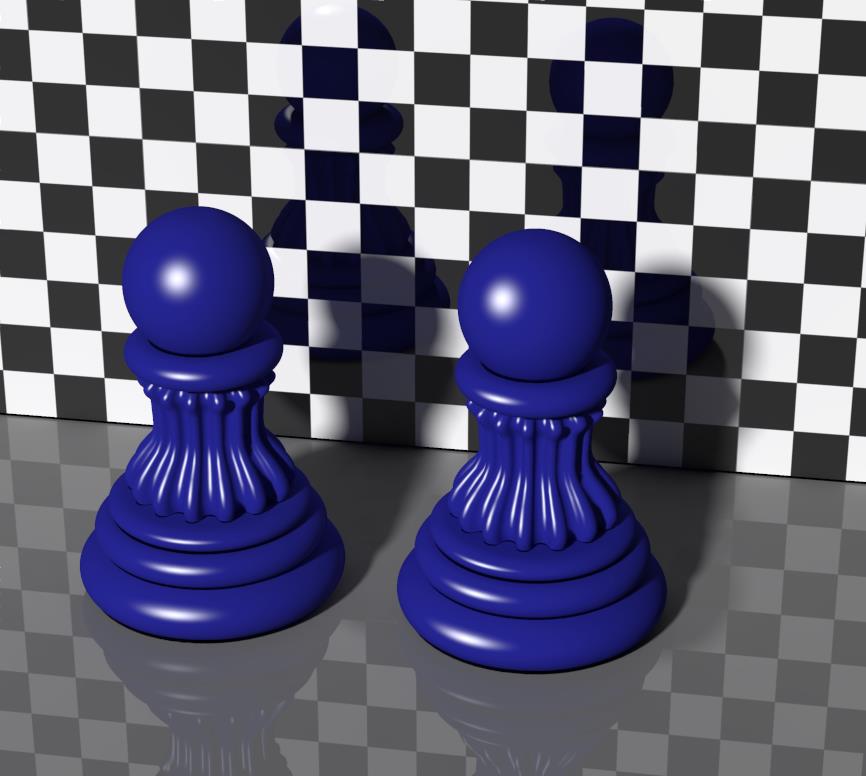
Besides a single Color entry, the choice is for None (demonstrated in the right pawn base in the image below), Light (pawn column) or Strong (pawn head) material. The left pawn in the render shows regular diffuse and specular, for comparison.

This article presents a comparison of the various skin and scattering nodes.

Next >

What’s the Special >CustomScatter node used for?

Nodes are the essential building blocks in the Advanced interface to the Poser Material Room. They are the graphical representation of mathematical function calls, that is: calculation procedures which turn parameters (inputs) to a result (output).

Intermediate

Like all special nodes, the CustomScatter node also provides diffuse, specular and eventually more as an all-in-one offer. Just black-out (or nullify) the regular Diffuse, Specular and other properties of the PoserSurface, and plug the node into Alternate Diffuse.

This CustomScatter node provides the raw parameters for Subsurface Scattering, as are addressed indirectly by all presets from the dedicated nodes. It does use the subsurface scattering as referred to in the Render Options. It’s offered from Poser 8 / Pro 2012 on.

The node takes the Pre-Scatter texture (might be an image map) and eventually some Pre-Scatter Ambient as well, scatters that around within the object surface layer while filtering it with the Scatter Color (white is: no additional coloring), and then the light leaves the surface layer while being filtered by the Surface Color parameter, So the Pre-Scatter Texture will get blurred while the Surface Color texture will remain sharp.

MaxError is a speed vs quality setting, large values (up till 1.0) give high speed and lower quality, low settings give higher quality (more scatter bounces within the layer, I guess), at the cost of longer render times.

The scattering itself is defined by

  • Main Free Path, in mm, the distance a scattered light ray can travel before being scattered again. In a cellular structure like skin, the cell-size might be a good start. This is about 0.15 mm for human skin, and say twice as much for some plant leaves. For suspension fluids (milk, ketchup) smaller values will apply. This value is also a measure for the skin layer thickness, and as milk and ketchup don’t have any in real life it’s my artistic taste only which really counts in the end.
  • IOR or: Index of Refraction, is determined by the stuff the skin layer is made of. The default 1.4 is fine for troubled water, while 1.8 is the value for glassy stones (as marble). I tend to stay in the 1.2 … 2.0 range to keep a sense of realism.


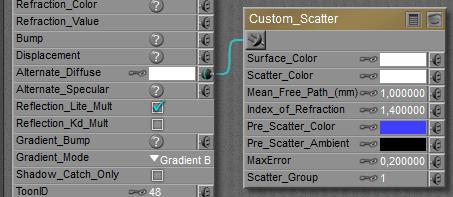
In the following render, the left pawn shows regular diffuse and specular. The right pawn shows Custom_Scatter with the settings as above, while having the object color in the Pre_Scatter_Color swatch.

By assigning the object color to the Surface Color swatch too, the color filtering will be done again when the scattered ray leaves the object. This intensifies the colors significantly:

Next to all this, this article presents a comparison of the various skin and scattering nodes.

Next >

What’s the Special >Scatter node used for?

Nodes are the essential building blocks in the Advanced interface to the Poser Material Room. They are the graphical representation of mathematical function calls, that is: calculation procedures which turn parameters (inputs) to a result (output).

Intermediate

Like all special nodes, the Scatter node also provides diffuse, specular and eventually more as an all-in-one offer. Just black-out (or nullify) the regular Diffuse, Specular and other properties of the PoserSurface, and plug the node into Alternate Diffuse. This Scatter node does not use the subsurface scattering as referred to in the Render Options. It’s offered from Poser 8 / Pro 2012 on.

The node represents the scattering of light within the outer layer of a real-life material. It takes the thickness, the internal structure as well as the natural color of the material into account, like ketchup is darker red, apple is pale green and skin is pinkish.
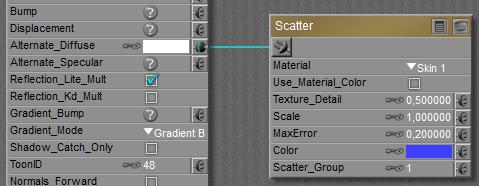
The internal structure of the scattering layer can be altered by picking a different Material from the list. The thickness of the layer can be altered by changing the Scale parameter, so when Apple (waterish in a cellular structure) is the substance of choice, but the surface layer of my stuff is twice as thick as a real-life apple (or the object is an apple, but at twice the regular size) then Scale should be set to 2.

MaxError is a speed vs quality setting, large values (up till 1.0) give high speed and lower quality, low settings give higher quality (more scatter bounces within the layer, I guess), at the cost of longer render times.

As in the regular (diffuse) case, the object surface can be tinted with color, image map, another texture node, and etcetera. This surface color is multiplied (filtered) by the color of the scattering. If I don’t want this latter effect, switch OFF the Use_Material_Color option. I might want the structure of Ketchup, the layer thickness of Ketchup but not the reddening from Ketchup.

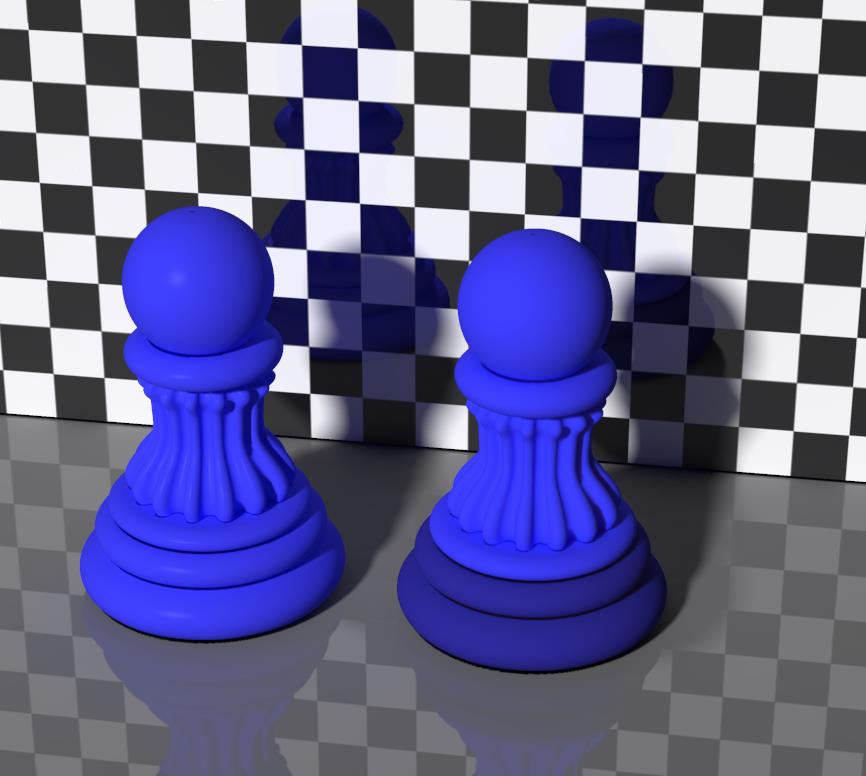
In the example below the right pawn has the Scatter surface, with the Use_Material_Color option OFF except for the base where the pinkish skin color is merged into the main color.
The second issue is: do I want the surface texture on top / at the outside of the object, or at the inner part of the skin layer. In the first (outside) case, details will be crisp but are not scattered themselves, in the second (inside) case the details are scattered as well, but the texture is blurred because of that. This is handled by the Texture_Detail option: 1.0 means “outside” (all details available), 0.0 means “inside” and the default setting is halfway 0.5.

When the surface texture already offers an object color (as is usual the case), and I want to make use of the scatter color as well to improve skin tones etc., then some portion of the skincolor should be removed from the surface texture to avoid “double counting” of the coloring. The Poser Manual, chapter Material Room Nodes, sector Scatter tells in detail how to accomplish this.

This article presents a comparison of the various skin and scattering nodes.

Next >
What’s the Special > Hair node used for?

Nodes are the essential building blocks in the Advanced interface to the Poser Material Room. They are the graphical representation of mathematical function calls, that is: calculation procedures which turn parameters (inputs) to a result (output).

Intermediate

Like all special nodes, the Hair node also provides diffuse, specular and eventually more as an all-in-one offer. Just black-out (or nullify) the regular Diffuse, Specular and other properties of the PoserSurface, and plug the node into Alternate Diffuse.

But besides that, the Hair node is special in its own right. It’s not just a surface cover, it’s a full 3-dimensional U-V-and-W mapped coloring device. And… it’s specially designed for the hair strands which result from applying the features in the Hair Room.

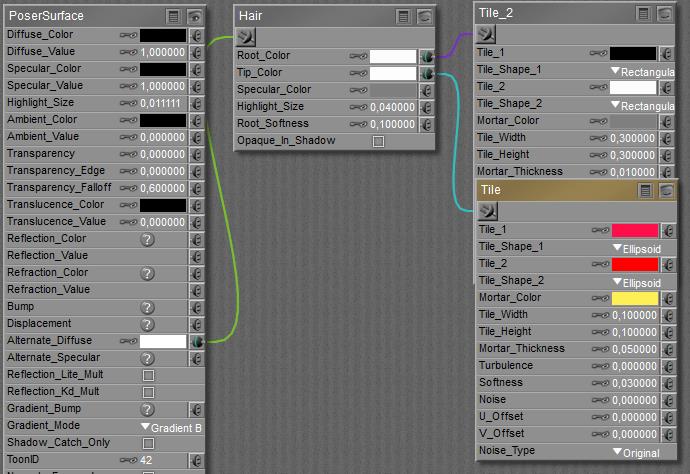
The (diffuse) coloring works as follows: one can apply a UV surface color at the hair-root level. A color, an image map, a 2D or 3D coloring node, whatever. So each strand gets its own color at the root. And one can apply a UV surface color at the other end, the hair-tip level. Then, Poser will interpolate the color, as in a gradient with set start and end colors, along the hair strand itself.

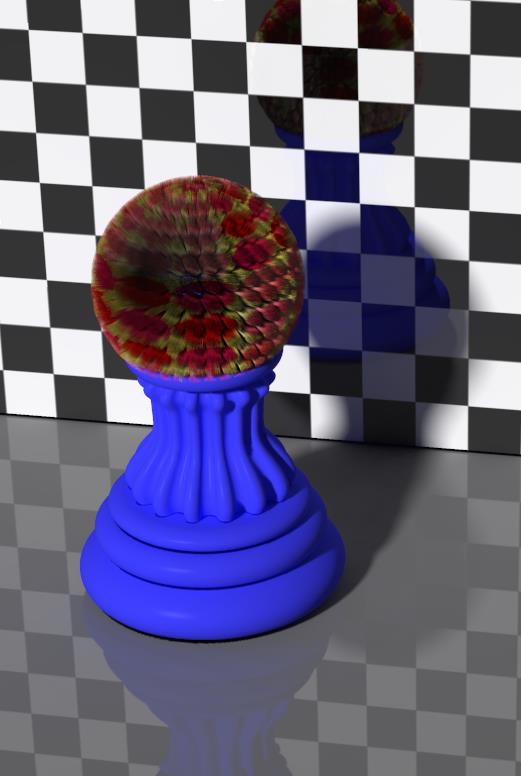
In the resulting image, the mid-part has a black tile at the root while the surrounding areas have a white tile underneath. So in some cases the color grades from black to red/yellow, and in the other cases from white to red/yellow. The black/white tiles are three times as large as the red/yellow ones.

Some notes.

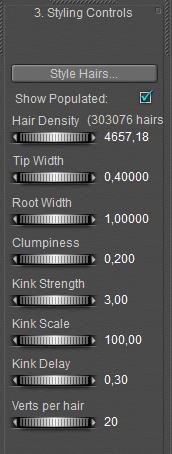
  • Hair – with any kind of coloring – is a challenge for rendering, due to its vast amount of vertices in the object. You might not realize this, but when you’ve got 300.000 hairs of 20 elements (verts per hair, see the screen grab) each, then you end up with 6.000.000 vertices. For comparison: a Poser figure like Vicky has about 60.000 vertices, so the hair object is 100 times as large. As a result, rendering stranded hair takes long render times and an enormous amount of memory. Like the image above: it took 90 minutes and 5.5 Gb ram to get rendered on quite a high-end machine.
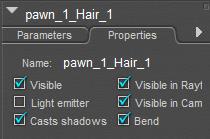
  • Under IDL conditions, each hair-element is considered to be a light source. This of course will grow out of hand pretty fast (as in the example above, I’ll have 6 million of them!), and it will require even more memory and render time. I do switch Light-emitter OFF!

Next >

What’s the Special > Velvet node used for?

Nodes are the essential building blocks in the Advanced interface to the Poser Material Room. They are the graphical representation of mathematical function calls, that is: calculation procedures which turn parameters (inputs) to a result (output).

Intermediate

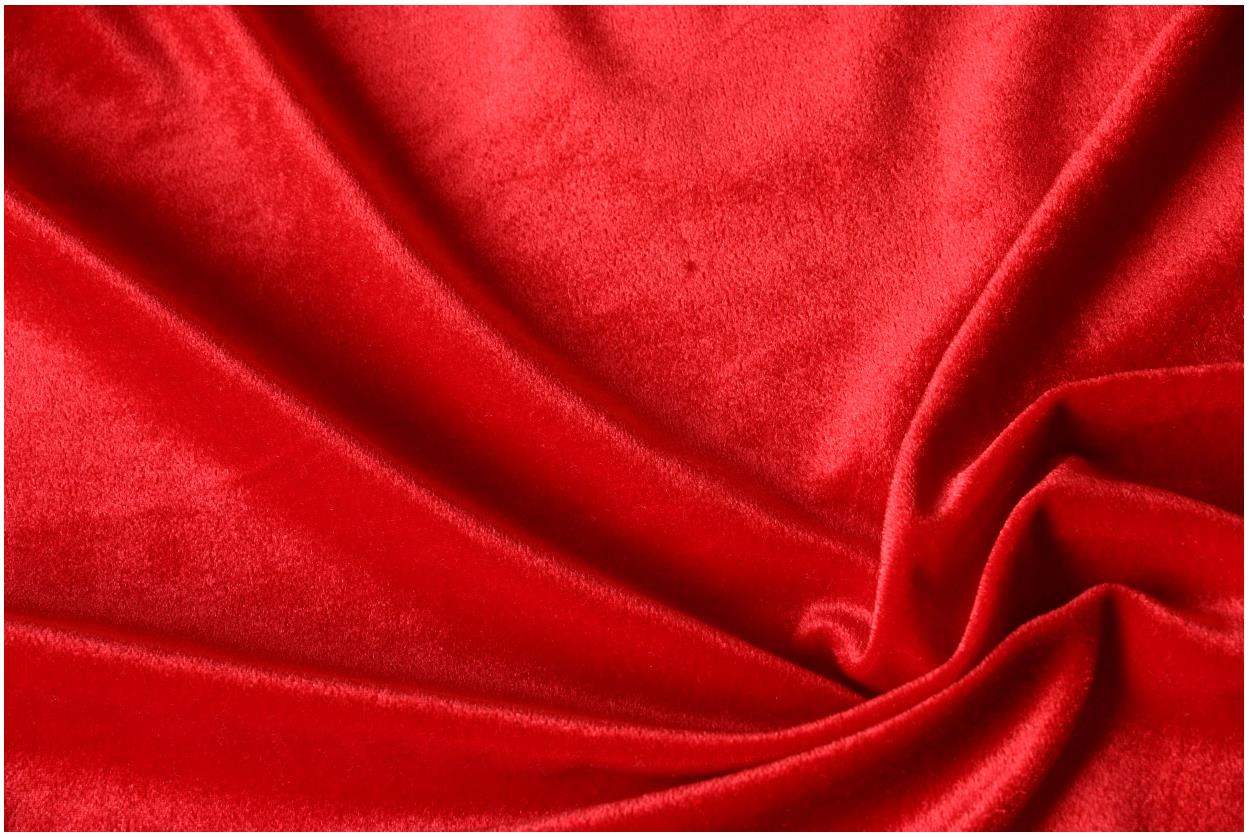
Real velvet is some ‘hairy’ cloth, with short shaved strands standing out. As a result, one looks into the bare ends of the strands when looking perpendicular to the cloth, without any specularity, and with deep dark color. When looking at it sideways however, one looks at the sides of the strands which do have some specularity, and usually have a lighter color. That’s the ‘Sheen’.


Note that the strands – which stand perpendicular to the cloth – that point towards the camera have the deep red color.

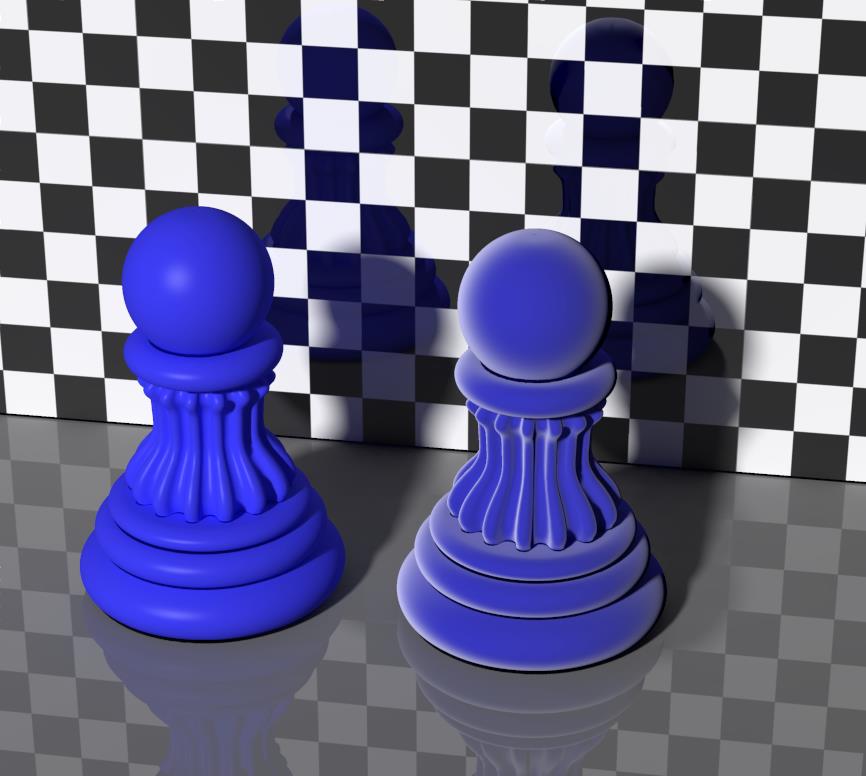
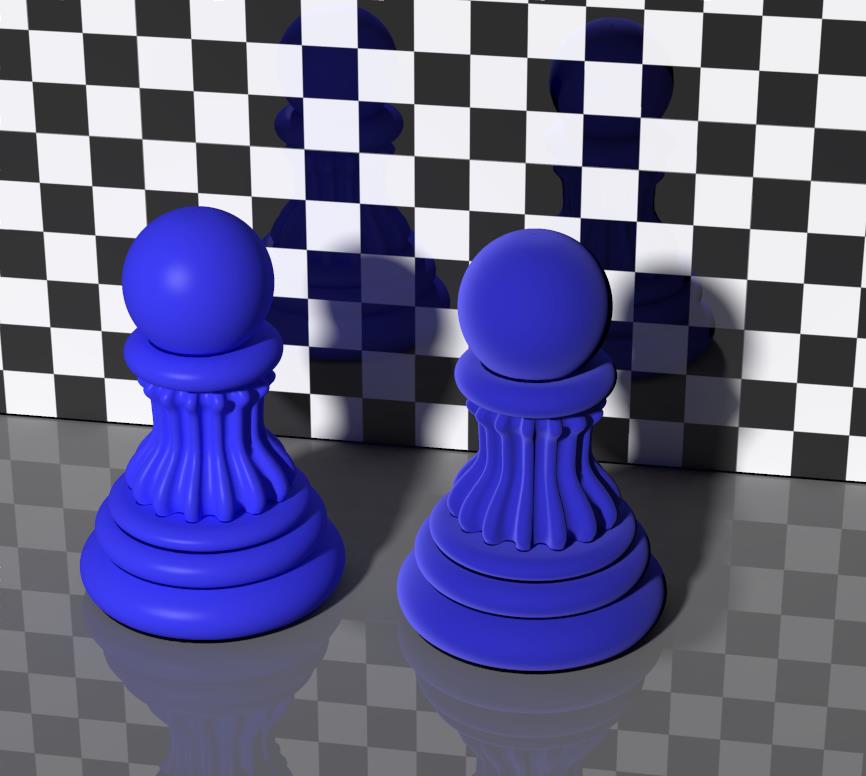
To illustrate this, just consider the extreme case of blue strands and a white sheen (right pawn, the left pawn shows regular diffuse and specular):

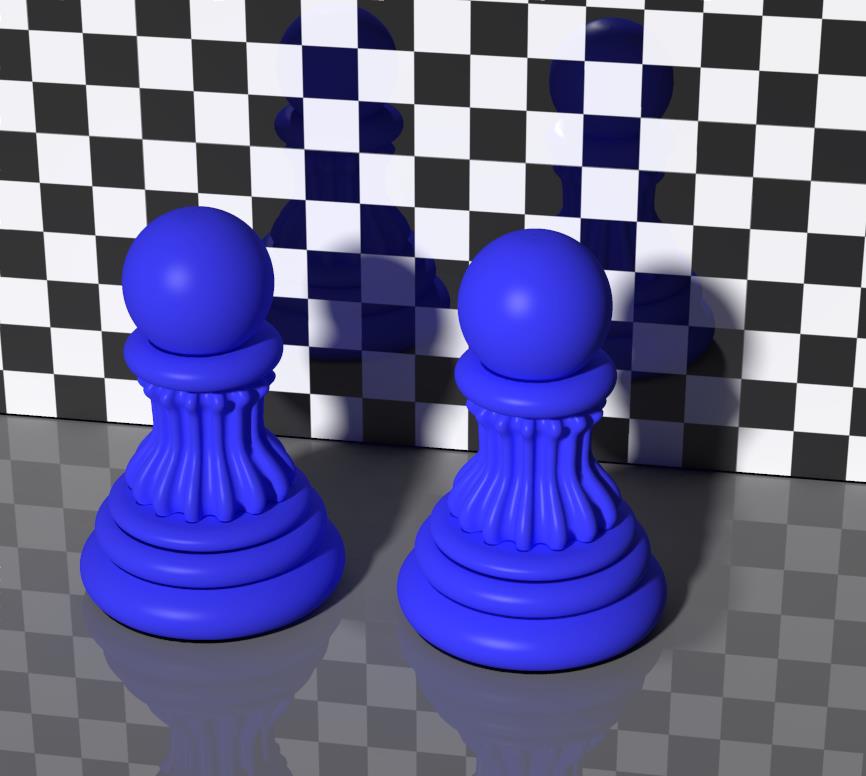
Although a just paler shade of the (Velvet_)Color makes a better sheen:


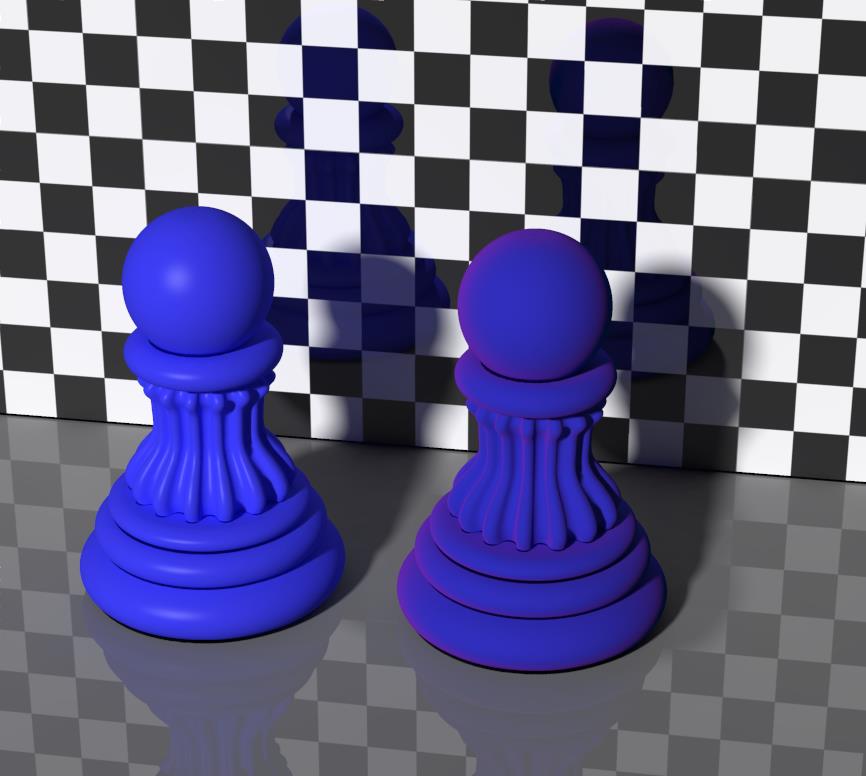
Note that darker or off-color sheens can make interesting stuff, which however are not realistic velvets. But strands with a bluish inside core and a dark purple outside coat can make:

Like all special nodes, the Velvet node also provides diffuse, specular and eventually more as an all-in-one offer. Just black-out (or nullify) the regular Diffuse, Specular and other properties of the PoserSurface, and plug the node into Alternate Diffuse.

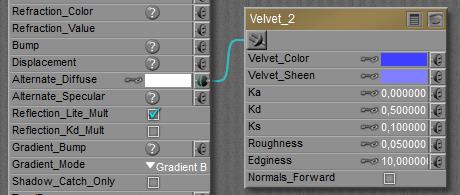
Kd, Ks and Ka represent the regular Diffuse_Value, Specular_Value and Ambient_Value and present any required mixture of those components. Roughness is the direct equivalent of Highlight_Size in PoserSurface, or Roughness in the various specular nodes. Its value is similar as well. Normals_Forward is the same as in PoserSurface, and in all diffuse and specular nodes.

The only new one is Edginess. The default (around 10) value makes realistic velvets. Low values (say 1.0) make very short-haired lightweight velvets, for which the Velvet_Sheen is quite dominant. High values (say 100) make long-haired heavy-weight velvets, for which the Velvet_Color itself is by far the dominant one. Compare cloth for T-shirts (lightweight) and for theatre curtains (heavy weight). Both extremes will lose the velvet effect somewhat.

Next >

What’s the Special > Subsurface Skin node used for?

Nodes are the essential building blocks in the Advanced interface to the Poser Material Room. They are the graphical representation of mathematical function calls, that is: calculation procedures which turn parameters (inputs) to a result (output).

Intermediate

In “old days” or “classical” Poser solutions, regular Diffuse (with image maps), Specular (sometimes with special maps too), and some Ambient were combined to mimic the presentation of realistic skin. Modern Poser versions (8 and Pro 2012, and up) offer additional surface scattering. This article presents a comparison of the various skin and scattering nodes.

For short: CustomScatter is the most generic, does require the SubSurface Scattering (SSS) option in the Render Settings, and provides direct access to all parameters of the mechanism. Subsurface Skin – discussed here – then is a derivative of CustomScatter, dedicated to (human) skin.

Like all special nodes, the Subsurface Skin node also provides diffuse, specular and eventually more as an all-in-one offer. Just black-out (or nullify) the regular Diffuse, Specular and other properties of the PoserSurface, and plug the node into Alternate Diffuse.


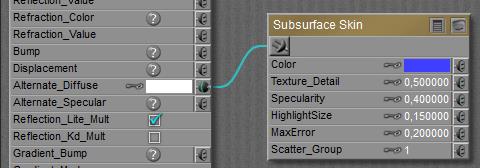
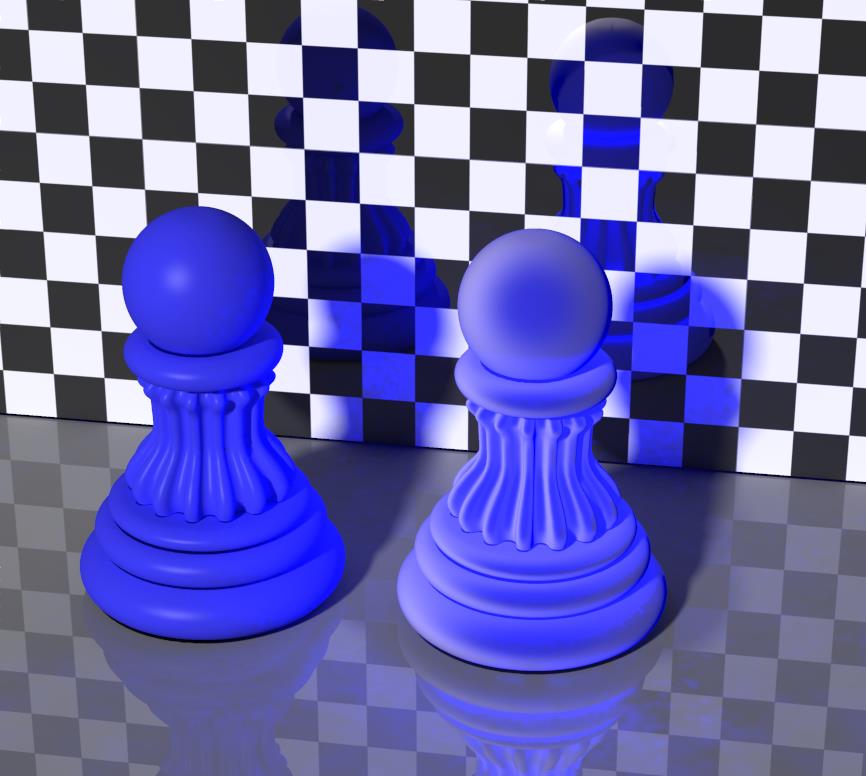
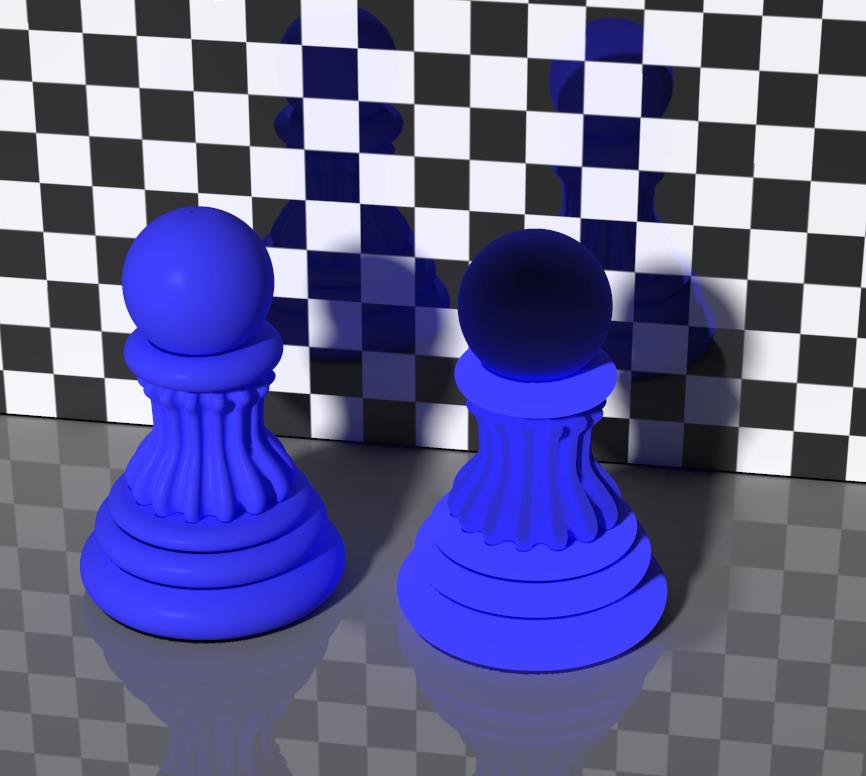
The left pawn shows regular diffuse and specular (default settings), the right pawn shows subsurface skin, as in:

To obtain a highlight of about the same size and intensity as the regular (left) material setting, the node needs about three times the regular values for Specularity and Highlight Size. But since the material supports some scattering under the skin, it will produce a more washed out color overall.

Some notes, mainly on parameters:

  • Texture Detail: this value is meaningful when a texture map is applied. At 1.0 the texture is applied at the outside of the skin layer, making the texture quite crisp but reducing the skin scattering. At 0.0 the texture is applied at the inner side of the skin layer, blurring the texture by the scattering. The default 0.5 is offered as a starting point.
  • MaxError: 1.0 offers speedy rendering at reduced quality, while 0.0 offers max quality at the cost of long render times. The default 0.2 is offered as a starting point.
  • Specularity: according to the manual, 1.0 matches human skin reflectivity. This is something different indeed from the regular Specular value where values exceeding 0.2 match shiny hard plastics. As said above, the Specularity and Highlight Size in this node need to be set three times as high as the settings in the regular Specular component to match the effect.
  • This node requires the SSS in Render Settings being switched ON.

Next >

What’s the Special > Skin node used for?

Nodes are the essential building blocks in the Advanced interface to the Poser Material Room. They are the graphical representation of mathematical function calls, that is: calculation procedures which turn parameters (inputs) to a result (output).

Intermediate

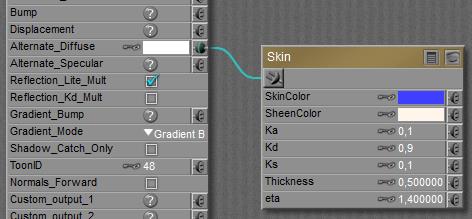
Skin is an “all in one” material node, which caters for diffuse, specular and ambient portions of the definition. So it responds to diffuse light (direct and indirect), specular light (direct only) and also generates some lighting of its own (glow). Just black-out (or nullify) the regular Diffuse, Specular and other properties of the PoserSurface, and plug the node into Alternate Diffuse.

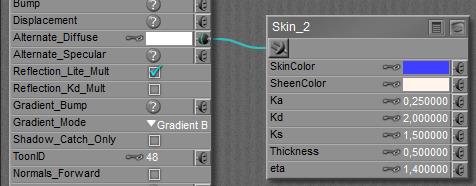
The SkinColor is dominant when looking straight onto the surface, the SheenColor becomes dominant at skew angles towards the camera. The idea is that light is diffused from slightly below the surface. At skew angles that light travels a longer distance through the surface layer, and picks up more color from within that layer. SkinColor therefor represents the color at the outer side, SheenColor represents the colorization within the surface layer by the scattering. The specular and ambient colors of the material are derived from them.

Kd is jargon for Diffuse value, Ks for specular value and Ka for ambient value.


The left pawn shows a regular diffuse and specular use, the right one shows skin at default settings (except for the color adjustment to blue).

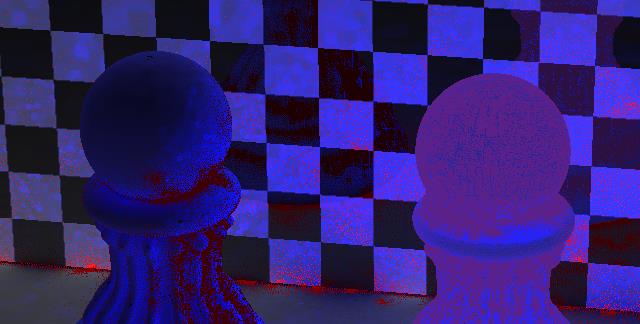
Note: with this node, precalculating Indirect Light takes quite some time, and the surface gets an enormous amount of ‘red dots’. RAM usage goes up accordingly (over 2Gb for a single pawn at 85% irradiance cache), so this node certainly is a ‘render killer’ and should be used on high performance machines (and patient users) only.


Left pawn using regular diffuse and specular, right pawn using skin node at default values.

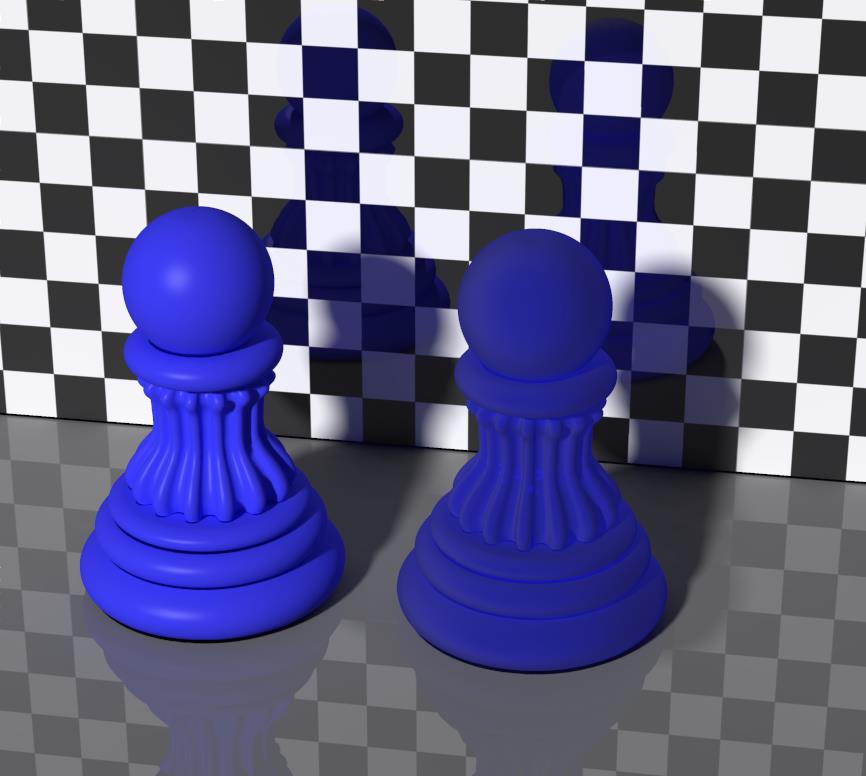
As the left pawn had Diffuse value 0.9, Specular Value 0.1 (and 0.0 ambient), let’s use those values instead of the default ones.

In the first place, the lower values for ambient and diffuse produce less Indirect Light, and renders much faster than the default settings. Second, the result looks like velvet, without any noticeable highlights. So, the Kd and Ks do behave different from their Diffuse Value and Specular Value equivalents. This effectively means that I’m on my own finding the right mix of settings.

Let’s set ambient to 0.1, just to add a bit.

Now the result looks like glowing velvet:

This article presents a comparison of the various skin and scattering nodes.

Next >
What’s the Specular > Ks Microfacet node used for?

Nodes are the essential building blocks in the Advanced interface to the Poser Material Room. They are the graphical representation of mathematical function calls, that is: calculation procedures which turn parameters (inputs) to a result (output).

Intermediate

All nodes in the Specular group respond to specular light, which refers to specular light from direct (point- spot- infinite) sources only. The regular ‘specular’ node itself, either separate or embedded in the PoserSurface definition directly is fast to calculate, but falls short for a neat illusion of about any real stuff except hard plastic. And even then Poser offers an alternative: Glossy for hard, smooth surfaces.
This is why Poser offers alternatives, like Blinn, or Anisotropic for microscopically grooved surfaces “with a direction”. Generally, Blinn is the preferred node to use, but it’s too soft for the really hard and shiny surfaces. Especially since not all hard, shiny surfaces are smooth. Some have a cellular structure, where each element is smooth and shiny, but the surface as a whole is more diffusive.

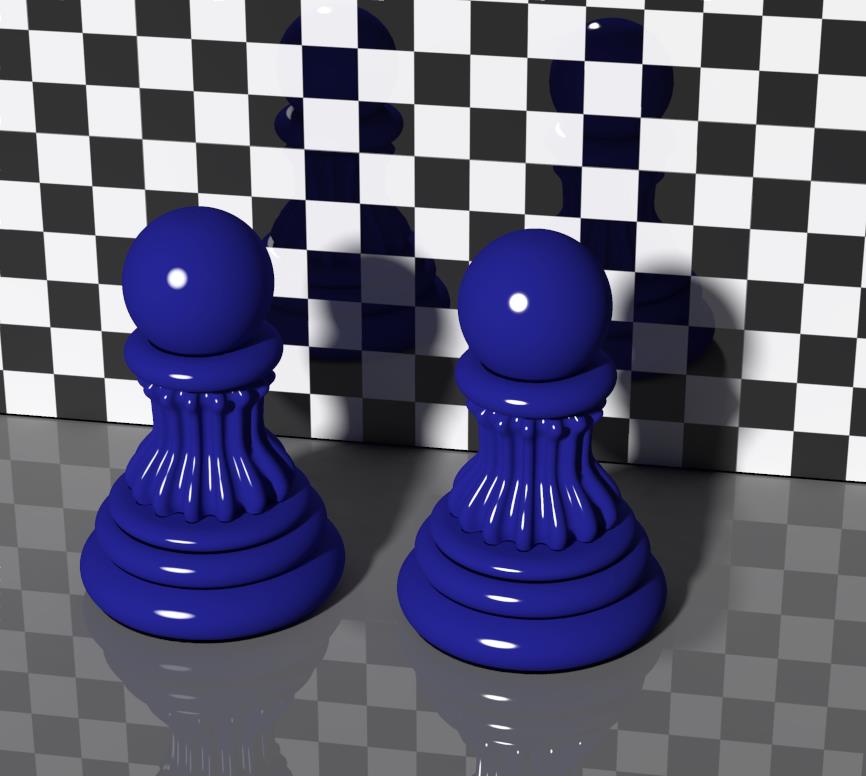
Recent Poser versions introduce the Ks-microfacet node for this. As can be seen (right pawn), the highlights are small and sharp as are those from glossy (left pawn).

So, like glossy was the improved version of Phong for hard and shiny stuff, ks microfacet seems the improved version of glossy, or the improvement over Blinn for hard and shiny stuff. What’s the difference with Glossy then?

Well, when I give the example a closer look, it shows that the glossy pawn (left) is fuzzy, blurred all over the highlight while the ks-microfacet one (right) is quite bold in the middle of the highlight, and becomes blurred at the edges only. To me, the latter has a stronger impression of smooth hard plastic or a hard blank lacquer than the first. Another difference is at the parameter values: although the highlights have about equal sizes, the glossy pawn (left) needs a roughness 0,02 (or: 2%) while the ks-microfacet one (right) needs a roughness 0,05 (5%) for it. This implies that the ks-microfacet node can represent much smoother and harder materials than the glossy node, as it has more ‘room to maneuver’ for nuances left before it reaches the ultimate 0.0 value. (At roughness <0.001 I won’t get a highlight of any size any more).

Next >

What’s the Specular > Phong node used for?

Nodes are the essential building blocks in the Advanced interface to the Poser Material Room. They are the graphical representation of mathematical function calls, that is: calculation procedures which turn parameters (inputs) to a result (output).

Intermediate

All nodes in the Specular group respond to specular light, which refers to specular light from direct (point- spot- infinite) sources only. The regular ‘specular’ node itself, either separate or embedded in the PoserSurface definition directly is fast to calculate, but falls short for a neat illusion of about any real stuff except hard plastic.
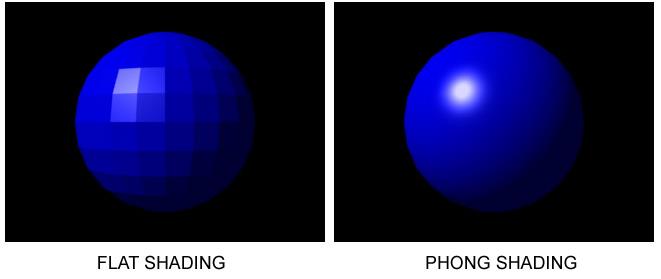
This is why Poser offers alternatives, like Blinn, or Anisotropic for microscopically grooved surfaces. Phong is considered completely outdated.

Some background

B.T. Phong introduced (in 1973) a method to make neat highlights and smooth surfaces out of a surface which consisted of small flat elements, as our 3D objects do.

As his method was improved by Blinn, and as the results in Poser hardly differ from the regular specularity (left pawn, vs right pawn showing Phong):

the method – and the node – can be considered outdated. The parameters have the same meaning as the Specular ones.

Next >

What’s the Diffuse > Toon node used for?

Nodes are the essential building blocks in the Advanced interface to the Poser Material Room. They are the graphical representation of mathematical function calls, that is: calculation procedures which turn parameters (inputs) to a result (output).

Intermediate

In cartoon style, images have their colors reduced and have the contours of object and object elements lined out. Poser once even had a Toon Renderer to support this but it dealt only with images as a whole. That effect can be obtained with about any reasonable image processing tool in post, nowadays.

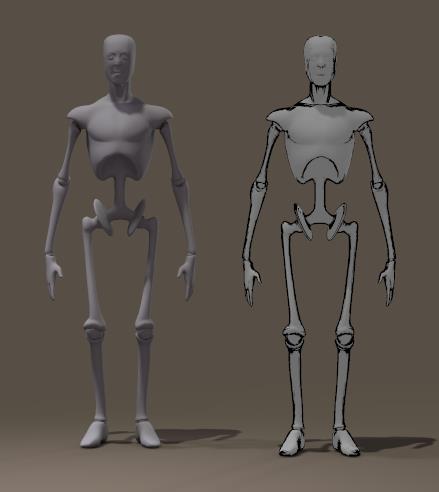
So Poser now offers a toon node, which translates a regular diffuse light distribution pattern to a reduced color scheme, plus the required line-out (inking) as well. This enables me to mix regular, photo real and cartoon elements in one scene, or even animation.

Diffuse Andy (left) and Cartoon Andy (right).

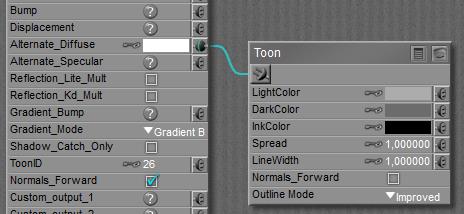
The node parameters are quite obvious:

The surface fades from LightColor to BlackColor like a regular surface would fade from bright to dark, but in a toon surface the pace is determined by the Spread value. If 1.0 then LightColor is very dominant, and I’ll see various surface and shape details. If low (say 0.1) DarkColor is dominantly present, and surface and shape details will hardly show.

The object elements are outlined in InkColor, with a specified LineWidth in a way determined by Outline Mode. Just experiment a bit to find out what settings fit your needs best.

Normals_Forward is like the similar switch in PoserSurface and in any node from the diffuse or specular group: when the surface elements have their normal (dictated by the vertex order in the mesh definition) in the wrong direction, light bounces might be calculated erroneously, and dark spots on the surface will result. Check the box to make Poser fix the issue.

Next >