What are the Custom_outputs intended for?

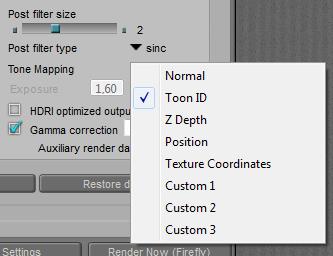
Like the ToonID, checking the Custom 1, 2 and/or 3 Auxiliary render data options in Render Settings enables extra layers in the export of the render result in Photoshop PSD format. This PSD layered export is available in Poser Pro only, and so are the three Custom fields.

When no additional actions are taken,

  • Custom 1 represents Diffuse
  • Custom 2 represents Specular
  • Custom 3 represents Shadow

When in doubt about the meaning of C1, C2 and C3, the Dimension 3D script for Render FireFly (in the Scripts > Partners menu) can help me out.

But I can take additional actions, and plug in any node tree into any of the Custom slots in which case that node tree takes over from the default meaning. It won’t affect the render result at all, as the extra PSD layers are meant for supporting post processing only (masks, selections, …).

Establishing the extra info might affect render time and memory use of course and it will generate the content as I require into the appropriate PSD-layers, once I take that format for exporting the render result.

Next >

What’s the ToonID intended for?

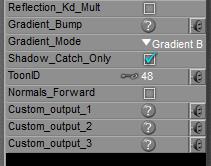
Each PoserSurface has a ToonID value assigned, and one can even make it varying over time (animated) as well as driven by a node construction, like a complex of math_functions and variables like the frame_number.

Various surfaces can get the same ID, when that helps me out. An instance of the render result, not showing colors and shades but showing ToonID’s instead, can be derived as follows:

  • In Render Settings, check the appropriate options in Auxiliary render data
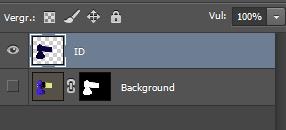
  • After rendering, export the image as a Photoshop PSD file. This file will present an “ID” Layer in which each Toon ID has a color of its own. This way the surface-areas can be selected easily for further modification in Photoshop (or alike).

Poser Aux render data and PSD layered export is available in Poser Pro only.

Next >

What’s the Shadow Catch Only intended for?

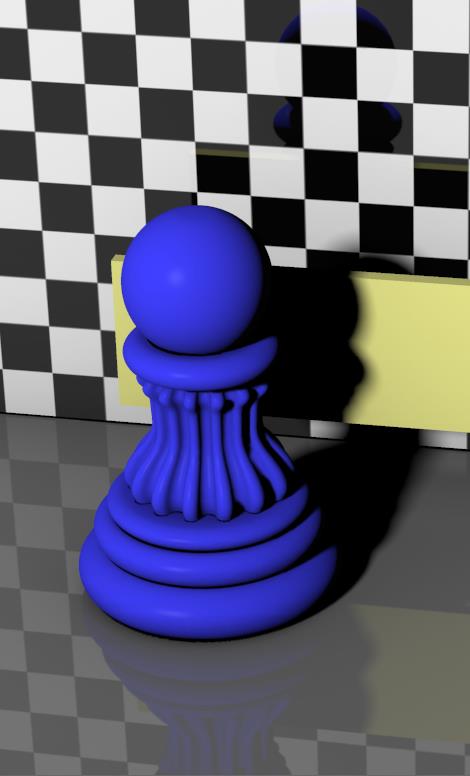
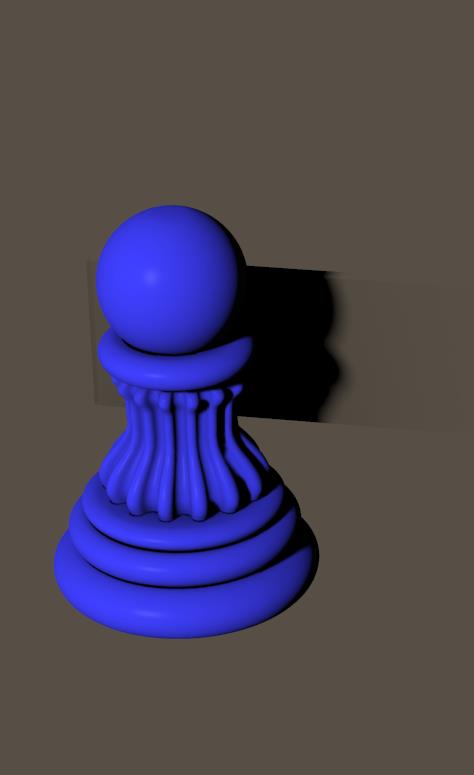
By switching ON the Shadow Catch Only option in a PoserSurface definition the surface will disappear completely, except from the shadows cast from other objects, and from itself as well.

Generally, this feature is used to create a render that blends well onto another image with objects around, and this is a way to transfer the shadows from objects in the Poser scene to the other objects in the background layer. The background objects are recreated in the Poser scene for their shape only (primitives do fine jobs in most cases, like blocks for buildings)

=>

As the ‘real’ objects catching the shadows are in the background image, one should avoid having any objects behind (or visible through) those shadow catchers in the Poser scene. That’s why the back wall and ground plane were made invisible in the right image. Otherwise, these will hamper the blending of the render with the background, and catch shadows as well.

Next >

Do Render Settings affect the behavior of materials?

A few of them do, and here they are:

Intermediate

Switching OFF the Subsurface Scattering option (Poser 8 / Poser Pro and up) will disable the nodes

to save render time at testing.

Switching OFF the Raytrace option disables IDL lighting, as well as the nodes from the Lighting > Raytrace group:

again, to save render time at testing. And, by the way, my lights can’t have raytraced shadows either.

The Raytrace Bounces slider (from 0 to 12) does affect IDL lighting as well as raytracing in reflections and the like. Each surface passed or bounced at, counts for one, so passing a refractive object takes two. Rays gradually die a bit when bouncing, and when the limit as set is met, the ray gets killed anyway. This mainly affects internal reflections when reflectivity is combined with transparency.

Reflection

Reducing Raytrace Bounces might result in pixels in the render which won’t receive a ray of light, and remain dark. Or at least the reflection of the object is discontinued somewhat. In other words: incomplete spots in the render, artefacts. The higher the slider is set, the less is the risk that those occur. And when the rays only need a few bounces anyway, then a high value won’t make a difference and no killing takes place. The slider sets a max value.

Reflect, max 1 ray, each ball reflects the other but not its surface color which is made by reflections.:
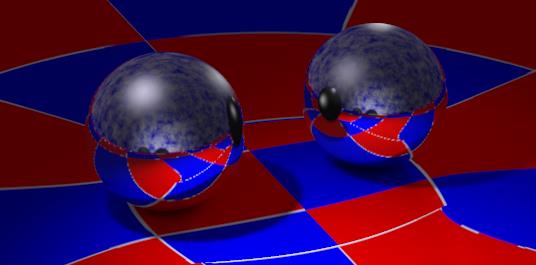
Reflect, max 2 rays, each ball can reflect the others surface but not its own reflection in that:
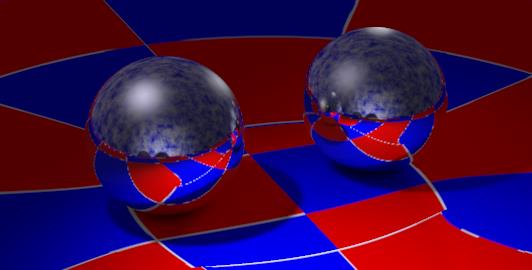
Reflect, max 4 rays, and render times are hardly prolonged:
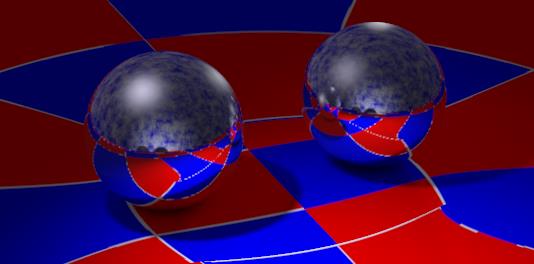
The spots missing reflections are black because that’s the color set as Background in the Reflect node. I can use any other color, or white with an image attached.
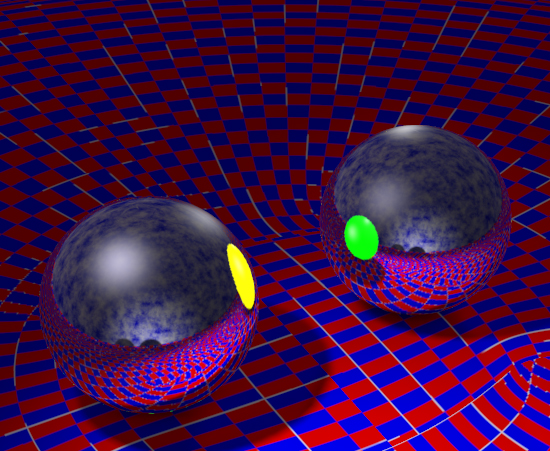
In that case, the Raytrace Bounces slider mixes raytraced and image mapped reflections: for the first (so many) bounces the reflection is raytraced, and from then on it’s mapped.

However, increased slider settings hardly increase render times, reflection is an efficient process. This however might change drastically when transparency is introduced as well. Then light not only reflects from the front, but also passes through the object to reflect from the (inside of the) backside of the object. And that ray will get reflected from the inside of the front side, and so transparency combined with reflection makes the infinite reflections of reflections of … etcetera that slows down rendering to its extremes.

Refraction

First, we’ve got Transparency, which is able to let light pass through a surface. Rays from direct light as well as from objects in the scene. And it does so without raytracing, so it’s not affected at all by any Raytrace Bounces value.  But it can’t bend light rays either.

Instead of – or on top of – transparency, Refraction makes light rays bend as well when passing through a surface. And that’s raytracing. But like Reflection, Poser Refraction deals with objects only and does not handle direct light itself. Without transparency, refraction will treat the surface as perfectly transparent for objects and applies bending as required.

So when objects are placed relative to each other to require refraction of refraction of … in the scene, and the Raytrace Bounces value is reduced, the light stops passing through the surface and might cause artefacts similar to Reflection. It depends on the amount of objects, each of them requires two bounces to let the light pass through, but two objects parallel to each other do not generate an infinite amount of mutual refractions like they can do with reflection. Hence, the Raytrace Bounces value does not need such high values anyway.

The number set is a maximum value, when Poser does not need them it won’t use them, but if the number of bounces for a light ray exceeds this limit, the light ray is killed. This might speed up the rendering while it also might introduce artifacts (black spots) in the result. The tradeoff is mine, but as nature has an infinite number of bounces, the max value is the best when I can afford it.
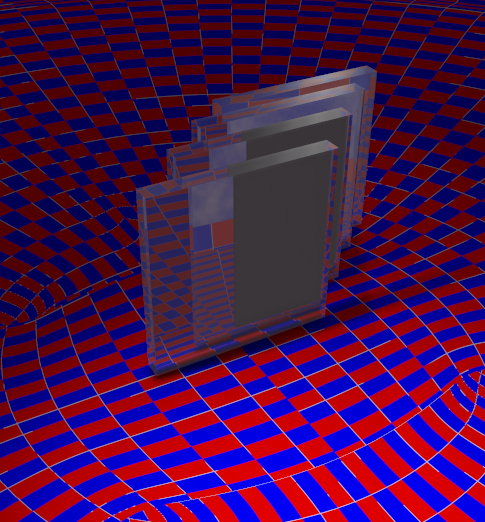
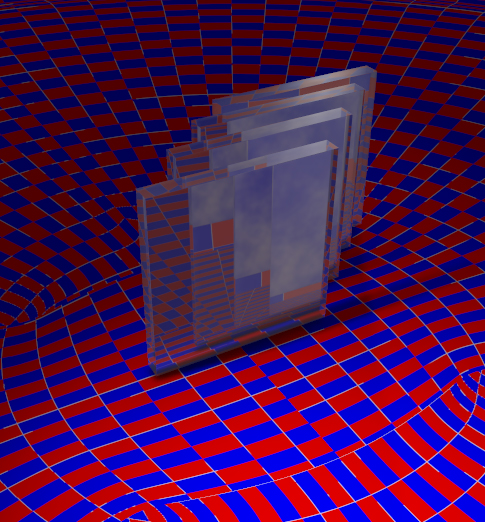
Left: Raytrace bounces set to 4, while 4 objects require 8 bounces. Right: When the value is increased to 8 or more, all objects and surfaces can be passed.

And like reflection, refraction as such is quite an efficient process. Until transparency kicks in.

Indirect Lighting
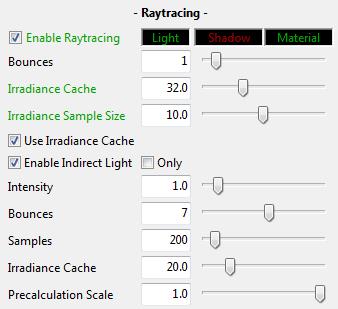
To some extent, InDirect Lighting (IDL) is an application of reflection. Light hitting objects is diffused back into the scene, hitting other objects and so on. At each bounce the ray dies a bit, and after so many bounces it gets killed if it happens to be still around anyway. In open scenes a ray might get lost into open space, but most scenes applying IDL are encapsulated within a dome. Then killing rays really reduces the amount of rays around, and hence reduce the lighting level.

Some scenes do present dark spots under IDL lighting, especially in the corners where walls and ceilings meet. That’s understandable: rays are bouncing around and one needs some luck to get a ray just in such a corner, instead of just bouncing away from the sides near to it. In such cases, killing rays early by a low Raytrace Bounces setting will increase the risk of missing a corner, and the corners will turn dark and splotchy. So an increased Raytrace Bounces value will reduce those artefacts, as it reduces artefacts in reflection itself.

Note that launching the render via the Scripts > partners > Dimension3D > Render Firefly menu gives me the opportunity to discriminate between raytrace and IDL bounce limits. So I can increase the latter without having the burden of large values for the first.

When I’ve also got direct lights in the scene (like a photographer uses a flash when working outdoors in the sun), this increase in IDL lighting levels will change the balance between direct and indirect light, and I might want to correct for that by altering the lighting levels at the sources of it.

Next >

Where do the Reflection Color and Value tables come from?

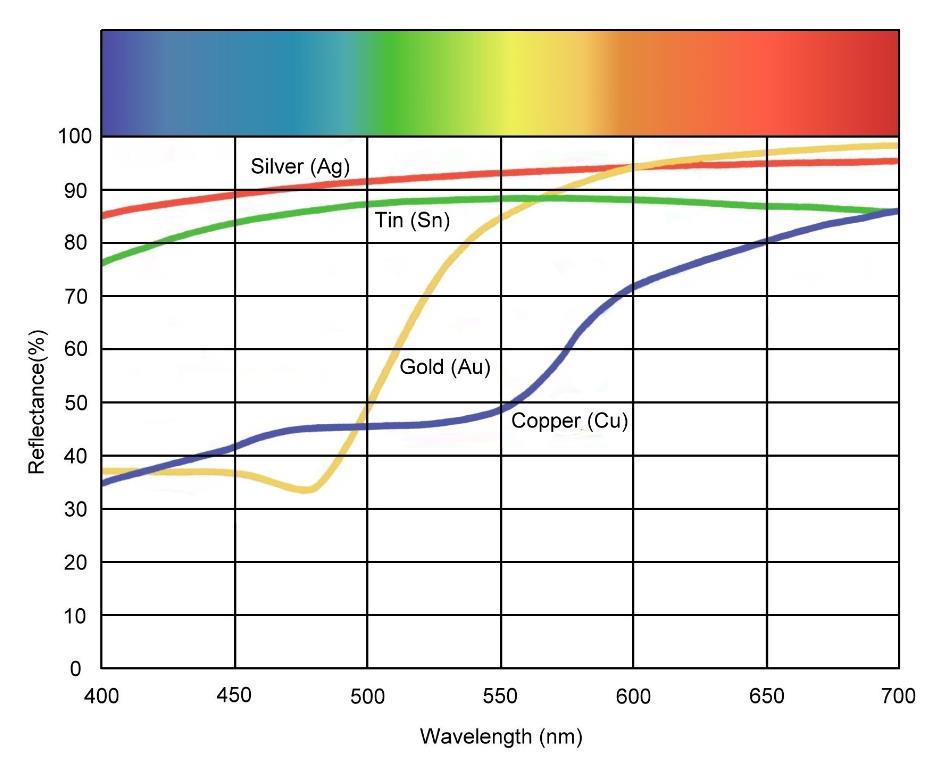
Mainly for industrial purposes, the response of light by metals is measured in detail, and published in handbooks, Wikipedia, and the like. Graphs basically look like:

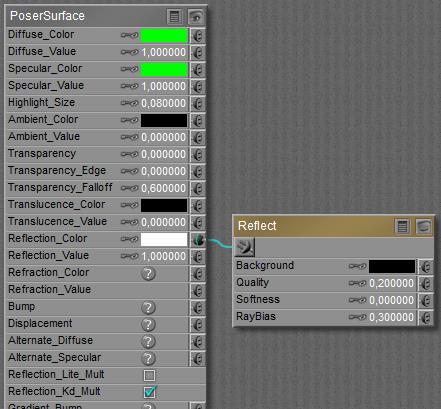
Take Copper for instance. About 37% reflectivity in the blues, 47% in green and up to 80 to 85% in the reds. That might read as RGB = (82% , 47%, 37%) or Hue 14° (out of 360) Saturation 55% Brightness 82%. Taking the previous article in mind, I can use that color and leave value at 100%. Or I can increase the color to 100% brightness (RGB = 255,147,115 or 100%, 57%, 45%) and use the 82% reflectivity for Value. The first approach is preferred, and looks like .

Anyway, I also can see in the Graph that Gold compared to Copper is a far better reflector in the greens and yellows, and even worse in blue. That makes gold less red, more yellow, and a better overall reflector. Adding Silver for an alloy, a common practice, makes the gold even more reflective and more light-yellow. Silver itself is a very strong reflector in all colors and therefore will show White, while Tin will be slightly less reflective, and will have a very mild greenish taint over it.

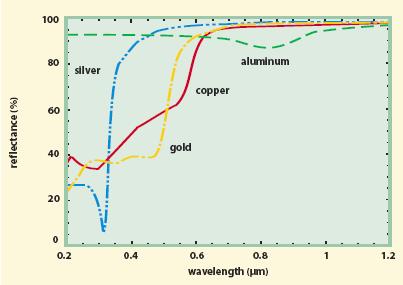
The graph above is quite clear in its interpretation, but I might run into images like

It’s the same story, but showing light response for a much wider color spectrum. Visible blue matches 400 nano-meter = 0.4 micro-meter while the graph starts at 0.2. And visible red matches 700nm = 0.7µm while the graph makes it till even 1.2, infra-red heat, well reflected by all metals as we know.

And the graph adds aluminum, which as I can see reflects slightly stronger in the blues than in the reds giving it a mild bluish taint.

Next >

What’s a proper Value for Reflections?

Or: what do I have to put into the Reflection Value field (Advanced interface)? Or: with what factor do I have to dim (multiply) the color I used according to the previous article? The latter is a much recommended approach when applying Gamma Correction (as available in PoserPro, and Poser 10 and up) to the rendering process. In that case, the Value itself should remain 1.0. Merging the reflectivity value into the color swatch is even a necessity when using Alternate_Diffuse instead of Reflection_Color, as Alternate_Diffuse does not offer a Value slot. This approach is recommended when the material definition offers some Transparency as well.

The value I’m looking for is: reflectivity.

On contrast to common expectations, shiny and reflecting materials only bounce a very limited amount of the light received, back towards the camera, into the render. In jargon: reflectivity is low. That expectations are high is understandable:

  • Highlights on a surface do stand out. This however is not due to the reflectivity of the surface, but because the lights which are reflected do stand out in their environment themselves. In Poser however, highlights are addressed by specularity, not by reflection.
  • Water, car and glass surfaces do appear quite reflective. This is because reflectivity increases enormously with skew angles, and that’s the usual way we see the environment reflected on those objects (Fresnel effect).

A plain, straightforward, perpendicular reflection, enabling me to see my own face reflected by the surface, is only strong in metals, and mirrors since these are coated with a metallic layer at the backside. The reflectivity of common materials can be found in the table presented below. The table also mentions the color, if any.

Table of Refraction Index (IoR) and Reflectivity (R)

Material Refraction index (**) Reflectivity Coloring (RGB) Result (RGB) = Reflectivity*Color
Water 1.33 0.020 5, 5, 5
Sugar solution 1.42 0.030 8, 8, 8
Oily fluids 1.50 0.040 10, 10, 10
Glass 1.50 0.040 10, 10, 10
Heavy Glass 1.60 0.053 13, 13, 13
Impure glass 1.80 0.082 21, 21, 21
Opal 1.45 0.034 9, 9, 9
Quartz 1.50 0.040 10, 10, 10
Salt 1.50 0.040 10, 10, 10
Amber (*) 1.55 0.047 Brown/orange
(90.2%, 68.6%, 0%)
12, 12, 12
Onyx, Amethyst 1.55 0.047 12, 12, 12
Pearl 1.60 0.053 13, 13, 13
Aquamarine, Emerald (*) 1.60 0.053 Light Cyan, Green
(0%, 66.7%, 45,1%)
13, 13, 13
Turquoise, Tourmaline (*) 1.65 0.060 Dark Cyan
(0%, 50%, 50%)
15, 15, 15
Sapphire (*) 1.77 0.077 Dark Red
(50%, 0%, 0%)
20, 20, 20
Zirconia 2.15 0.133 34, 34, 34
Diamond 2.40 0.170 43, 43, 43
Lead 2.60 0.200 Bluish Grey
(50%, 50%, 62.5%)
41, 41, 51
Titanium 6.15 0.519 132, 132, 132
Tin (Sn) 6.54 0.540 138, 138, 138
Chrome 6.76 0.551 141, 141, 141
Nickel 8.79 0.633 161, 161, 161
Platinum 9.45 0.654 167, 167, 167
Copper 18.78 0.808 Reddish brown
(86.3%, 35.3%, 0%)
206, 84, 0
Gold 36.81 0.897 Reddish yellow
(100%, 70.6%, 0%)
229, 161, 0
Aluminum 43.43 0.912 Bluish
(95%, 95%, 100%)
221, 221, 233
Silver 119.20 0.967 247, 247, 247
Zinc 17.94 0.800 204, 204, 204
Steel 11.25 0.700 178, 178, 178

See http://refractiveindex.info/ for details on all sorts of stuff. See http://colors.findthedata.org/ for colors.

(*) for fluids, glasses and gems the color affects the light passing through. The reflection color however is white, as these ain’t metals.

(**) On Refraction Index. Warning: High School Math stuff ahead.

For all materials, non-transparent ones like metals included, Reflectivity (R) and Refraction Index (IoR) are related:

R = [ (IoR  -1)/(IoR +1) ]2     and/or     IoR = ( 1+ √R) / (1- √R)  (√ for square root)

This too stresses that reflectivity is quite low (less than 10% in most cases) for transparent materials like fluids and glasses, while the Index of Refraction is pretty high (usually 10 and up) for non-transparent metals. It’s this IoR value that has to be used in Fresnel nodes and the like. When you like to have a more detailed understanding, try a physics class on optics for a change. Kidding, it’s complex stuff.

Alloys

Metals are combined, usually for the physical properties of the resulting alloys. These are stronger, more flexible, more durable, less brittle, cheaper, and so on, compared to the pure stuff. For Poser renders, I’m doing quite well when simply using the mixing percentages for the resulting color and reflectivity.

Alloy Mixture
Yellow Gold (22K) 92% Gold, 5% Silver, 2% Copper 1% Zinc
Red Gold (18K) 75% Gold, 25% Copper
Rose Gold 75% Gold, 22% Copper, 3% Silver
Pink Gold 75% Gold, 20% Copper, 5% Silver
White Gold 75% Gold, 25% Platinum
Soft Green Gold 75% Gold, 25% Silver
Green Gold 75% Gold, 20% Silver, 5% Copper
Purple Gold 80% Gold, 20% Aluminum
Brass 67% Copper 33% Zinc
Bronze 88% Copper 12% Tin
Yellow Copper (Messing) 60% Copper, 40% Zinc
Pewter 90% Tin 10% Lead

For example: when mixing 90% Gold (reflectivity 0.897) and 10% Silver (reflectivity 0.967) then the resulting alloy will have a reflectivity of 90% x 0.897 + 10% x 0.967 = 0.994. And I can do a similar thing to the RGB values of their respective colors.

Making an Easy Life hard

So, I can look up the color and the reflectivity of a metal, a glass or fluid, put these values in the Reflection_Color and Value fields respectively, and I’m done?

Not really, as I have to compensate for double-counting. For instance, the material at hand has no specific reflection color but does have a 70% reflectivity. Then I can either put in White for Color and 70% for Value, or I put in 70% Grey for Color and 100% for Value. But I should not combine 70% Grey in Color with 70% in Value, as that will reduce the surface reflections to 70% x 70% = 49% instead. This especially requires some care when a color is applied indeed. When that color has 90% brightness, then the first step in reduced reflectivity is already taken care of. Applying a reflectivity value of 80% as well will reduce the surface reflections to 90% x 80% = 72%. Vice versa, when I want that say 70% overall, then I should enter the appropriate 90%/70% = 80% in the Value field.

The recommended approach however is to reduce the brightness of the color swatch, and leave the Value at 1.0. Or even better, plugin any reflection node into Alternate Diffuse instead of Reflection_Color. See this article for details on both.

Okay, so I’ve got a color like RGB = (50%, 50%, 62.5%) or as Poser says: (127, 127, 159) and I want to turn it into its 100% brightness equivalent. How should I do that?

  • Take the largest number, which is 62,5% or 159 for Blue in the example
  • Divide all RGB values by that number, and multiply by 100% or 255 respectively In the example, that would make 50/62,5*100% => 80% , 80%, 100% or 127/159*255 => 204, 204, 255.
  • Now, the Value field can get its proper Reflectivity, or the color swatch can get dimmed to the proper result. A 20% reflectivity will then result in 16%,16%,20% or 41,41,51.

Next >

What’s a proper Color for Reflections?

Or: what do I have to put into the Reflection Color swatch? For short: white, except for colored metals. Eventually with a reduced brightness for reflectivity, which is a much recommended approach when applying Gamma Correction (as available in PoserPro, and Poser 10 and up) to the rendering process. Merging the reflectivity value into the color swatch is even a necessity when using Alternate_Diffuse instead of Reflection_Color, as Alternate_Diffuse does not offer a Value slot. This approach is recommended when the material definition offers some Transparency as well.

On about all sorts or materials, reflecting surfaces are neutral, as having a blank lacquer on top of it. The incoming light bounces directly from the surface without entering it at all, and it’s from within the surface that objects get their color. Reflections do not filter the color, and hence are best represented by some shade of gray (white for 100% reflection).

This however is not the case for metals. For those materials, light does not enter the surface (so formally metals don’t have diffusion) but some colors bounce more effectively than others. Gold bounces best in the yellow/red range and less efficient in the blues, copper bounces best in the deeper reds, while more bluish metals bounce better in the blues than they do in the reds. See the next article for details on colors of metals and alloys, and the next after that for a detailed discussion.

In a simple Poser setup, one can choose to color the reflections directly.

Intermediate

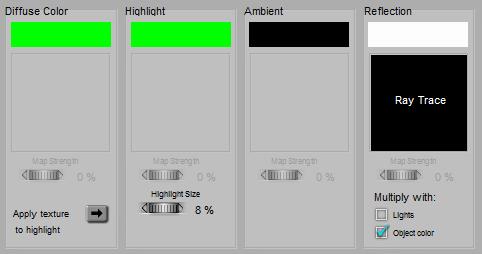
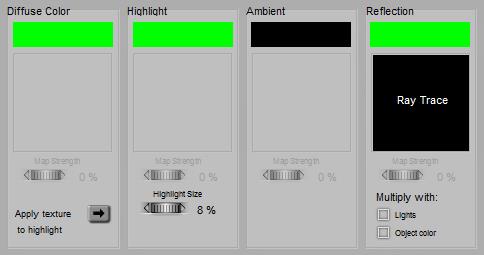
In a more complex setup, like a colorful object with dents and rusty spots, one would have to put a (perhaps even modified) copy of the diffuse channel into the reflection channel in the material definition to filter the reflections. That’s pretty tedious for a large Diffuse node tree. So Poser supports this by providing the Reflection Kd Mult option (called Multiply with Object Color in the Simple interface) which forces the reflection to be multiplied by whatever results from Diffuse Color. This option is OFF by default and is intended to be switched ON for metals, and for metallic materials like some car paints.

Option ON

Reflection applies the Object (Diffuse) color using the Multiply option. The Reflection Color itself should remain white to avoid double filtering. In this case, even metals should have a Diffuse color too!
 or

Option OFF

Now Reflection has a color of its own, for metals that is.

Formally, metals have a high reflectivity and no diffuse. Ensure that there is always something to reflect, then, using Raytrace (above) or an image (below). As there is no Diffuse, do not multiply with it!
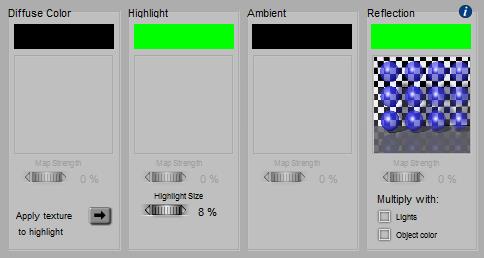
or

In all cases above, note that Reflection deals with objects in the scene only. So I have to set up Highlight / Specularity in such a way that this ‘reflection of direct lights’ is handled similar to the other reflections. Metals color, non-metals don’t, as a guideline.

Next >

Can I get a (simplified) explanation on Lambert and diffuse shading?

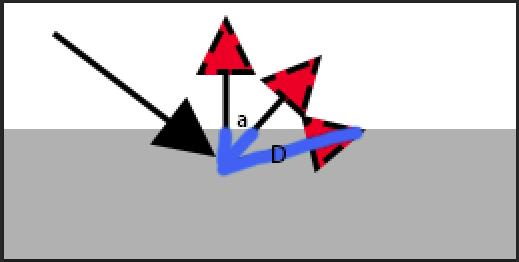
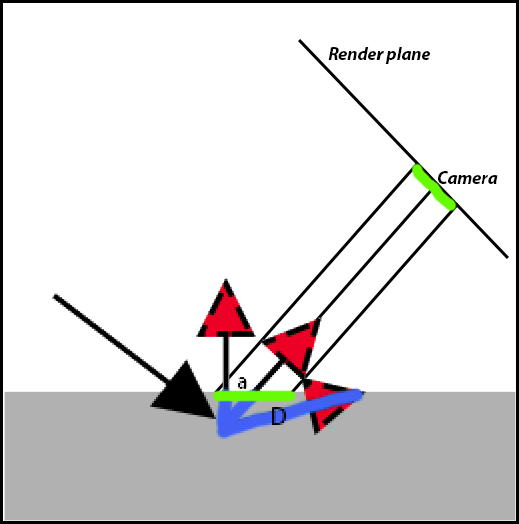
Light from any direction hits a surface, penetrates it for a very slight amount – which will give some absorption, and then it gets re-radiated in a color-filtered way equally in all directions. The path back to the surface will give absorption too, proportional to the distance D traveled through the object surface.

As this distance D is inversely proportional to the cosine of the exiting angle (D=D0/cos(a)), the intensity of the diffuse light in that direction will be proportional: I = I0 cos(a). This is the angular distribution of outgoing, diffuse light, according to the mathematician J.H. Lambert (about 1750). At perpendicular scattering, angle a=0 so cos(a)=1 and the response is maximal, while at parallel scattering cos(a)=0 and there is no response at all.
And since cosine calculations are hardwired into modern CPU electronics, this is a speedy rendering approach by any means. Therefore, Poser includes Lambert shading into Diffuse (see the basic and intermediate articles on this). This offers a resource-friendly first step towards more realistically looking renders. And, for people who want more steps in that direction, Poser offers alternatives like Clay.

Now, look what will happen to the render result. A specific area on the render plane (say: a pixel), marked green in the illustration, gets its light from an area on the object surface (marked green as well). At skewer angles a between surface normal and camera, this area on the object gets larger: A = A0 / cos(a).
At skewer angles such an area emits less light per unit of surface (cm2 or alike) and the resulting amount of light onto the pixel in the render plane is I * A = I0 cos(a) * A0 / cos(a) = I0 * A0 is a constant

So the Lambert shading not only matches a nice explanation on diffuse lighting, it also makes that the intensity of light in the render result does not depend on the camera angle to the surface. Because at skewer angles the pixel in the render represents a larger area on the object surface, which diffuses less light towards the camera, and both effects cancel out.

Look at the light

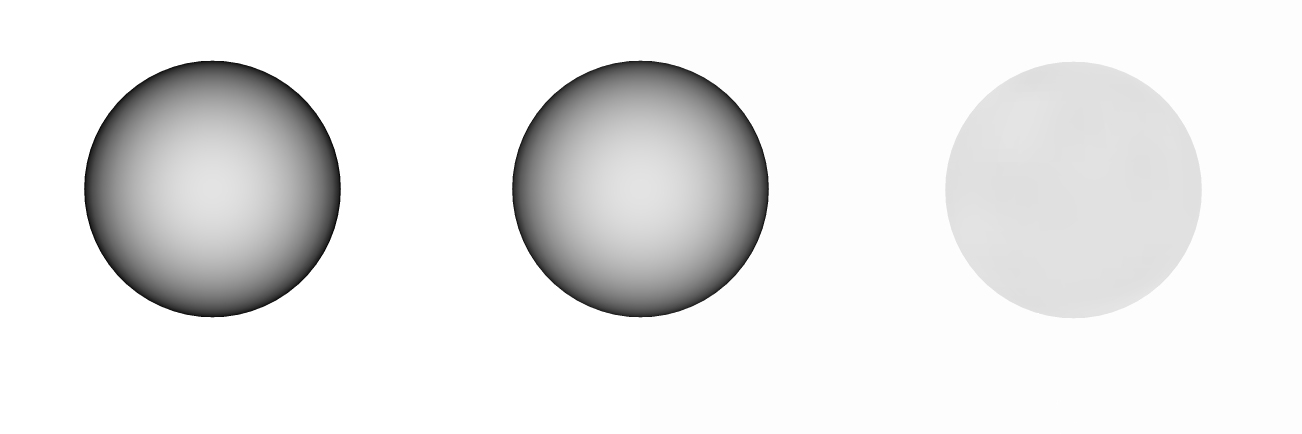
This leaves the effect of the incoming light itself. At skewer angles, the same amount of light will hit larger and larger areas of the object surface, so the intensity per unit of surface decreases accordingly: L = L0 cos(b) . Besides the math, this means that the extent to which shading reveals the shape of an object, depends on the ‘directivity’ of the light only. Point lights are quite directive, even a flat surface it lit under varying angles. An infinite light is less directional, a flat surface is evenly lit but a ball is not. IDL lighting is hardly directive at all, the light comes from all directions and all surface areas are equally lit whatever the shape of the object. Hence the shape of objects is less revealed, and objects will look flat.


Left: point light nearby, the edges get darker faster. Mid: Infinite light. Right: IDL, the ball looks like a disk.

Next >

Can I get a brief intro on Node-tree building in Material Room?

Nodes are the essential building blocks in the Advanced interface to the Poser Material Room. They are the graphical representation of mathematical function calls, that is: calculation procedures which turn parameters (inputs) to a result (output).

Intermediate

In a mathematical way (rendering is all about endless computations, isn’t it) the PoserSurface definition can be read as

PoserSurface =

 (Diffuse + Alternate_Diffuse) * (1-Transparency) +
(Specular + Alternate_Specular) +
(Ambient + Translucence) +
Reflection + Refraction

while Bump and Displacement act as special modifiers (and Transparency does have various side effects when reflection and refraction are applying raytracing).

A component of the PoserSurface can be read as

Diffuse =

(Diffuse_Color * DiffuseColor-input) *
(Diffuse_Value * DiffuseValue-input)

where each “input” refers to the result of any kind of node having its output connected to it. When there is no node attached, the input acts as a 1.0, or: neutral in the multiplication.

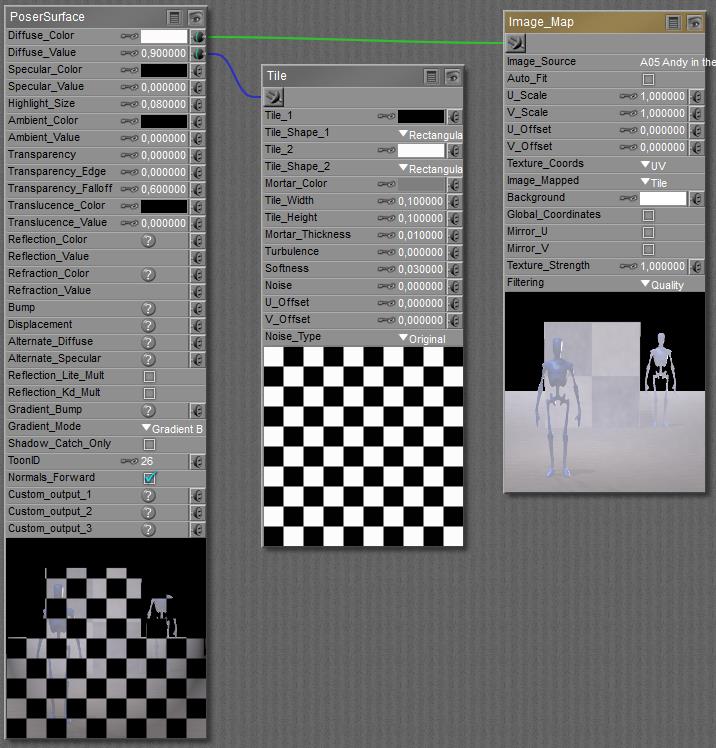
Each node offers one output which can be connected to (serve as input for) one or more (!) input connectors. Each input connector can have at most one output connected to it. If I want a combination of nodes attached to an input socket, I need a construction node to define the combining math myself.

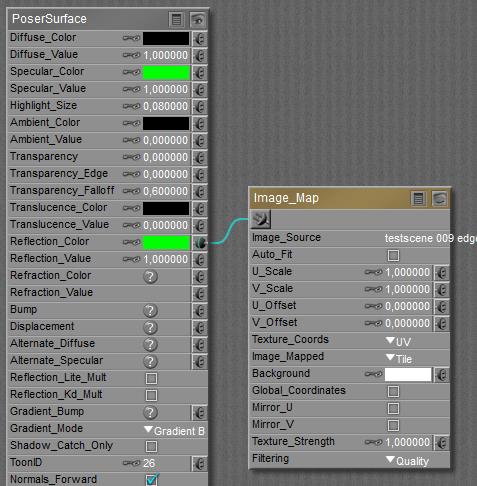
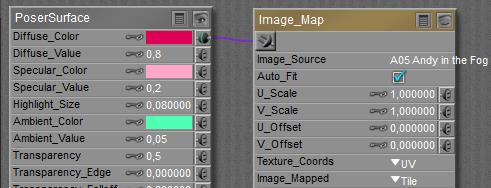
As the example above reveals, a node (like Image_Map) offers inputs or parameters of various nature. Some of them are ‘autonomous’, like the Image_source involved or the Auto-fit option. These cannot be driven by other nodes any more. But other inputs, like U_Scale, can offer a dial-value filtering of any additional results from other nodes connected to it.

Thus far, all node inputs and outputs are visible in the interface, and can be addressed explicitly. But be aware that a lot of nodes also have some additional interactions with the Poser scene or system.

  • The root node, PoserSurface, looks like a regular node with inputs but its output slot is “missing”. It sends its results to the renderer instead.
  • Actually, things work the other way around: for each surface element the renderer needs some results for, the PoserSurface function is called for that surface-material definition. And that function calls the other functions according to the nodes attached to its inputs, which may call functions according to the nodes attached to their inputs and so on. In other words: PoserSurface is not pushing results into the renderer but the renderer is pulling results from PoserSurface. Complex node trees then make large stacks of function calls, and the calls are made for each surface element in the rendering process. High numbers for pixel samples and/or low values for shading rate in the Render Settings increase the number of evaluations in the renderer, and hence the amount of PoserSurface calls as well.
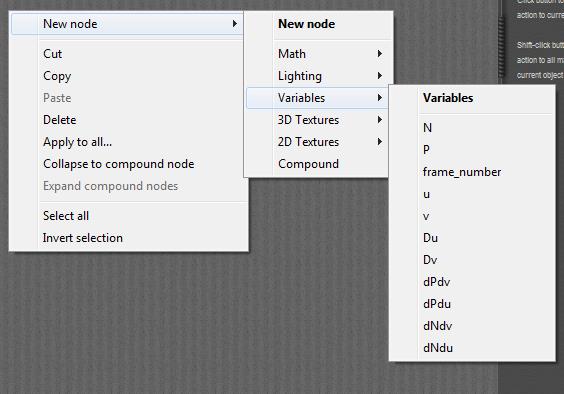
  • From all that, the coordinates of that surface spot, in space and time, are available to all node-functions called. U,V,W with respect to the surface, X,Y,Z with respect to scene space, Framenumber with respect to time, and some more as referred to in the Variables nodes group:
  • Next to the ‘backdoor’ communications with renderer and scene place and time, the nodes are communicating with the lights.

o   The ones in the Lighting > Diffuse group (diffuse, clay, …) require any diffuse lighting from direct or indirect sources to produce their result. No such lighting, no output (0, black, …).

o   The ones in the Lighting > Specular group (specular, Blinn, …) require any specular light, and I need a direct infinite, point- or spotlight to produce that. No specular light on that spot on the surface, then no output. IBL lamps and any light from objects (IDL, ambient, reflection, …) are considered diffuse, even highlights from object surfaces produce diffuse light under IDL conditions and are not considered specular themselves.

o   The ones in the Lighting > Special group (skin, velvet, …) serve both purposes, they offer a response to diffuse light as well as to specular light, and even can combine that with some autonomous ambient effect. Some of them require the Subsurface scattering option in Render Settings to be switched on in order to produce any output at all.

o   The ones in the Lighting > Raytrace group (reflect, refract, …) require light from surrounding objects, and do not work on the light from direct sources. When there are no such objects in front (reflect) or behind (refract) the surface at hand, they can’t do their job and will produce their default ‘background’ response.

For example,

  • I’ve got an object which has some response to diffuse or specular light, and produces an ambient glow too. And I’ve got no lights at all in the scene. Then only the ambient glow will show, as the Diffuse and Specular components have nothing to respond to, and the Reflection and Refraction lack any surrounding objects to work with.
  • Now I connect the diffuse node to the Ambient_Color slot in an attempt to get some intensity distribution into the glow. What do I get? It kills the glow. The diffuse node will not receive any diffuse light from any source, therefore it produces a null response, which is input to Ambient_Color which will therefore produce black as well.
  • So… nodes like those require light onto the surface and produce a response from that, they are not producing light distributions as such for output. No light, null response, black output.

Next >

A PoserSurface material component, offers Color and Value. How do these work together?

In a previous article it is discussed that the various components of the PoserSurface definition are simply added up on a color by color basis to make the final result. This topic is on the individual elements of such a component.

In the Simple interface, I can have an image map combined with a color swatch. The color swatch acts like a filter, as if I’m looking at the image through a transparent, colored piece of plastic.

In technical terms, both are multiplied. For instance, take a red swatch, or: RGB=(100%,0%,0%) multiplied with any color (red, green, blue) on a color-by-color basis. That will give: (100% red, 0% green, 0% blue) of just (red, 0,0). The red filter will only let the red color pass through, and will kill the other color parts. That’s why multiplication means: filtering.

Intermediate

The Advanced interface to Material Room offers Value slots next to Color ones, and more nodes to plug into the slots than just image-map.

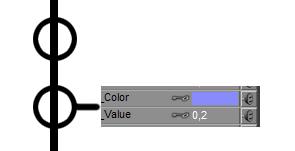
When a tree of nodes, from either no node at all to a whole complex of combinations, is plugged into the color swatch, then the result from the node-tree and the swatch are multiplied on a color-basis. Red times red (both in percentages, 90% x 80% = 72%), green times green and blue times blue. When a value is supplied by the node chain, then that value is used in all three color channels instead. When no node is attached to the color swatch, then just the color swatch itself results from the transaction or: a node-value of 1 is used.

When a tree of nodes, from either no node at all to a whole complex of combinations, is attached to the value plug, then the result from the node-tree and the plug are multiplied on a value-basis. Both in percentages, 90% x 80% = 72%. When no node is attached, then just the plug value itself results from the transaction or: a node-value of 1 is used. When the node tree offers a color instead, then this color is turned into a brightness value first.

Then, the resulting value is multiplied to the resulting color, for red, green and blue separately.

Example:

Image with brightness and color variation plugged into Diffuse Color, and different image with brightness and color contrast plugged into Diffuse Value. It’s like stacking filter on filter on filter …

And for now… something different

Technically, various components offer a filtered access into the spine of the PoserSurface material definition. Whatever I plug in, it gets filtered (aka multiplied) by the Color and Value present. The Color will be affected by Gamma Correction, the Value will not. So 80% White and 100% Value will behave different from 100% White and 80% Value under GC render conditions. See this article for details.

This holds for Ambient and Translucence, and for Reflection and Refraction. Diffuse and Specular are similar, but include a build-in shader as well which manages the distribution of light intensities over the surface. See the basic and intermediate articles on Diffuse, the basic and intermediate articles on Specular, and the article on the Lambert shading itself. Alternate_Diffuse and _Specular in turn offer the color swatch (filtering) only. Bump and Displacement are different, they act as special surface modifiers.

Next >