An Overview on Backgrounds

Although various configurations can be setup via Material Room menus, and can be managed through the Simple interface, this topic is considered Intermediate level.

Intermediate
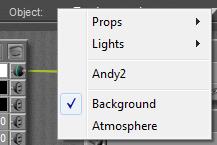
When the renderer cannot fill a pixel of the result due to the lack of light from any objects into the camera, as if the camera is looking into a void, then that pixel is filled with “background” (color, picture, movie frame). When exporting to a format which supports transparency, such pixels are left transparent. When using a sky dome in IDL lighting conditions, or when using a plane (billboard) -like object with an image assigned to it, then there is always an object in view of the camera, and no background or transparency will be produced.

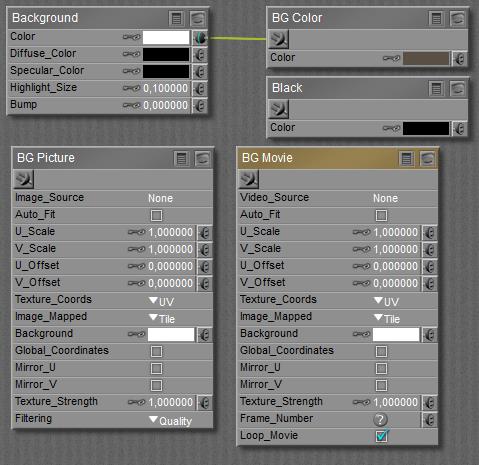
When selecting Background in Material Room, various nodes are presented:
There are various ways to use those nodes in the Render Settings:

And there are various ways to fill those nodes

  • Document Picker ,
  • File > Import menu

So, how do all these relate?

The Document Picker has entries for Foreground, Background, Shadow and Ground. The latter fills the Diffuse Color for the Ground object in the scene, Foreground and Shadow are relevant for Preview only. The 2nd from left, Background Color, fills the BG Color node:

makes

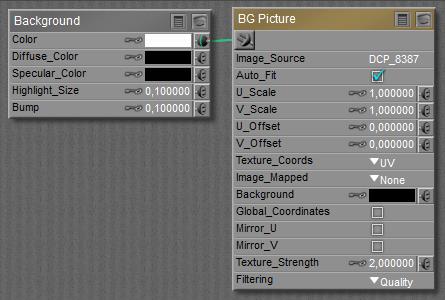
Importing a Background Picture loads the selected image into the BG Picture node, AND connects that node with the Background node, AND sets Render Settings to (Render Over:) Background Picture. This displays the picture in preview, and in the render.

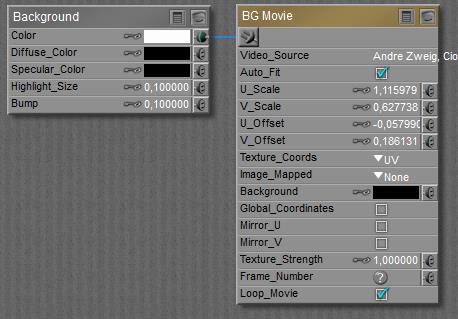
Importing a Background Footage loads the selected image into the BG Movie node, AND connects that node with the Background node, AND sets Render Settings to (Render Over:) Background Picture. This displays the correct frame in the render, but it’s not that good in showing the right frame in Preview, and in adjusting it when stepping through the frames with the animation controls.

Render Settings:

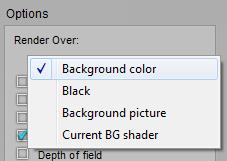
  • Background Color and Black picks whatever is produced by the BG Color node or Black node respectively. They do not need to be connected to the Background node. I can set the nodes to any color, and/or attach a complete texture defining node-tree to them.
  • Background Picture takes whatever is in BG Picture or BG Movie, whichever is connected to the Background node. If none of them is connected the Color from the Background node is used. If any of them is connected, any further content of the Background node is ignored. E.g. color filtering will not take place.
  • Current BG Shader picks whatever is connected to the Background node, and includes the color filtering through the Color swatch of the node.

Handling the nodes directly

I’m free to fill the BG Color and/or the Black node with anything, and attach a complete node-tree to them as well. Any of them can be picked in Render Settings directly. The result of the BG Color node will show in Preview, unless… either BG Picture or BG Movie is attached to the Background node.

I can assign an image to the BG Picture node, it’s completely compatible to the regular image_map node. It will show in Preview when connected to the Color slot of the Background node. It will show unmodified when selected as Background picture in Render Settings, and it will show color-filtered through the Background nodes Color swatch when the Current BG shader option is used.

I can assign an animation to the BG Movie node, it’s completely compatible to the regular movie node. It will show in Preview when connected to the Color slot of the Background node. It will show unmodified when selected as Background picture in Render Settings, and it will show color-filtered through the Background nodes Color swatch when the Current BG shader option is used.

Notes:

  • When playing the animation in preview, Poser tries hard to show to proper frames for background. When stepping through the animation manually however, the background frames are not (always) updated. It’s improved in the most recent versions, though.
  • I first have to connect BG Movie to the Background node, and then I select the video. When any video is already selected before the connection is made, then that selection will get lost and has to be re-established again. This also is the case when BG Movie is setup properly, gets disconnected for any reason, and is re-connected again.
  • Both cases are not bugs but features, aimed at saving resources (computing power, responsiveness, disk space) at caching the individual movie frames during scene development.

The Background node at last offers various slots, but after a lot of test renders the conclusion must be that only Color offers a well understood and well determined contribution to the result. The other slots do affect the result somewhat in some way, but are recommended to be left at their default (0 or black) value. The Color slot, eventually filtering anything which is plugged into it, is shown in the render when Current BG shader is selected in Render Settings. The node does not show in preview, nor do any regular nodes attached to it. However BG Picture or BG Movie do show when plugged into Color, but without any filtering by the swatch.

Next >

(How) can I rotoscope against a movie in the background?

Although various configurations can be setup via Material Room menus, and can be managed through the Simple interface, this topic is considered Intermediate level.

Intermediate

First I set a Background Movie, either via the menu File > Import > Background Footage:

or via the Material Room directly, connecting the BG Movie node with the background node:

The BG Movie node is completely compatible to the regular movie node. Note that I first have to connect BG Movie to the Background node, and then I select the video. When any video is already selected before the connection is made, then that selection will get lost and has to be re-established again. This also is the case when BG Movie is setup properly, gets disconnected for any reason, and is re-connected again.

Then I switch ON the use of the movie in the render, via Render Settings:

That is: do use Background Picture or Current BG shader. See the overview on background nodes in general.

Next >

(How) can I add a background picture in my render?

Although various configurations can be setup via Material Room menus, and can be managed through the Simple interface, this topic is considered Intermediate level.

Intermediate

First I set a Background Picture, either via the menu File > Import > Background Picture:

or via the Material Room directly, connecting the BG Picture node with the background node:

The BG Picture node is completely compatible to the regular image_map node.
Then I switch ON the use of the picture in the render, via Render Settings:

That is: do use Background Picture or Current BG shader. See the overview on background nodes in general.

When I’m still having problems with the Background, I just check:

  • Whether the GROUND object (or any other object) is obstructing the view
  • Whether I’m trying to load an 16-bit-per-color image (don’t)

Next >

(How) can I use a reference picture in the preview only?

Although various configurations can be setup via Material Room menus, and can be managed through the Simple interface, this topic is considered Intermediate level.

Intermediate

First I set a Background Picture, either via the menu File > Import > Background Picture:

or via the Material Room directly, connecting the BG picture node with the background node:

The BG Picture node is completely compatible to the regular image_map node. Then I switch off the use of the picture in the render, via Render Settings:
That is: do NOT use Background Picture nor Current BG shader.

In Material Room the associated BG Color and Black nodes can be dressed up with any node-tree. So I even can connect a different image to them, and have a picture in my render different from the preview. See the overview on background nodes in general.

When I’m still having problems with the Background, I just check:

  • Whether the GROUND object (or any other object) is obstructing the view
  • Whether I’m trying to load an 16-bit-per-color image (don’t)

Next >

(How) can I make a “green screen” shot, to add backgrounds in post?

Although various configurations can be setup via Material Room menus, and can be managed through the Simple interface, this topic is considered Intermediate level.

Intermediate

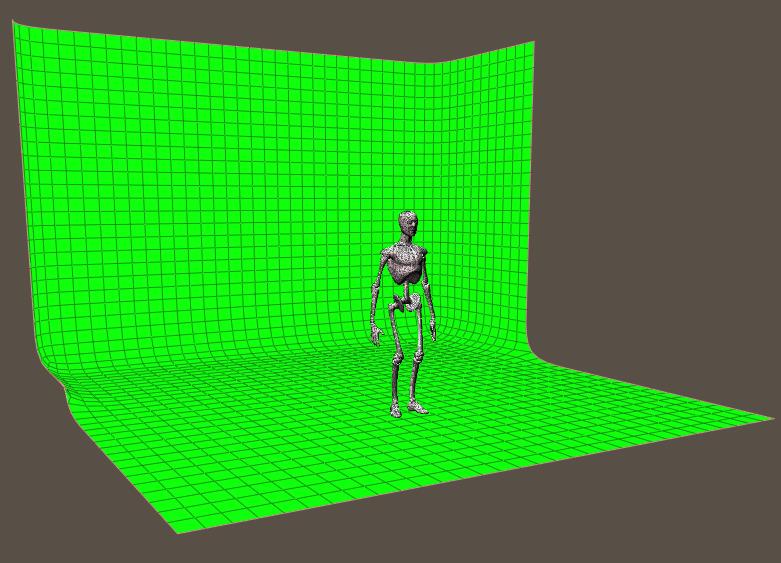
1) Either I put an object at the relevant place in the scene, and give it a uniform (green) texture,

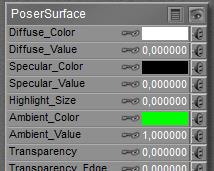
  • The object material should be Ambient only. It should not support Diffuse, Specular, Transparency, Reflection, Bump/Displacement, etc. (unless I want to have the effects of the scene lighting on my backdrop replacement as well)
    makes
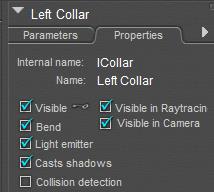
  • The object should not cast shadows (unless I want them on my backdrop replacement as well), nor should it act as a light emitter in IDL lighting conditions, nor should it be visible in raytracing (reflections!). Those properties should be switched OFF.

2) Or without any object obstructing the background, I export my image in a format which supports transparency (like PNG),

3) Or without any object obstructing the background, I activate Background Color and assign it an appropriate color.

Either
Or
Or
will do the job.

See the overview on the background nodes in general.

Next >

Poser Materials V2 Background

The second group of articles is on Background. I can preview as well as render against an image (photo’s or mattes), against footage (rotoscoping) or against a color (green screen shots).

(How) can I create volumetric spotlights in my scene?

Although various configurations can be setup via Material Room menus, and can be managed through the Simple interface, this topic is considered Intermediate level.

Intermediate

Spotlights with a volumetric effect need a foggy atmosphere to come into existence.

As Depth Cue relates to the camera, so does Volume relate to the lights. Volume effects can be switched on/off themselves too, so they can be set independent of the Depth Cue effects.

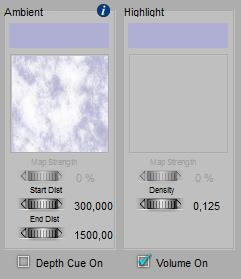
The main parameters are Volume Color, and Density (*). When a direct light illuminates a volume in the scene, that volume acts like a transparent fuzzy object with that specific internal color. The lower the Density the more transparent it seems.

(*) Volume Color is referred to as Ambient Color in the Simple interface, while Density is shown in the Highlight column. This confusing presentation is known as an issue, and might be addressed in later versions of Poser.


Next to all this, each light can have its own Atmosphere Strength parameter:
So some lights can interact more than others. For example:

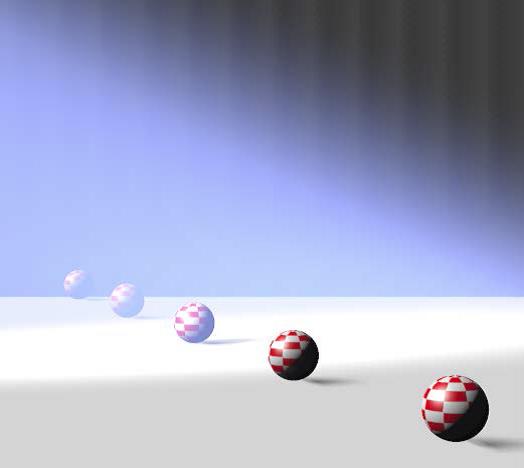
One infinite white light, Atmosphere Strength as low as 0.000010 plus one white spotlight, angular falloff from 10 to 20 (narrow light bundle), Atmosphere Strengths as high as 0.100. From the different Atmosphere Strength settings of the lights one can discriminate the spotlight from the overall scene lighting. The bluish color is from the Volume settings.

Do note that especially Volume effects take some time to render. A larger stepsize speeds up the calculations at the cost of quality and detail. Increasing the Noise parameter helps to improve on the quality especially at larger stepsizes. Noise and Stepsize are available in the Advanced interface only.

Next >

(How) can I create a smoky or foggy atmosphere in my scene?

Although various configurations can be setup via Material Room menus, and can be managed through the Simple interface, this topic is considered Intermediate level. Next to that, managing the details of a scene Atmosphere requires the use of ‘cloudy’ nodes from the 3D Texture group, which by themselves are considered Advanced.

Intermediate

First, be aware that atmospheric effects can be created in post as well, while when done in Poser it might imply a serious extension of my render time.

A tutorial on Poser Render Passes, including atmospherics post work, can be found at http://www.book.artbeeweb.nl/?p=388 A tutorial on Poser atmospherics can be found at http://www.book.artbeeweb.nl/?p=3093

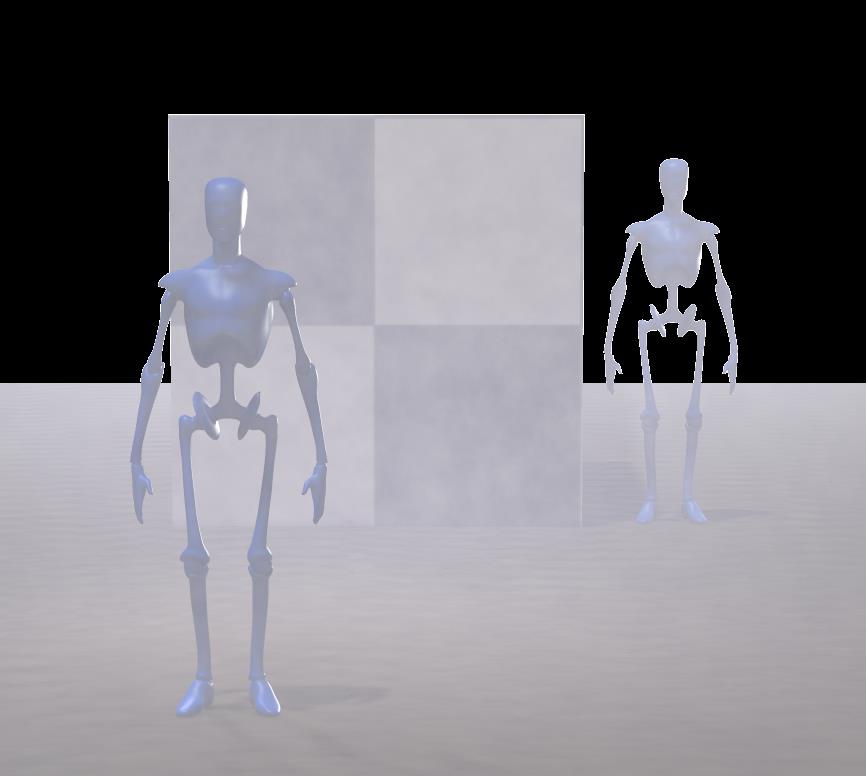
Second, Poser atmospherics reveal themselves only in front of an object in the scene. Any object bouncing light towards the camera will do. But in front of just a background color, a background picture or a background movie frame, the atmospherics remain invisible. Poser atmospherics do need a visible object facing the camera to get uncloaked. The color of the object is irrelevant, or better: the darker the object, the better a whitish fog will be visible.

For example: a nearby and a faraway character, a B/W colored box, the default ground floor and an “empty” background make:

So, how to do it? I enter the Material Room, click the [Create Atmosphere] button and select one.

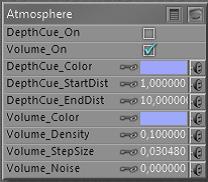
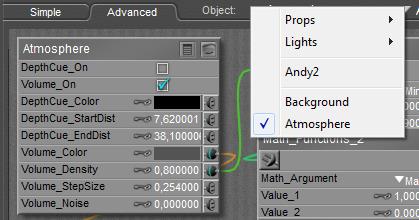
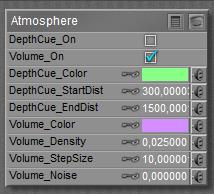
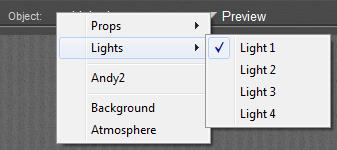
How to alter the settings? In the Material Room, I use the list next to Object and select Atmosphere.

When using the Simple interface, the material looks like:

Note that the Simple Interface contains some bug (all Poser versions up to Poser 10 / Pro 2014), see below.

How to switch it off? The Atmosphere main node supports DepthCue as well as Volumetrics. Both can be switched on and off independently.

What about DepthCue and Volume? DepthCue is a quite uniform haze effect which colorizes the scene, depending on the distance of the surface to the camera. Volume is a smoky, cloudy fog effect which is located within the scene, not related to the camera position. Tip: in order to make an object or character disappear into the darkness, a dark fog can be used instead of a whitish one.

Advanced interface

When using the Advanced interface, I learned that

  • Volume Step-Size and –Noise are not supported in the Simple Interface. These are quality-settings for better render results (at the cost of longer render times).
  • The [Create Atmosphere] button can produce quite some node-tree to define such a material. ‘Cloudy’ nodes from the 3D Textures group will be present to drive the look and feel of fogs and alike.
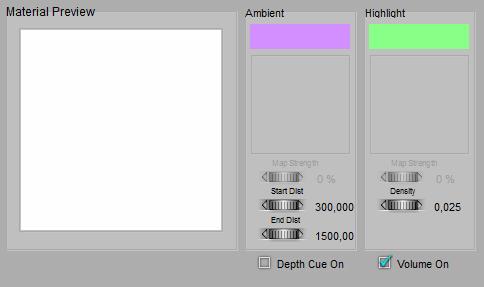
  • From the Simple interface, Ambient matches Depth-Cue and Highlight matches Volumetrics. But I also find a bug (Poser 10 / PoserPro 2014 and before): the color and image-map assignments are reversed.

=>

(The bug is reported to Smith Micro and will be addressed, some day).

Next >

Poser Materials V1 Atmosphere

The first group of articles is on Atmosphere. I can create haze and fog, and volumetric effects for (spot)lights, at the cost of increased render time, of course.

Poser Materials V Materials for Non-Objects

The articles in this section discuss properties for Scene Atmosphere, Scene/render Background and Lights Coloring. These are not objects with a surface, but do have properties which are handled in Material Room. These properties can be accessed via the Object selector.

Most of those topics are considered Intermediate level, although various configurations can be setup via Material Room menus, and can be managed through the Simple interface. On the other hand, managing the details of a scene Atmosphere requires the use of nodes from the 3D Texture group, which by itself is considered Advanced.

This section concludes with some varied, advanced topics like mapping for IBL , Gamma Correction (GC) and GC on Transparency. The Appendix lists all Material Room nodes and relevant Render Settings, and their availability in the various Poser versions.